B l e o f c o n t e n t s Installer quick setup guide
Installation and Operating Guide Warranty
Serial no
Record the Model Number
Millbrook Drive Lincolnshire, IL 60069, USA. Phone
Compliance
NEC National Electrical Code
Important Safety Instructions
Table of Contents
Setup Checklist
Audio / Video 1, 3
Installation/Connections Overview
Typical Pedestal Type Mount with Swivel Bracket
Vesa Standard TV Mounts
Mini glossary
Antenna Hookup
Connect an off-air antenna to the LCD TV/Monitor
G E 1
Cable Service Hookup
Connect cable service to the LCD TV/Monitor
Locate the Antenna/Cable jack on the back of the VCR
Antenna & VCR Hookup
Connect antenna and a VCR to the LCD TV/Monitor
Connect cable service and a VCR to the LCD TV/Monitor
Cable Service with VCR Hookup
Pillow Speaker Interface
Controlling the TV with Mechanical Switches
Pillow Speaker Hook Up
Controlling the TV with Serial Data
AC Power Cord
TV Operation
Using the front control panel to operate the LCD TV/Monitor
Remote Control Sensor and/or Alarm mode
Front Panel Controls
Descriptions of the menus and on-screen displays
On-Screen Menus Overview
Info
Other Menus & On-Screen Displays
User Remote Control Key Functions
Installer Remote Control Key Functions
Auto Program Channel Search
Removing unwanted channels
Channel List
After the channel search, remove unwanted channels
Operating the Channel Label Menu
Channel Labels Setup
Channel Labels Setup
On-Off Timers Setup
Clock Setup
Enter button
Daylight Saving
Time Zone Settings
Installer can set the Time Zone
Choose a language for the on-screen menus
Menu Language
OK Enter button
Chip
Use the Up/Down/Left/Right arrows buttons to choose
Set up the menu options for Tvpg Rating
Use the Up/Down/Left/Right arrows buttons to choose
To highlight the Setup menu
Set up the menu options for Mpaa Rating
Press the OK Enter button
Canadian English Ratings
Set up the menu options for Canadian English Rating
Set up the menu options for Canadian French Rating
G E 3
To highlight the Caption menu
Use the Down ADJ arrow to highlight Analog Mode
Caption Menu
Also turn closed captions on
Option Font Size, Font Style, Foreground Color etc
Service
To highlight the Caption menu
Use the D / E / F / G ADJ buttons to customize each
OK Enter button
Set up the audio options for the end user
Adjust the speaker balance for optimum sound quality
Sound Menu
You can set digital audio language
Using External Speakers
Up/Down/Left/Right arrow buttons to set your own set
Tings for the options. When finished, press the OK
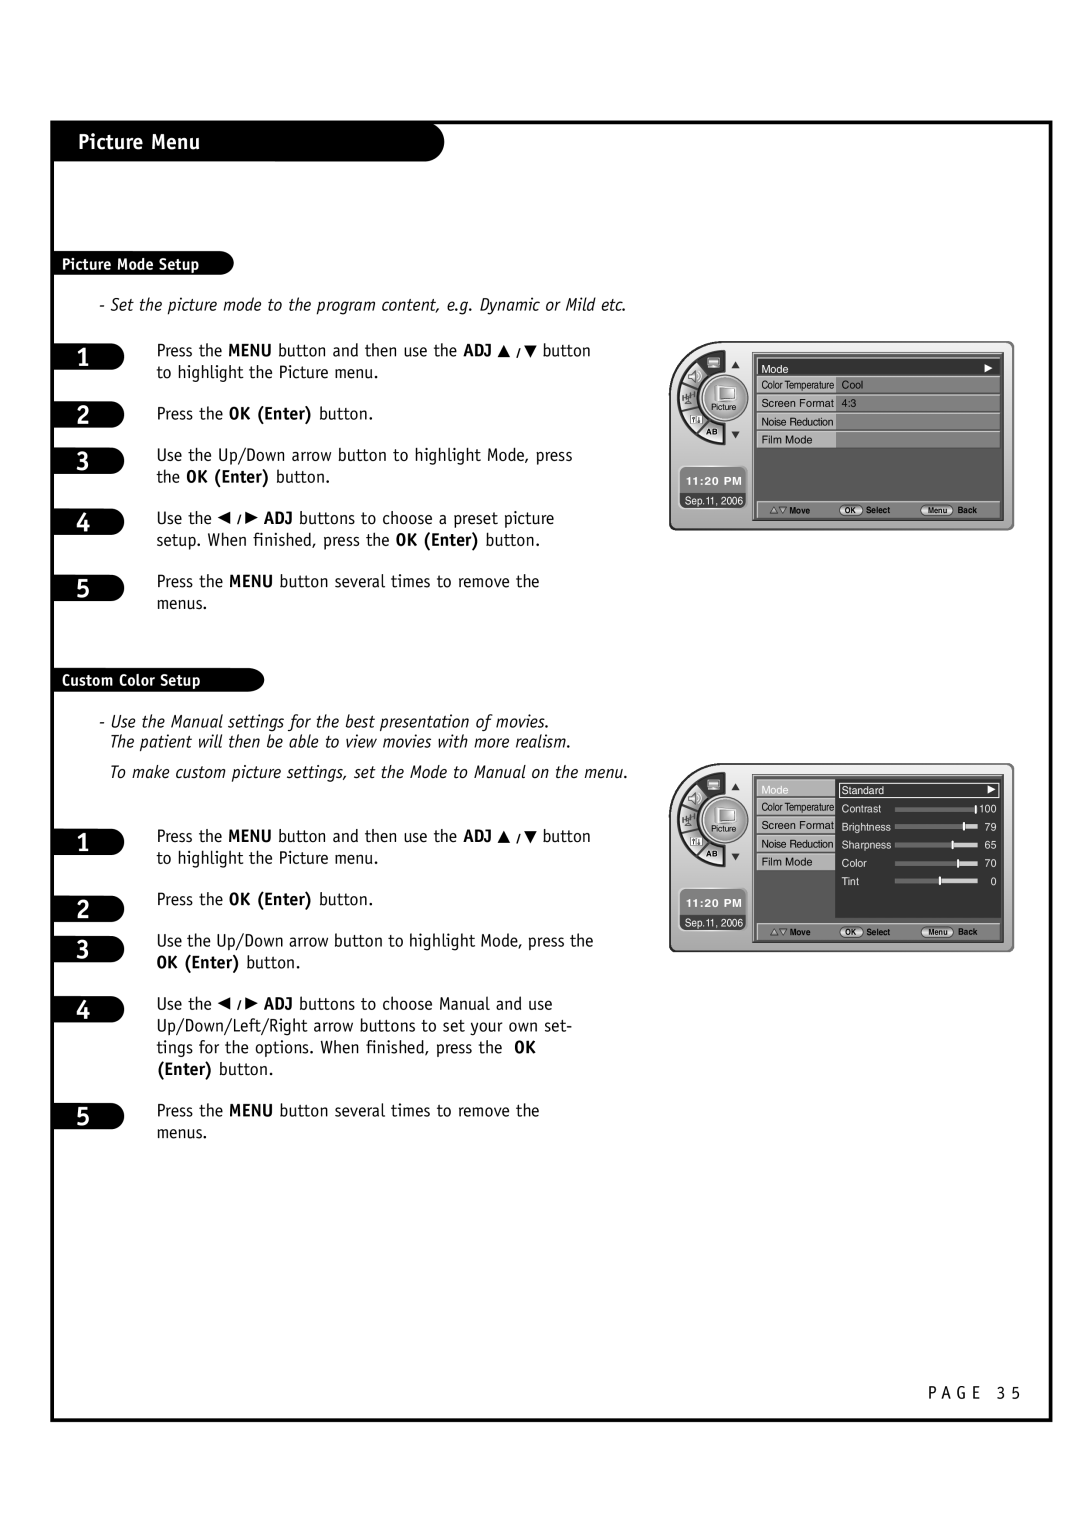
Picture Menu
Use the F / G ADJ buttons to choose Manual and use
User can choose preset formats for the picture
Inactive TV Display Channel Bank
Managing the Channel Banks
Program package
Channel Bank Number Display
= Delete
Examples of typical channel banks chars filled
Basic Extend
Other = Active
110 111 112 113 114 115
Channel Number Purpose
100
Channel Number 101 102 103 104
Typical Installer Menu
G E 4
Commercial Mode Setup
If batteries are removed, the Clone Clock time will be lost
Cloning Connections/Learning Setup
Turn to the next page to continue Cloning Setup
Set the Clock Optional
Clone Programmer Learning Setup
Learn Setup from Master L20V54S
Disconnect L20V54S Power for 15 Seconds
Cloning Connections / Teaching Setup
Teach Master L20V54S’s Setup to the target
Installer Menu Items 000 through
Installer Menu
Accessing the Installer’s Menu
Using the Installer’s Menu
CH not Avble
Installer Menu Items 035 through
Installer Sequence
Detailed Descriptions of Installer Menu Items
Feature Level
Mute Disable
Scan Mode
Sleep Timer
Atsc Band
Detailed Descriptions of Installer Menu Items
AUX Status
Quick Shutoff
Start Minor Channel
Reference TV Features / Menus that can be Cloned
Atsc Tune Mode
G E 5
Changing Source Labels on Master TV
Adding Channel Icons and Labels in the 2-5-4 + Menu Mode
To Do Channel Editing/Labeling, proceed as follows
Changing/Adding Channel Labels on Master TV
Detailed Instructions
Reference Detailed Information For Making a Master TV
Reference Software Version Check
Procedure to Check Software Version
Software Problems
L20V54S Aux Input Configuration / Troubleshooting
Some quick and easy tips to resolving problems
Symptoms Possible Causes Possible Solutions
Troubleshooting
Clone Programmer Troubleshooting
Reference Cloning Procedure Troubleshooting
Reset Clone After Static Shock
Controller Quick Check
Clone Troubleshooting Flow Chart
TV Operation Check
OHM RF Cable
Glossary of Terms
G E 6
Installer Quick Setup Guide
Quick Setup Guide For Integrated Master TVs
See table of contents for more information
G E 6
G E 6
G E 6
OWNER’S Responsibility
For Customer Support/Service Please call
Copyright 2007 LG Electronics U.S.A., Inc
LG’S Responsibility