


Introduction
Introduction | 2 |
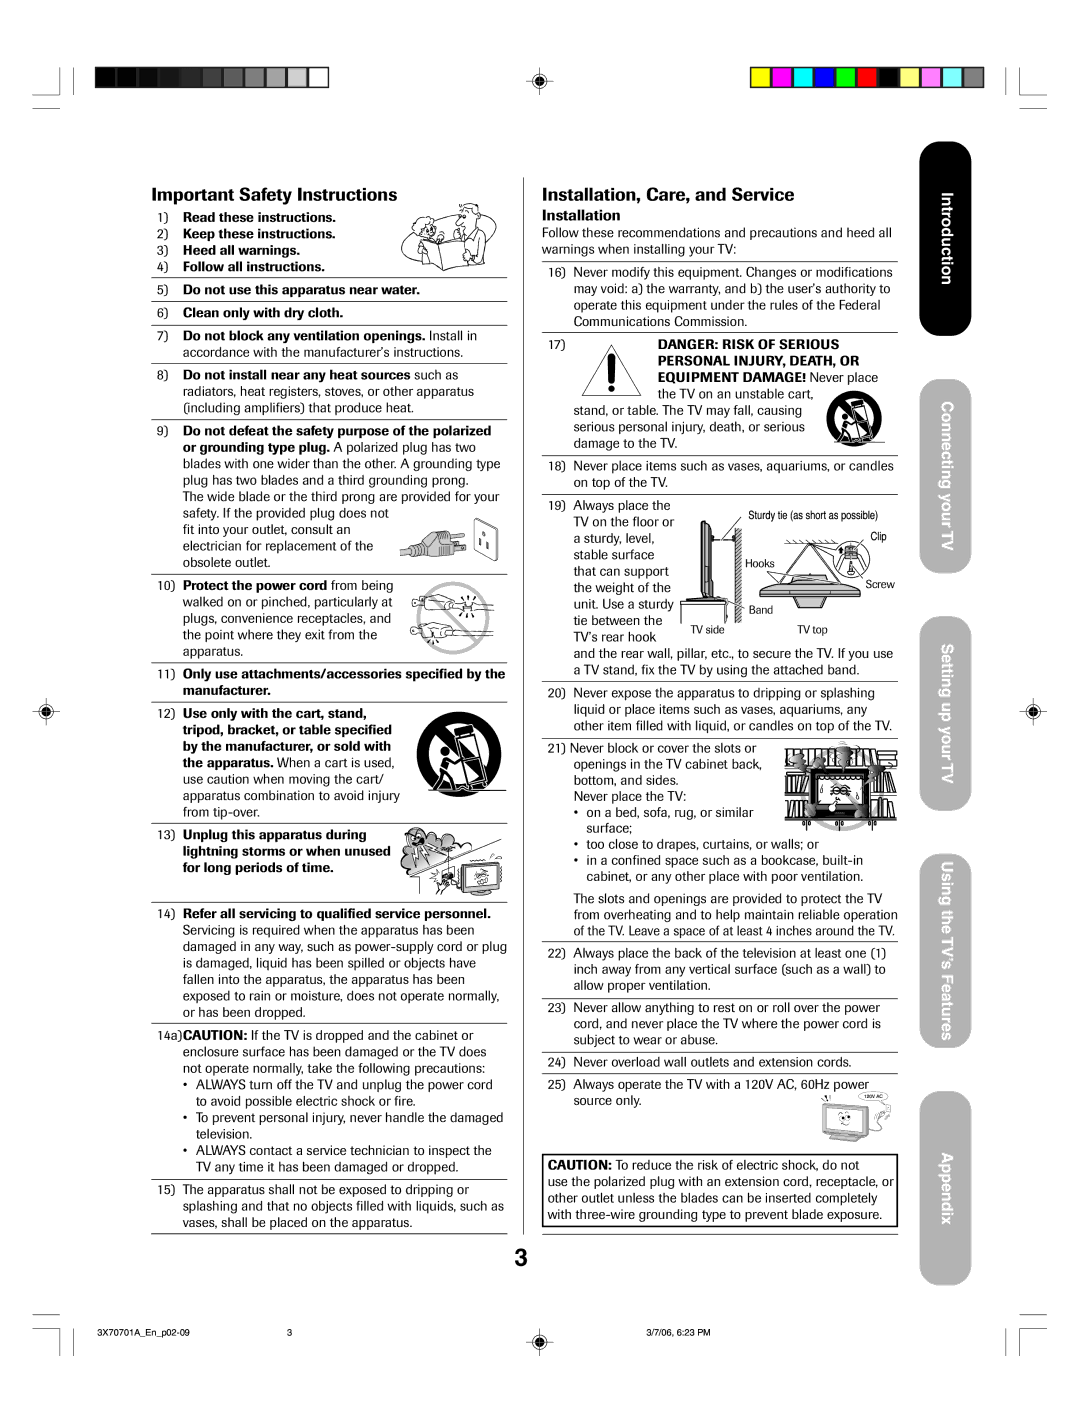
Important Safety Instructions | 3 |
FCC Declaration of Conformity Compliance |
|
Statement (Part 15): | 5 |
Important notes about your Plasma TV | 5 |
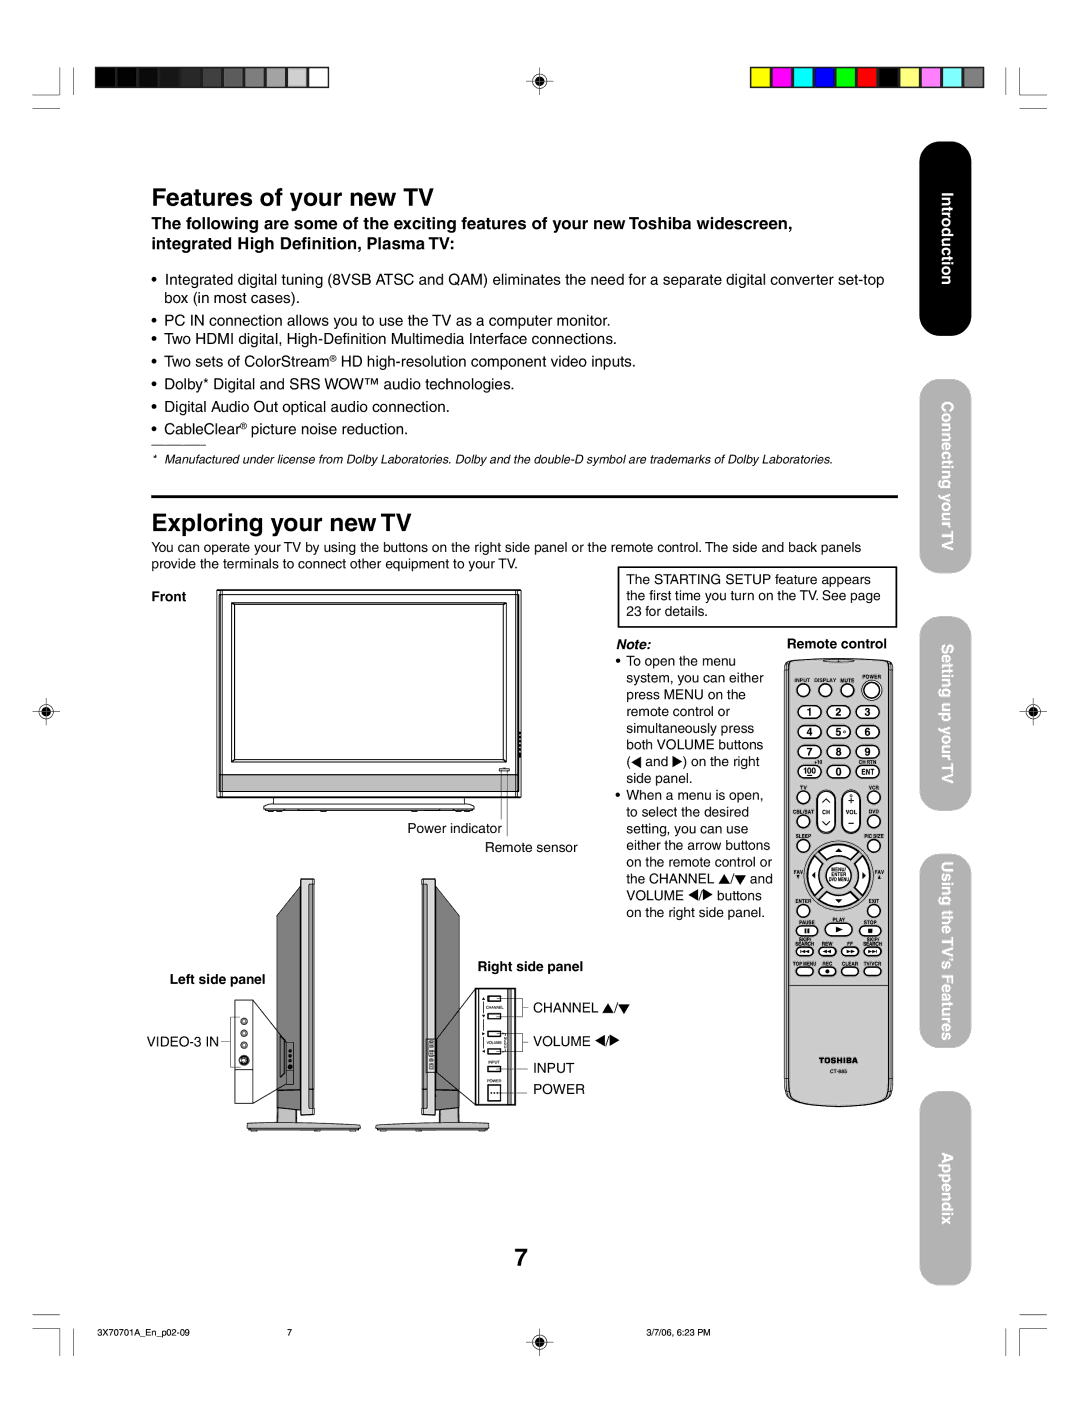
Features of your new TV | 7 |
Exploring your new TV | 7 |
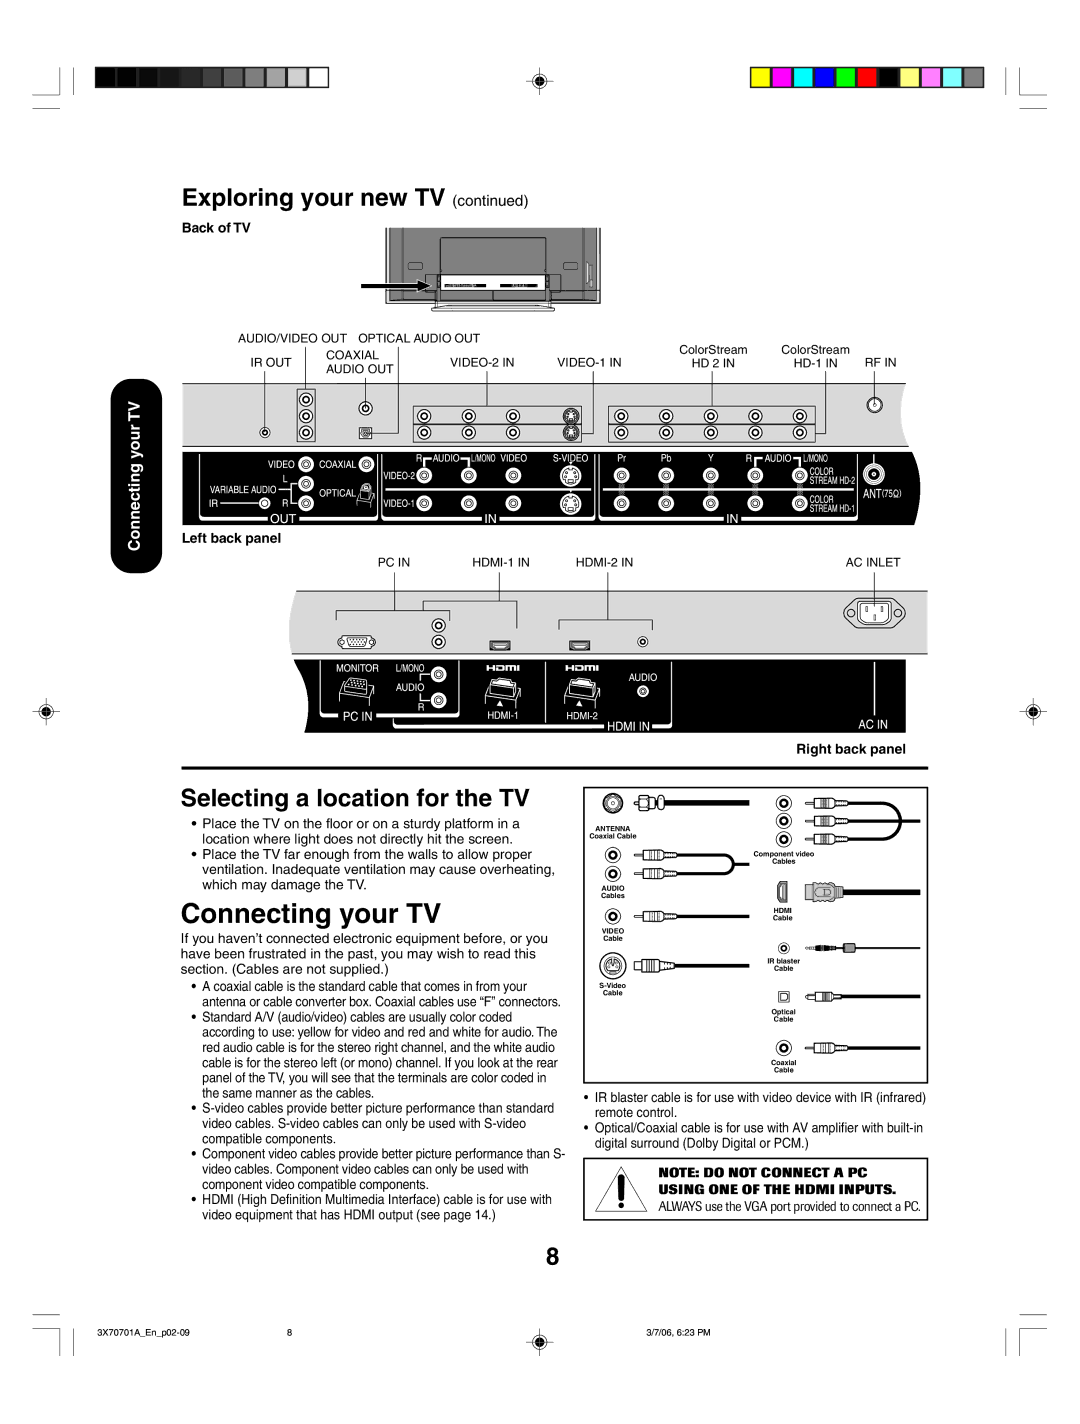
Selecting a location for the TV | 8 |
Connecting your TV | 8 |
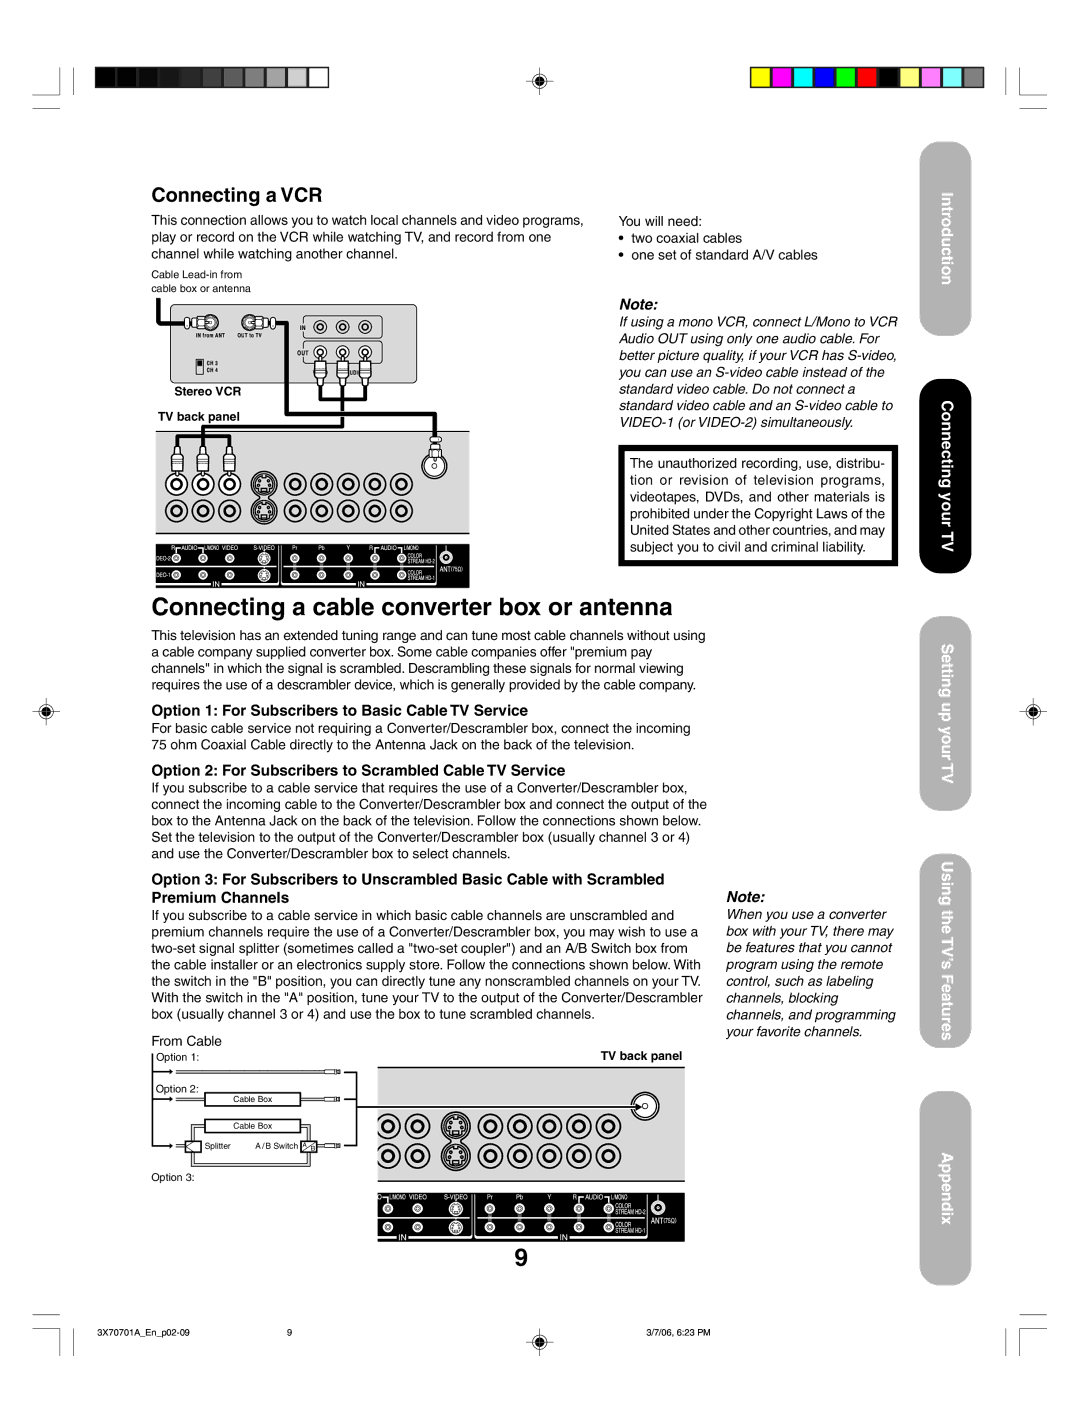
Connecting a VCR | 9 |
Connecting a cable converter box or antenna ... | 9 |
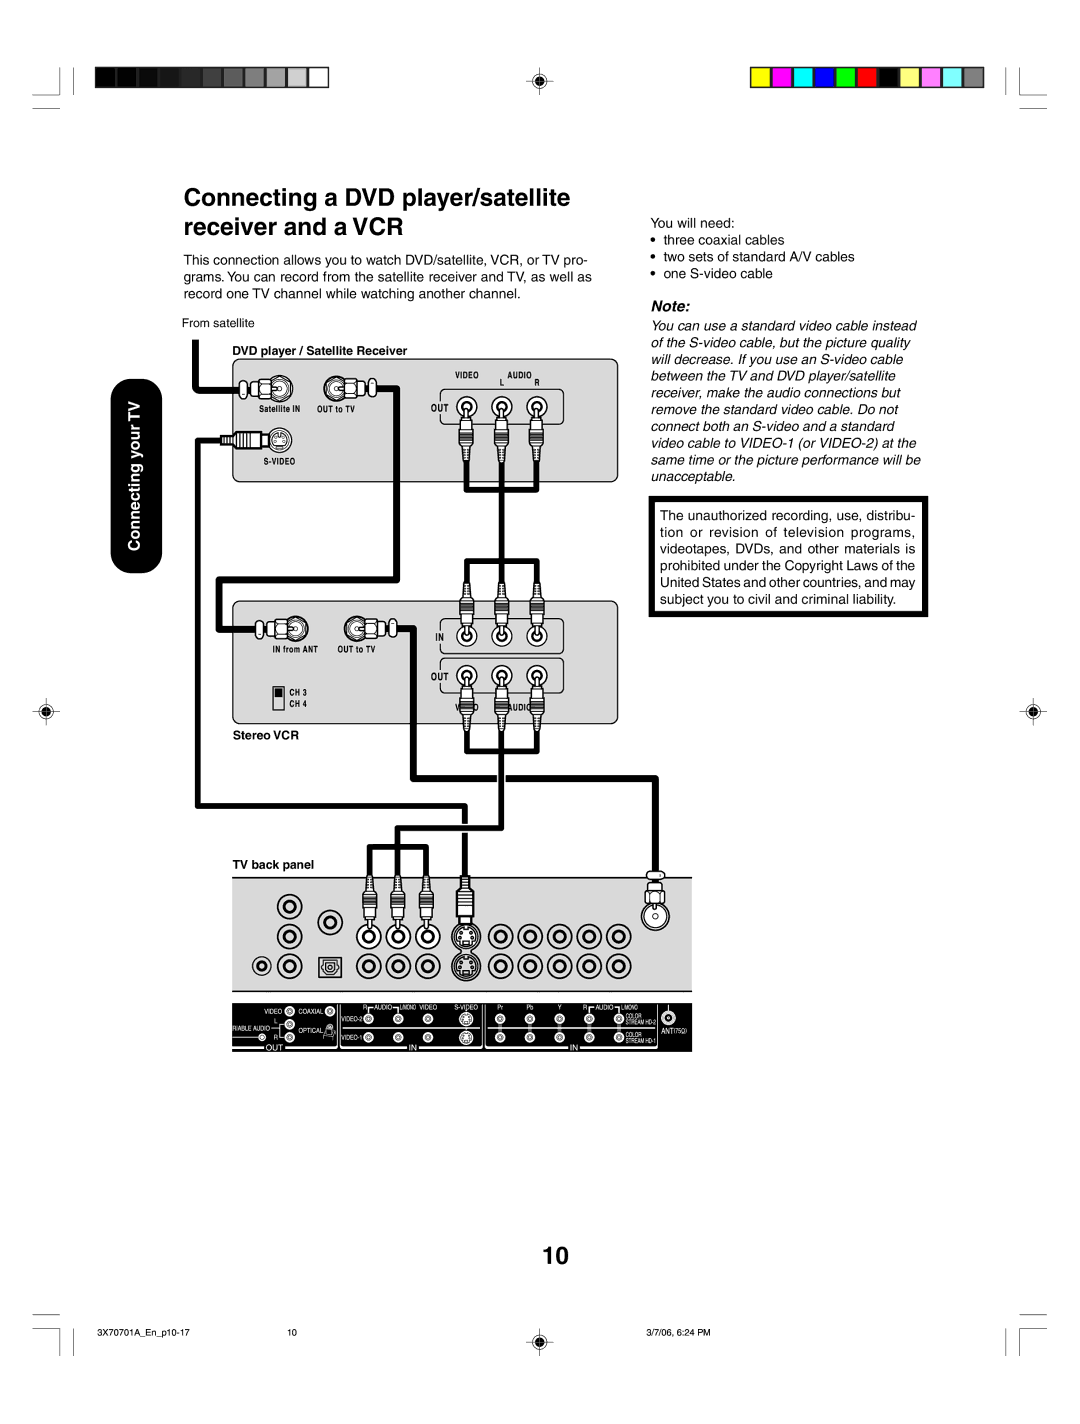
Connecting a DVD player/satellite receiver |
|
and a VCR | 10 |
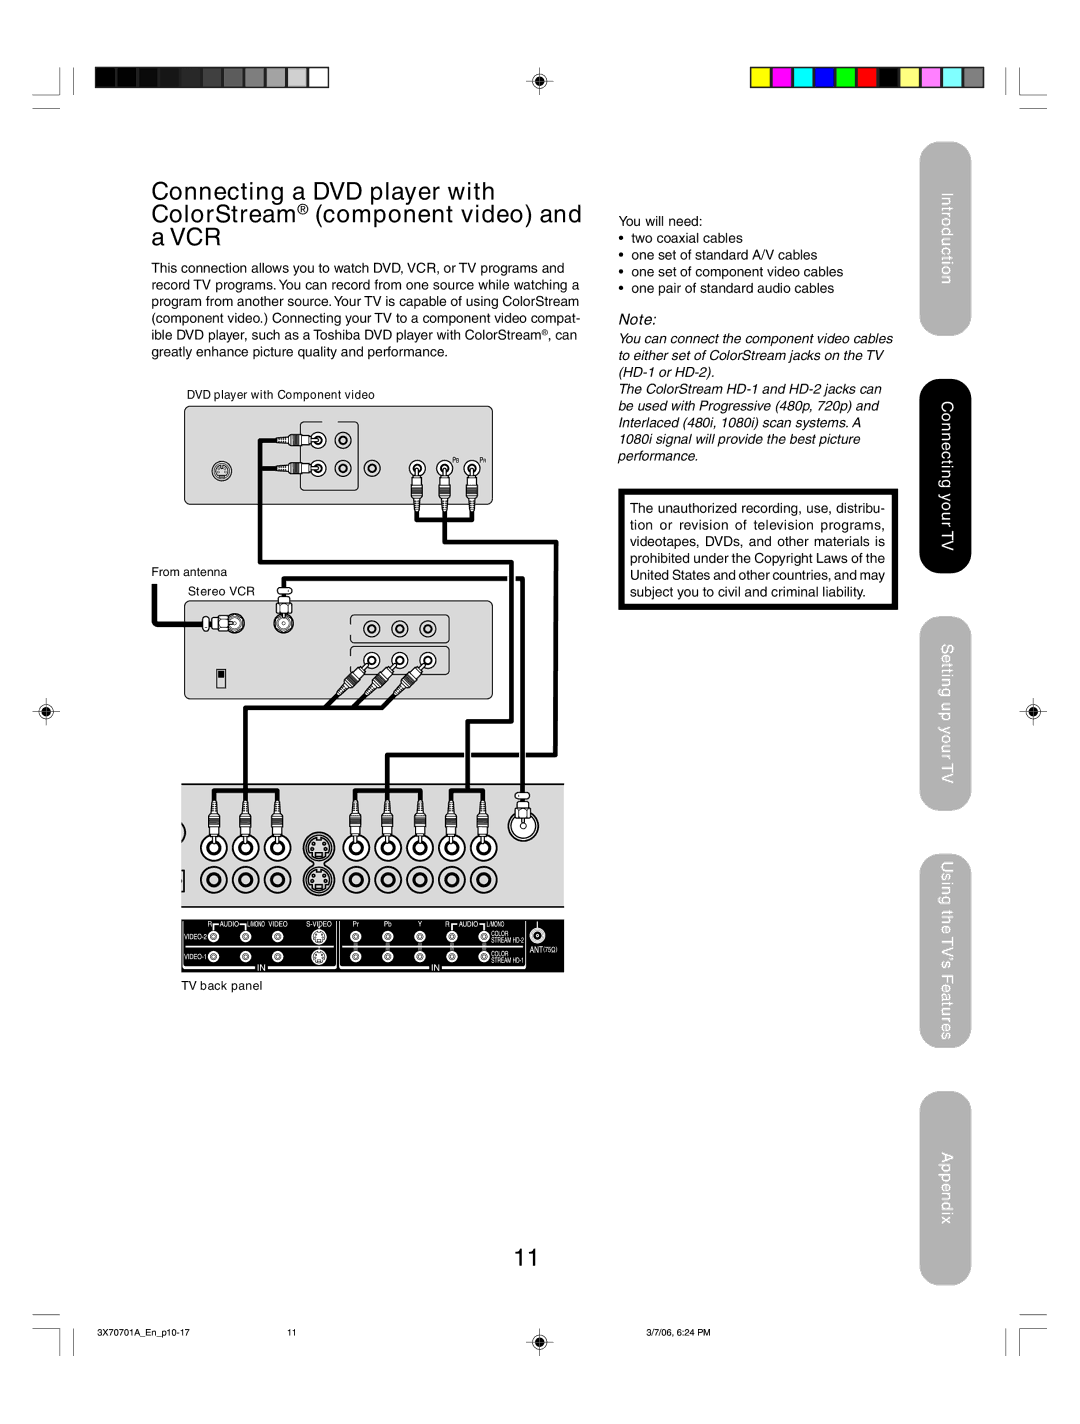
Connecting a DVD player with ColorStream® |
|
(component video) and a VCR | 11 |
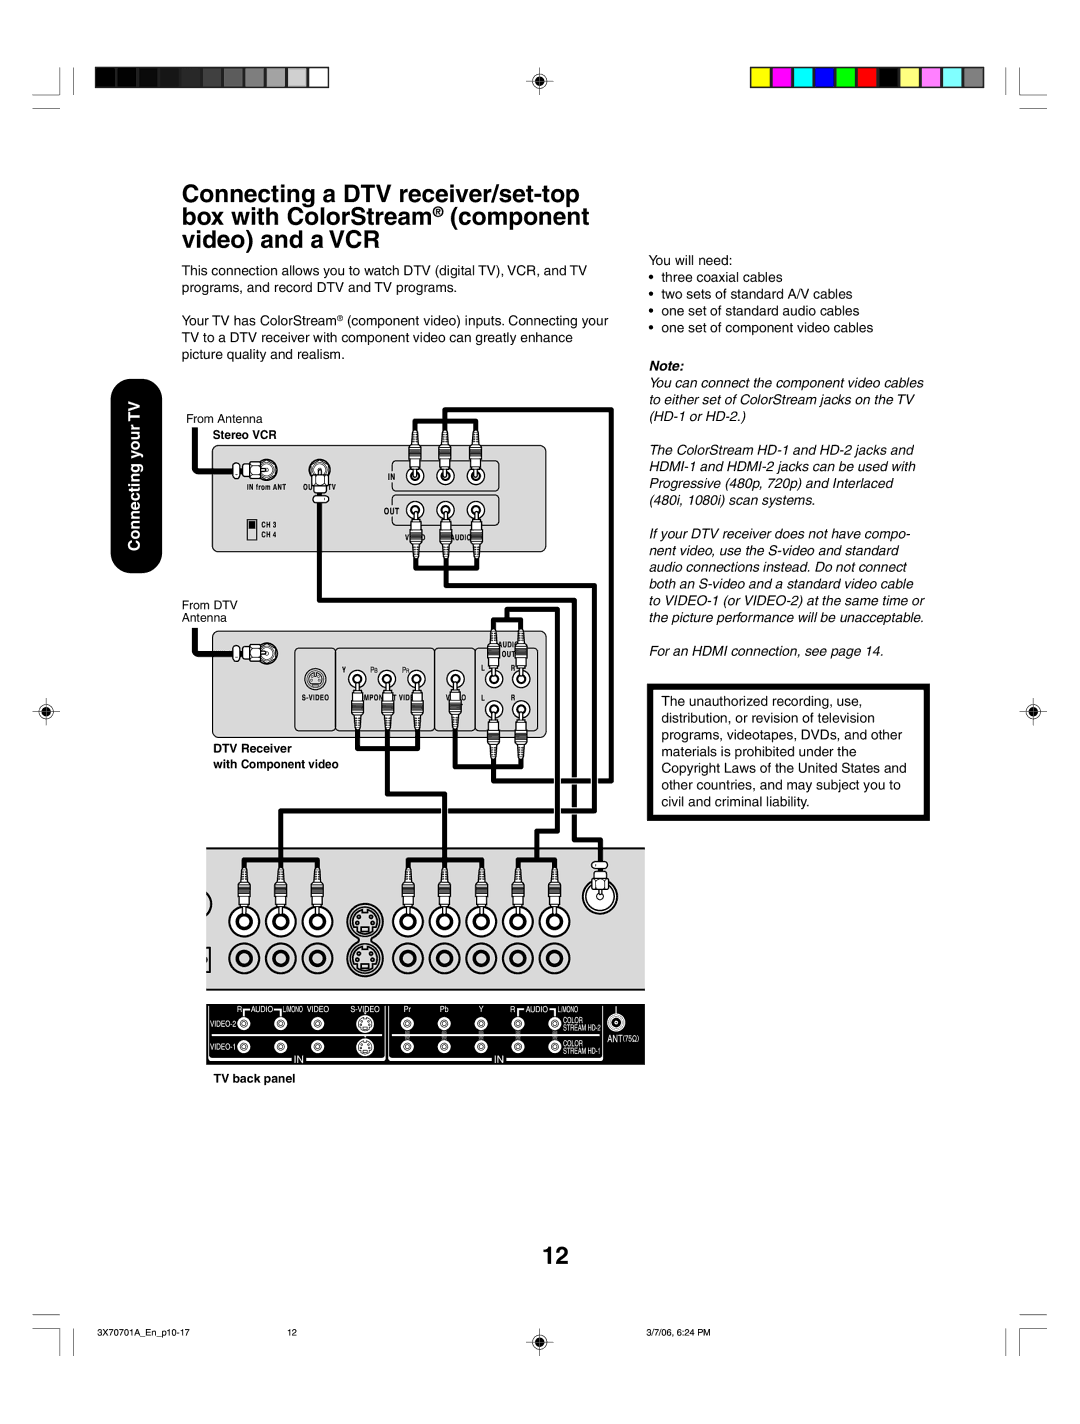
Connecting a DTV |
|
ColorStream® (component video) and a VCR ... 12 | |
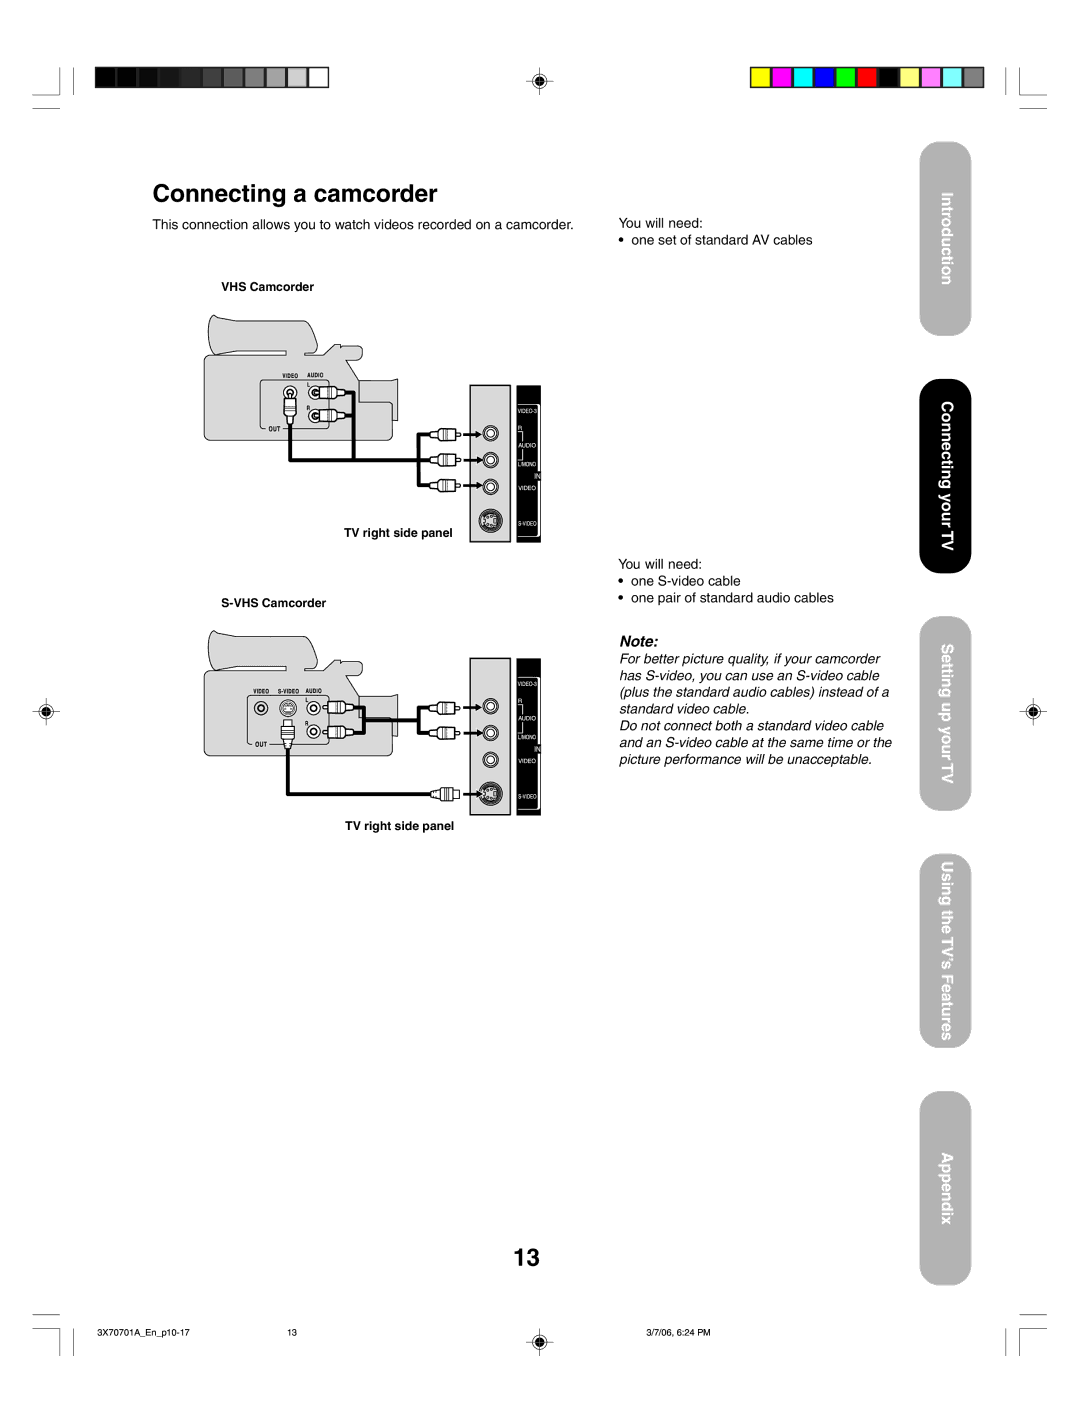
Connecting a camcorder | 13 |
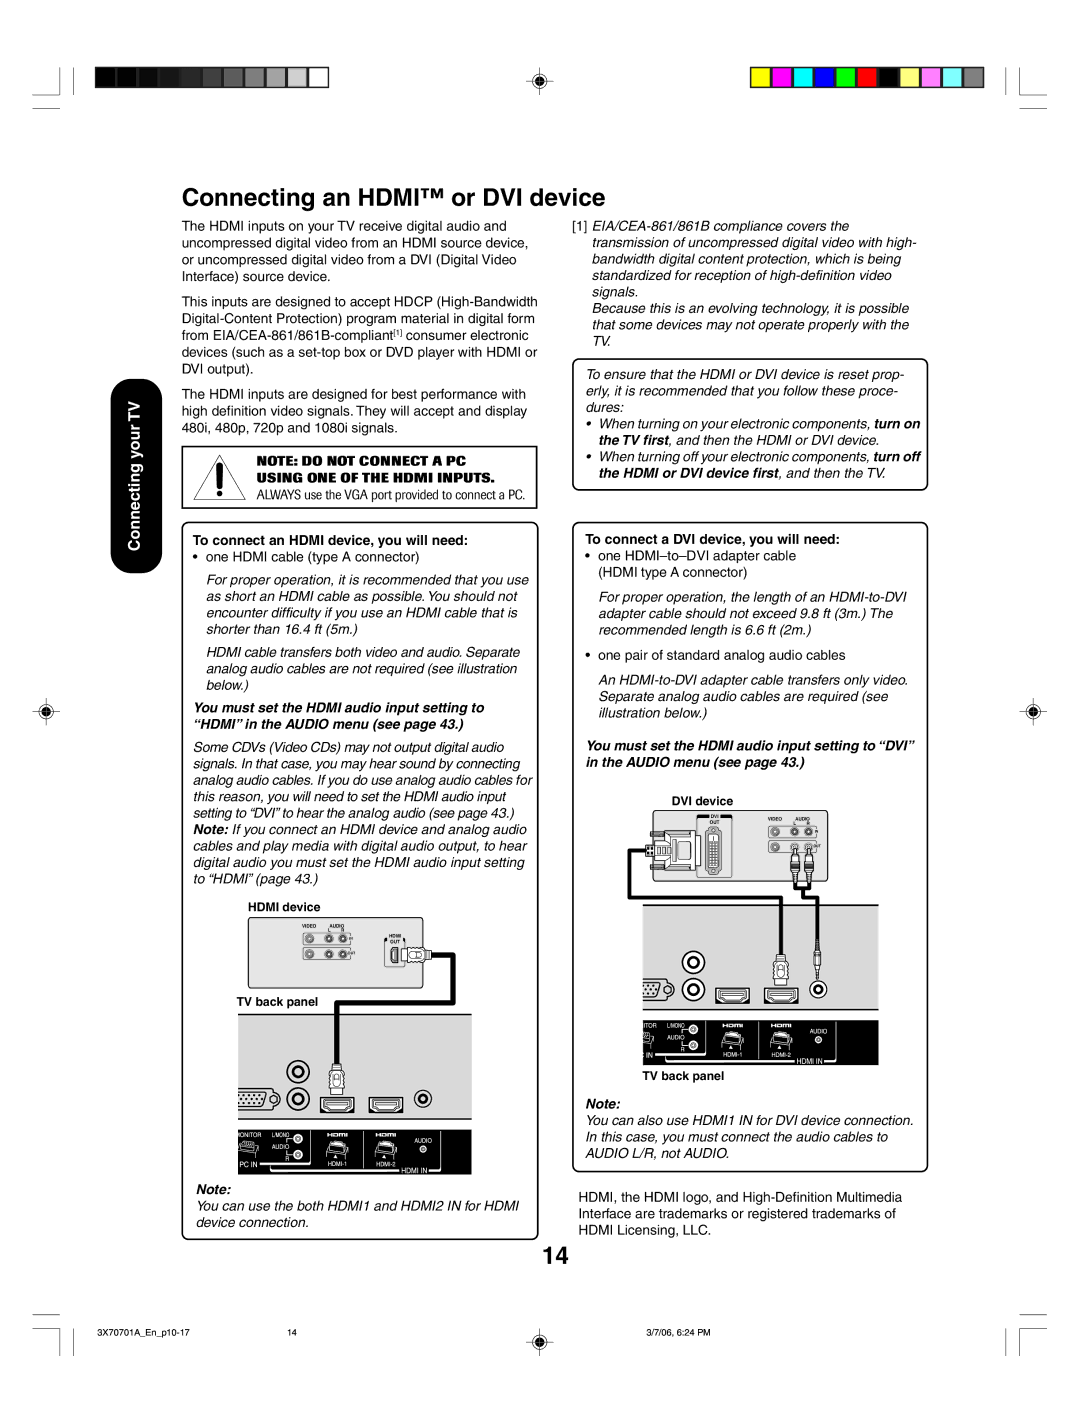
Connecting an HDMI™ or DVI device | 14 |
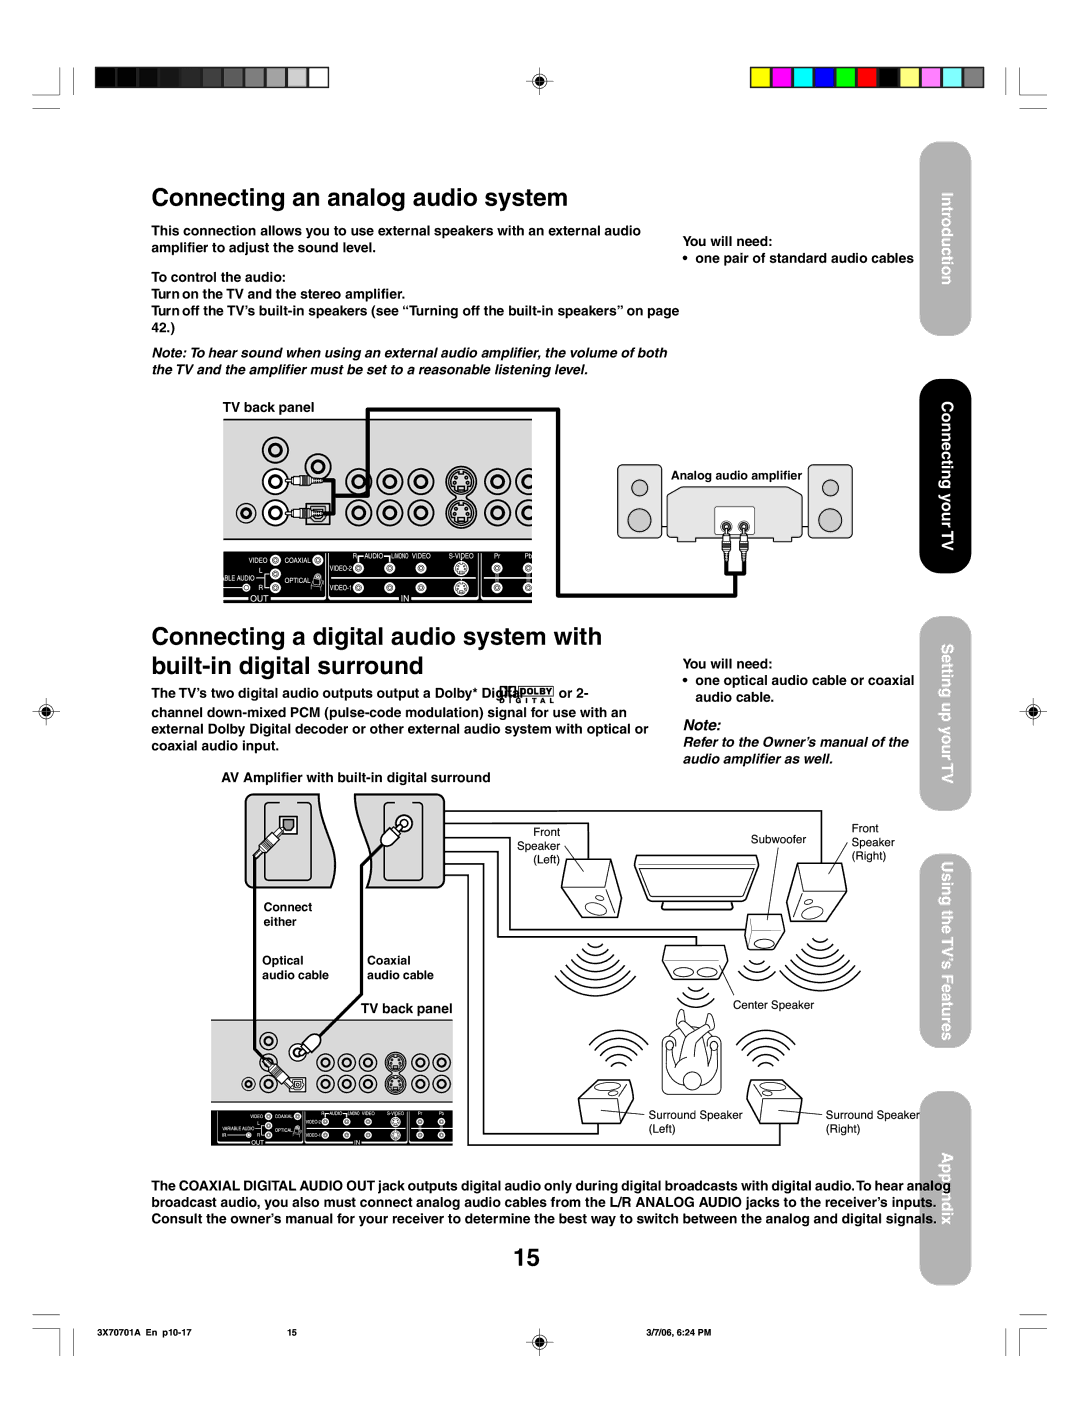
Connecting an analog audio system | 15 |
Connecting a digital audio system with |
|
digital surround | 15 |
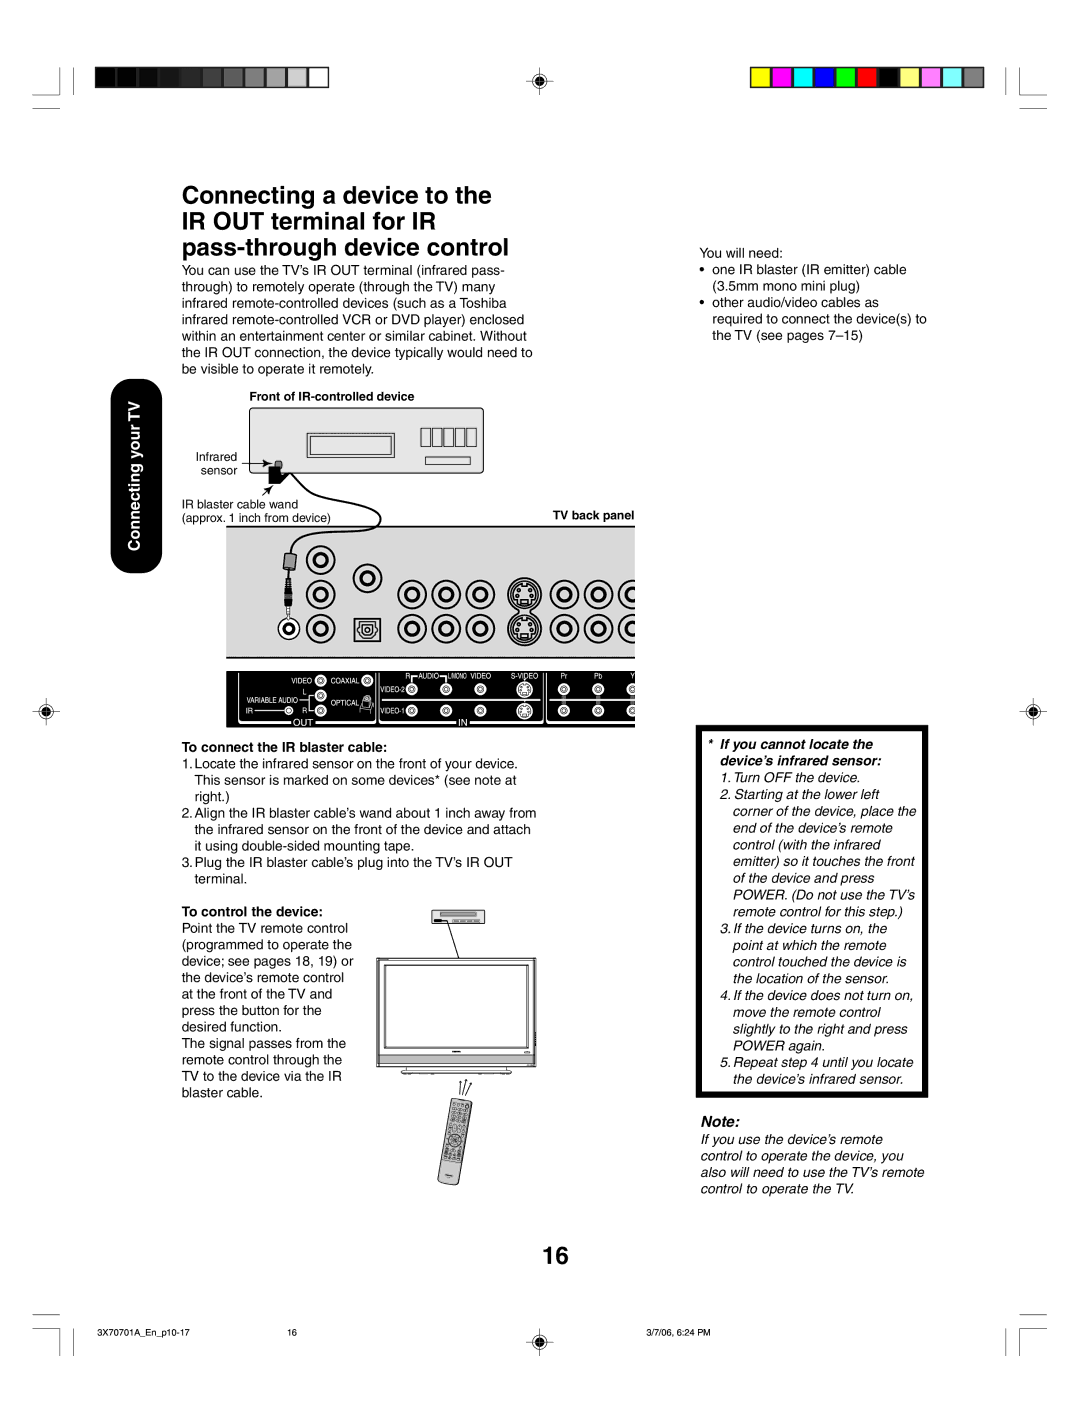
Connecting a device to the IR OUT terminal for | |
IR | 16 |
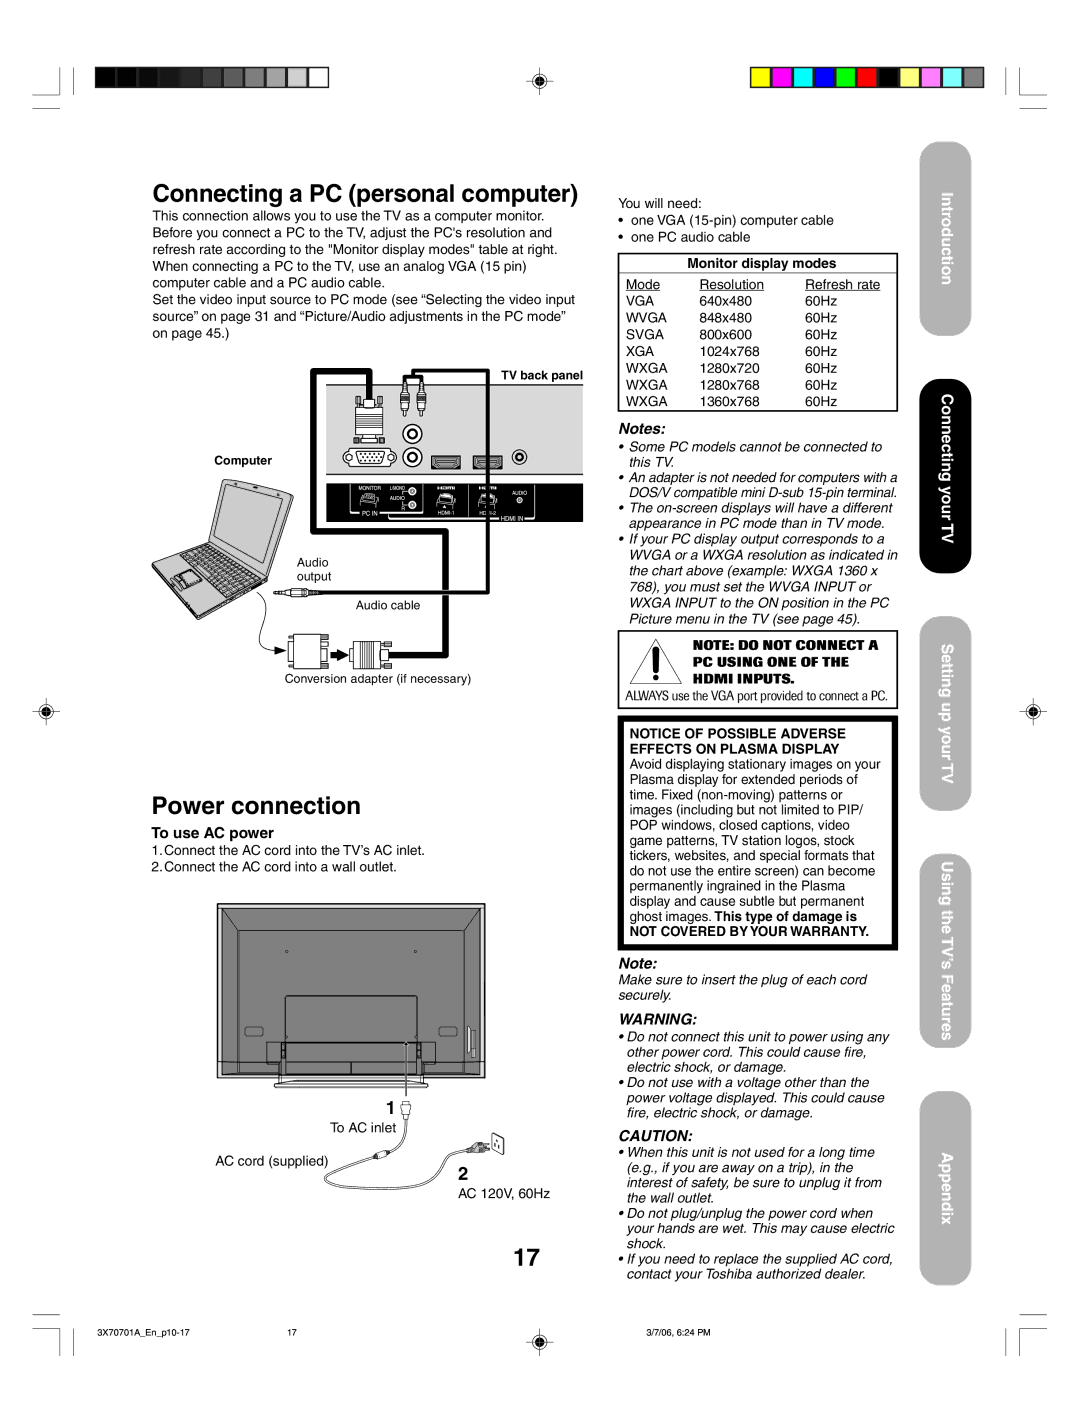
Connecting a PC (personal computer) | 17 |
Power connection | 17 |
Setting up your TV | 18 |
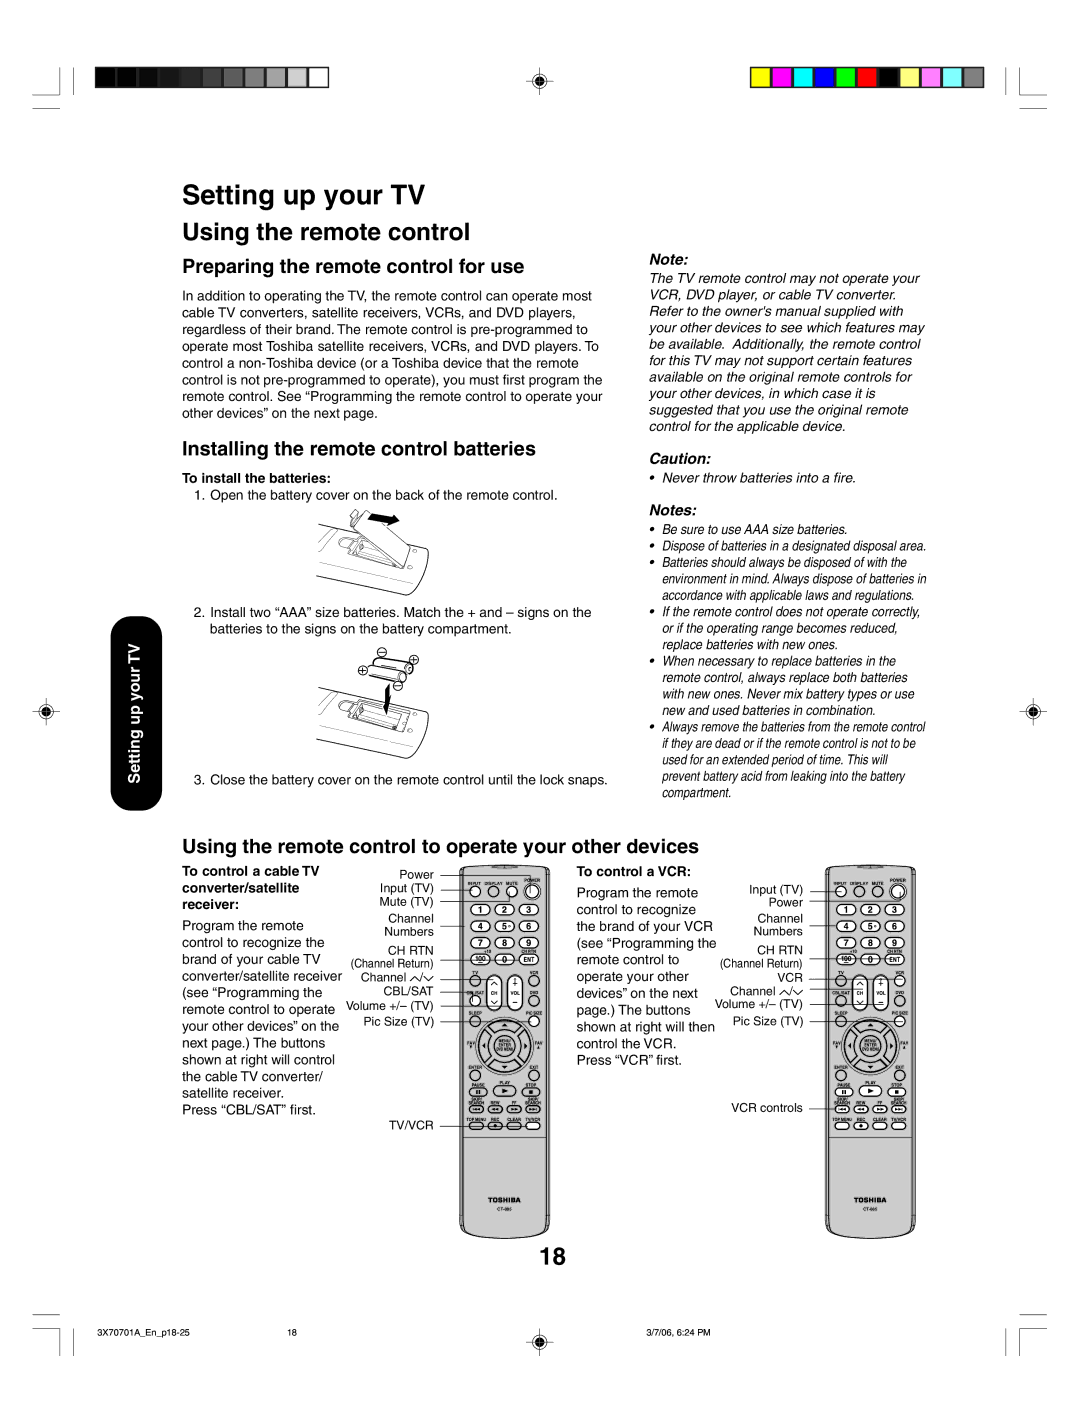
Using the remote control | 18 |
Preparing the remote control for use | 18 |
Installing the remote control batteries | 18 |
Using the remote control to operate your |
|
other devices | 18 |
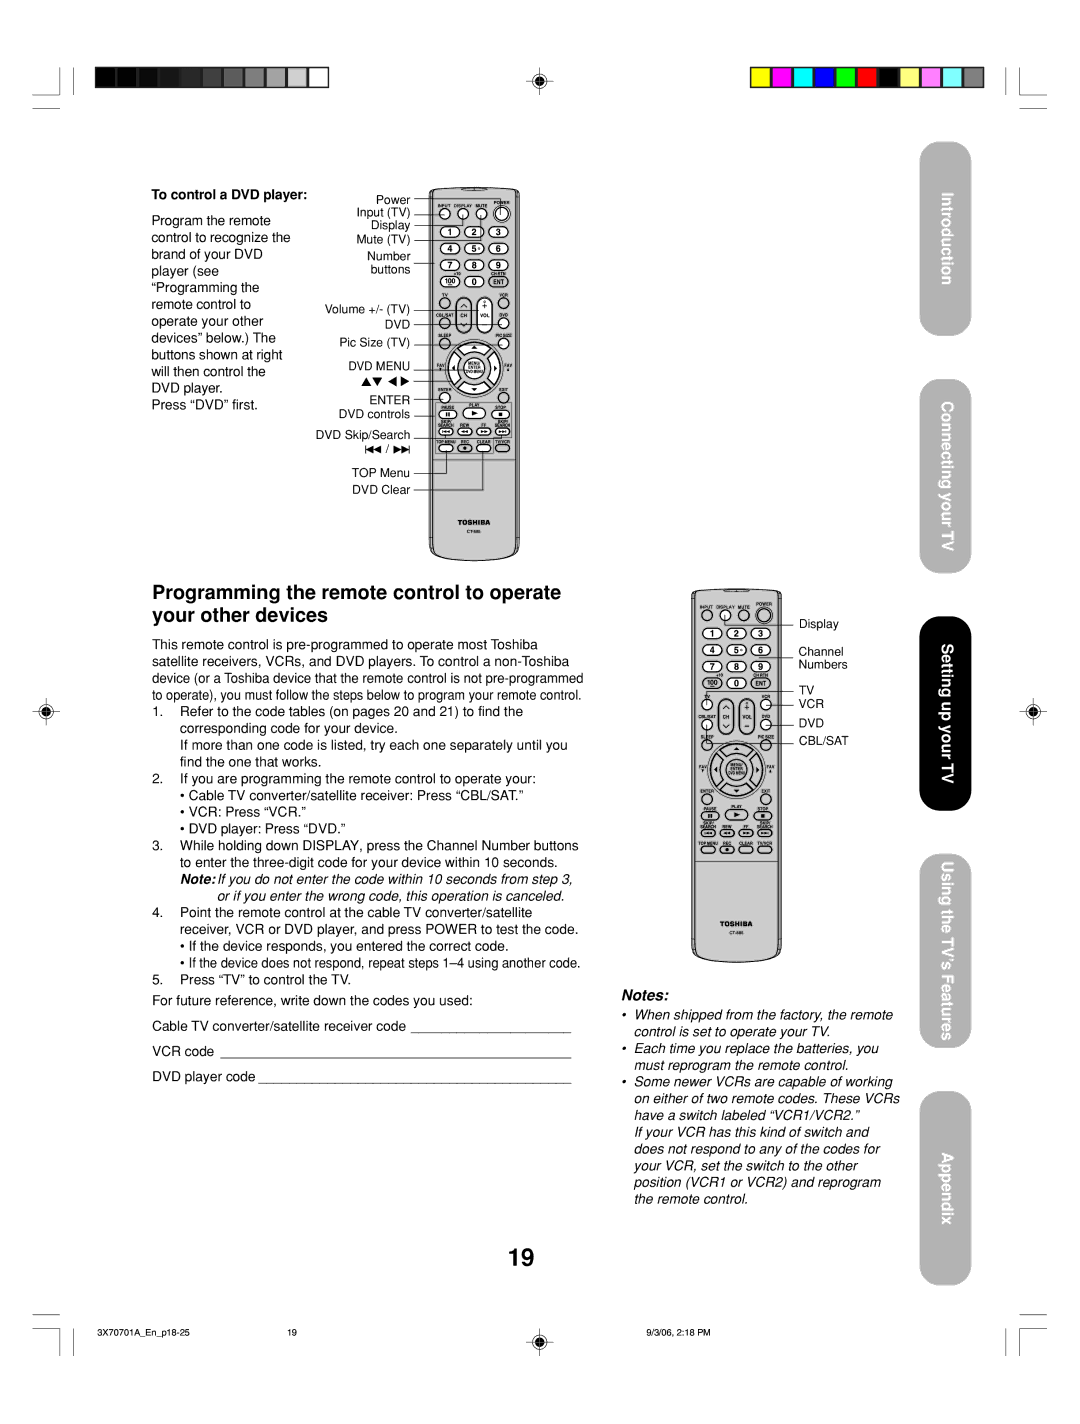
Programming the remote control to operate | |
your other devices | 19 |
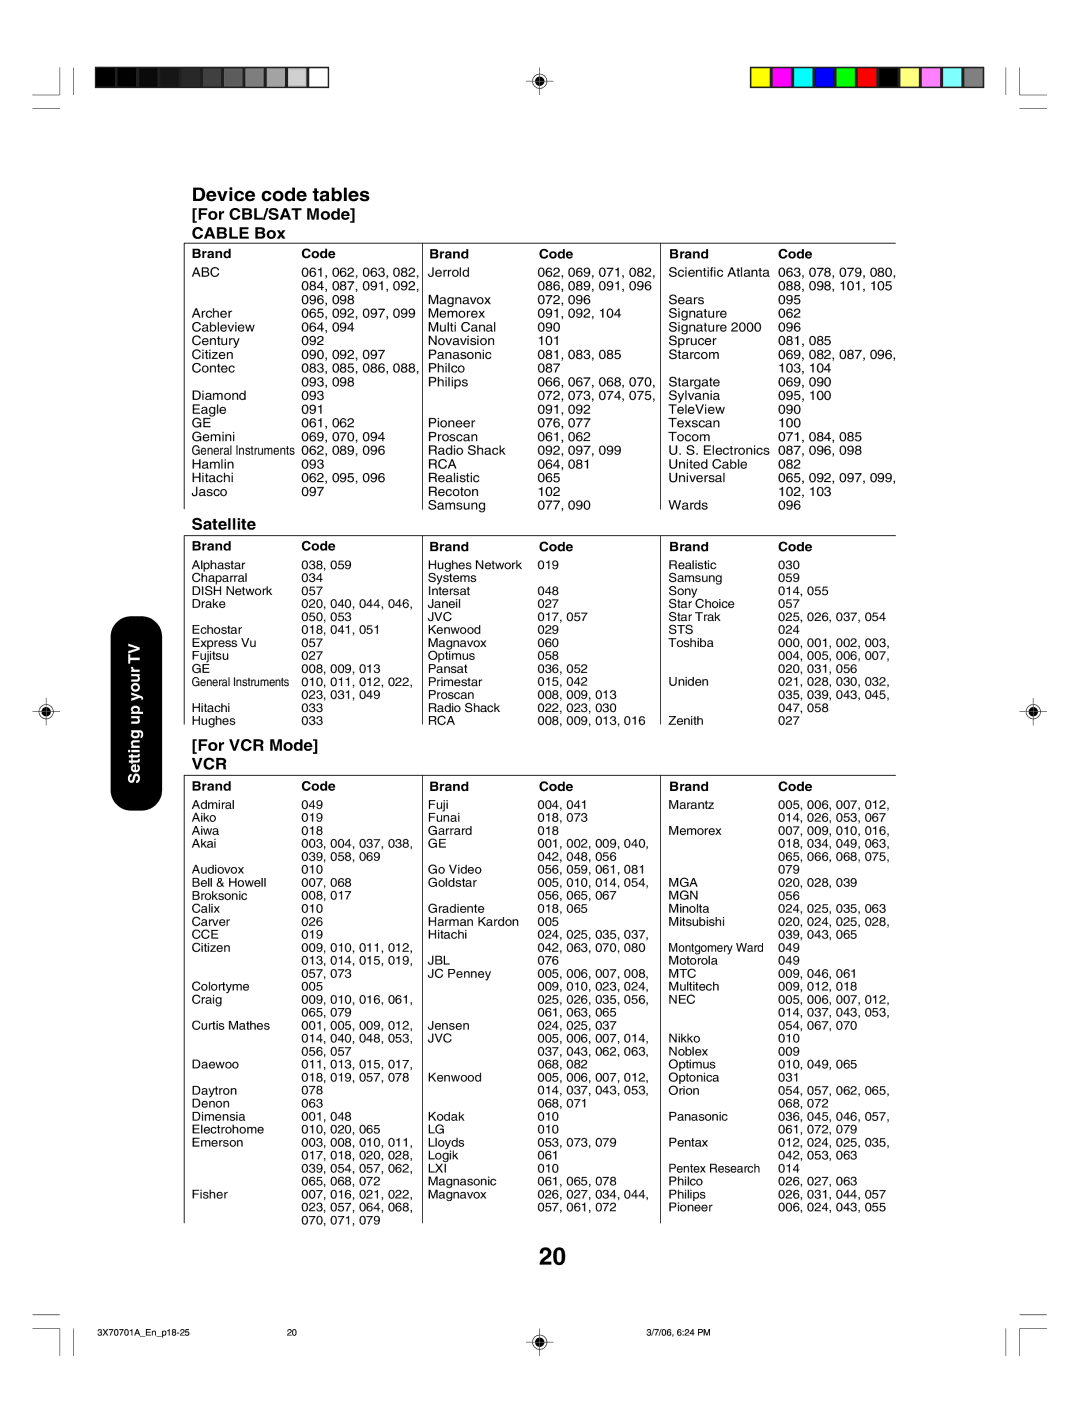
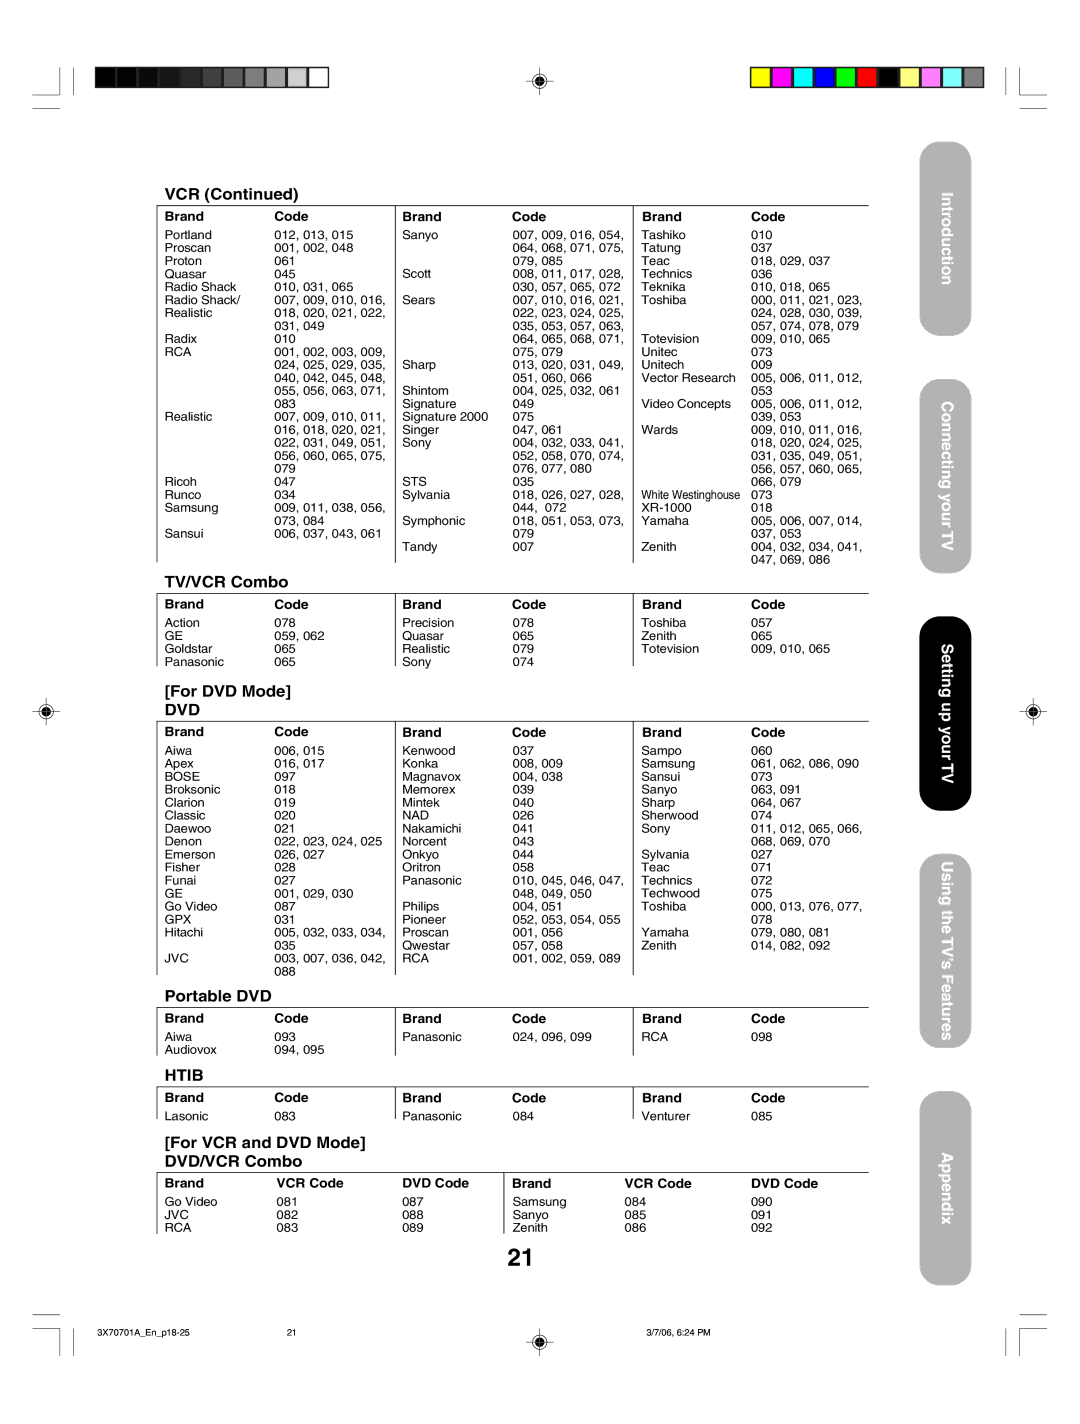
Device code tables | 20 |
Learning about the remote control | 22 |
Starting setup | 23 |
Changing the | 23 |
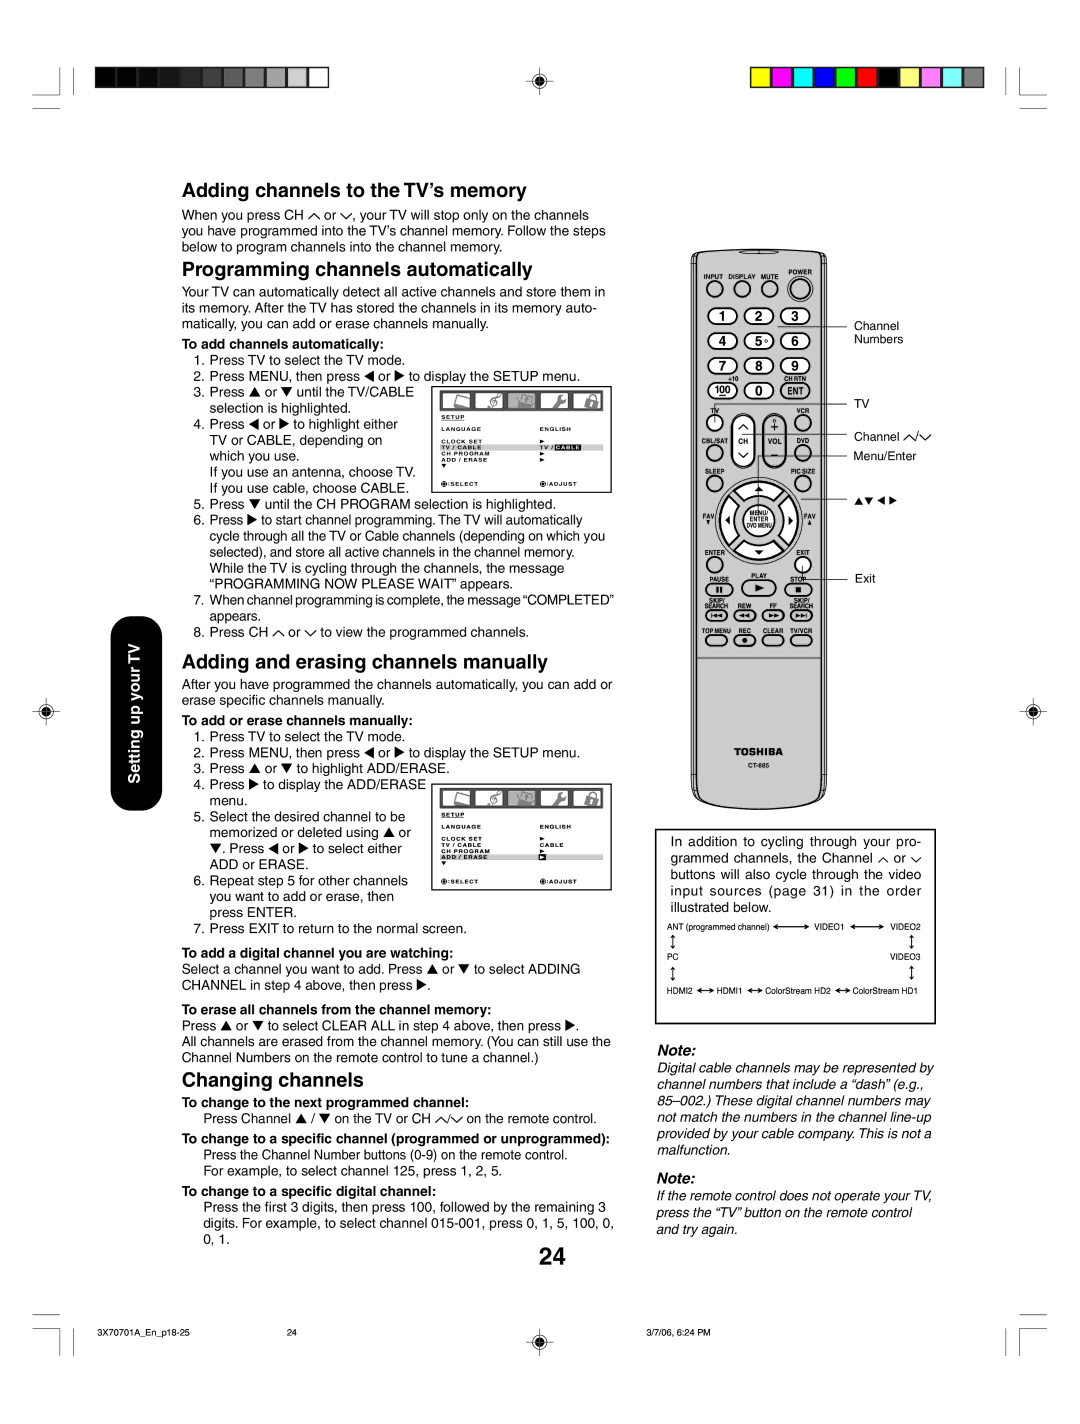
Adding channels to the TV’s memory | 24 |
Programming channels automatically | 24 |
Adding and erasing channels manually | 24 |
Changing channels | 24 |
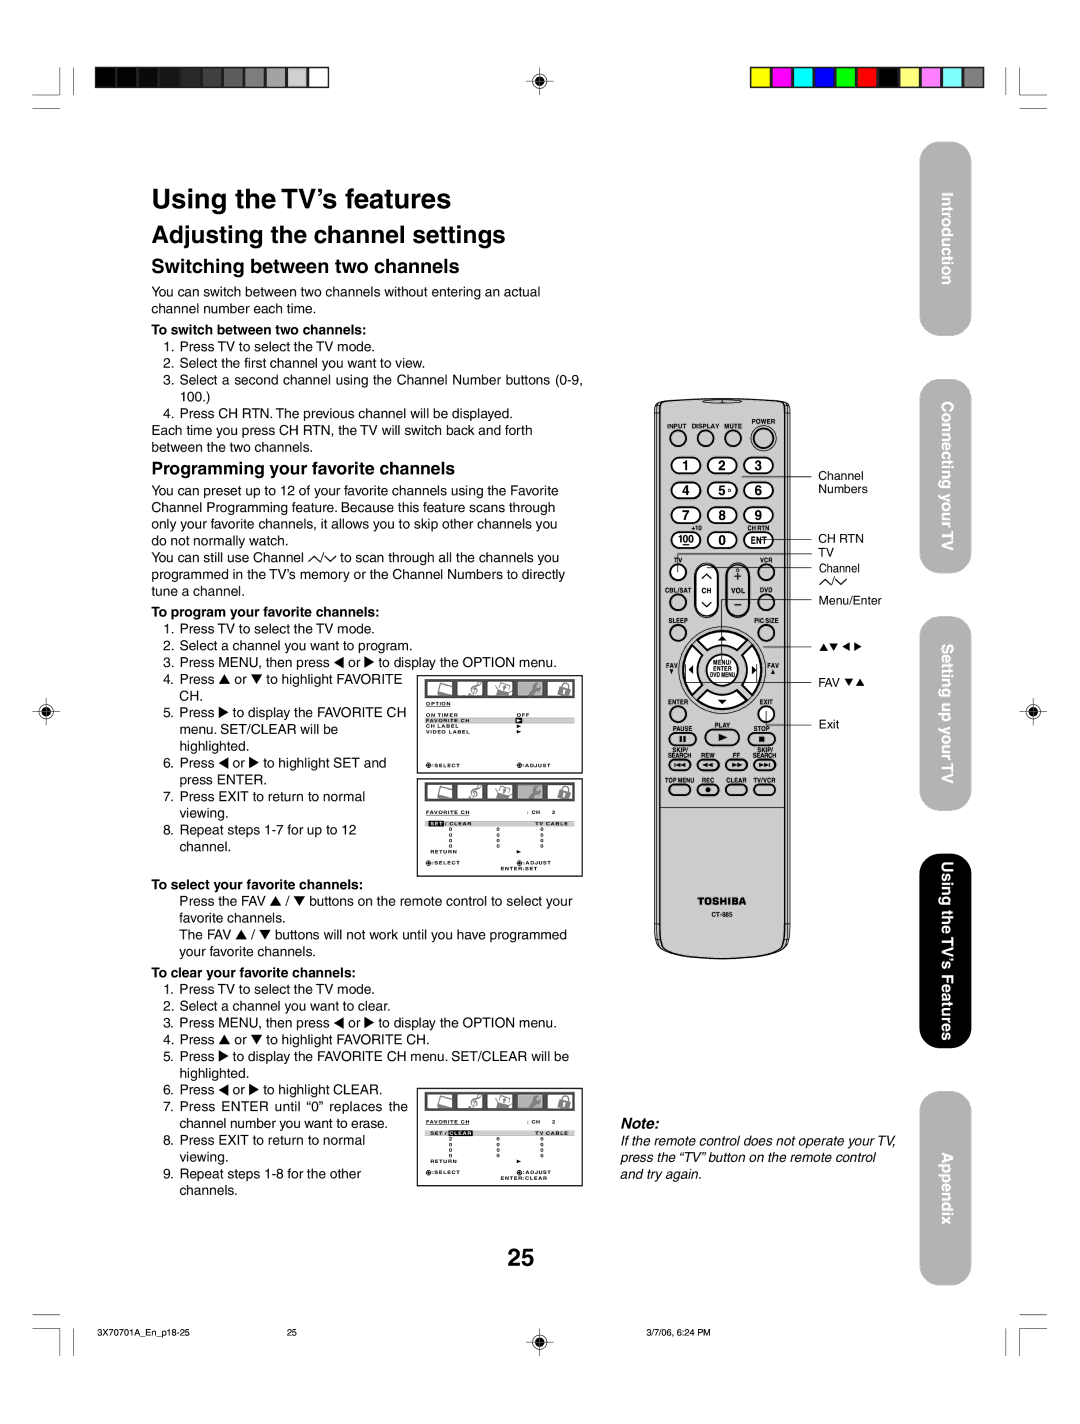
Using the TV’s features | 25 |
Adjusting the channel settings | 25 |
Switching between two channels | 25 |
Programming your favorite channels | 25 |
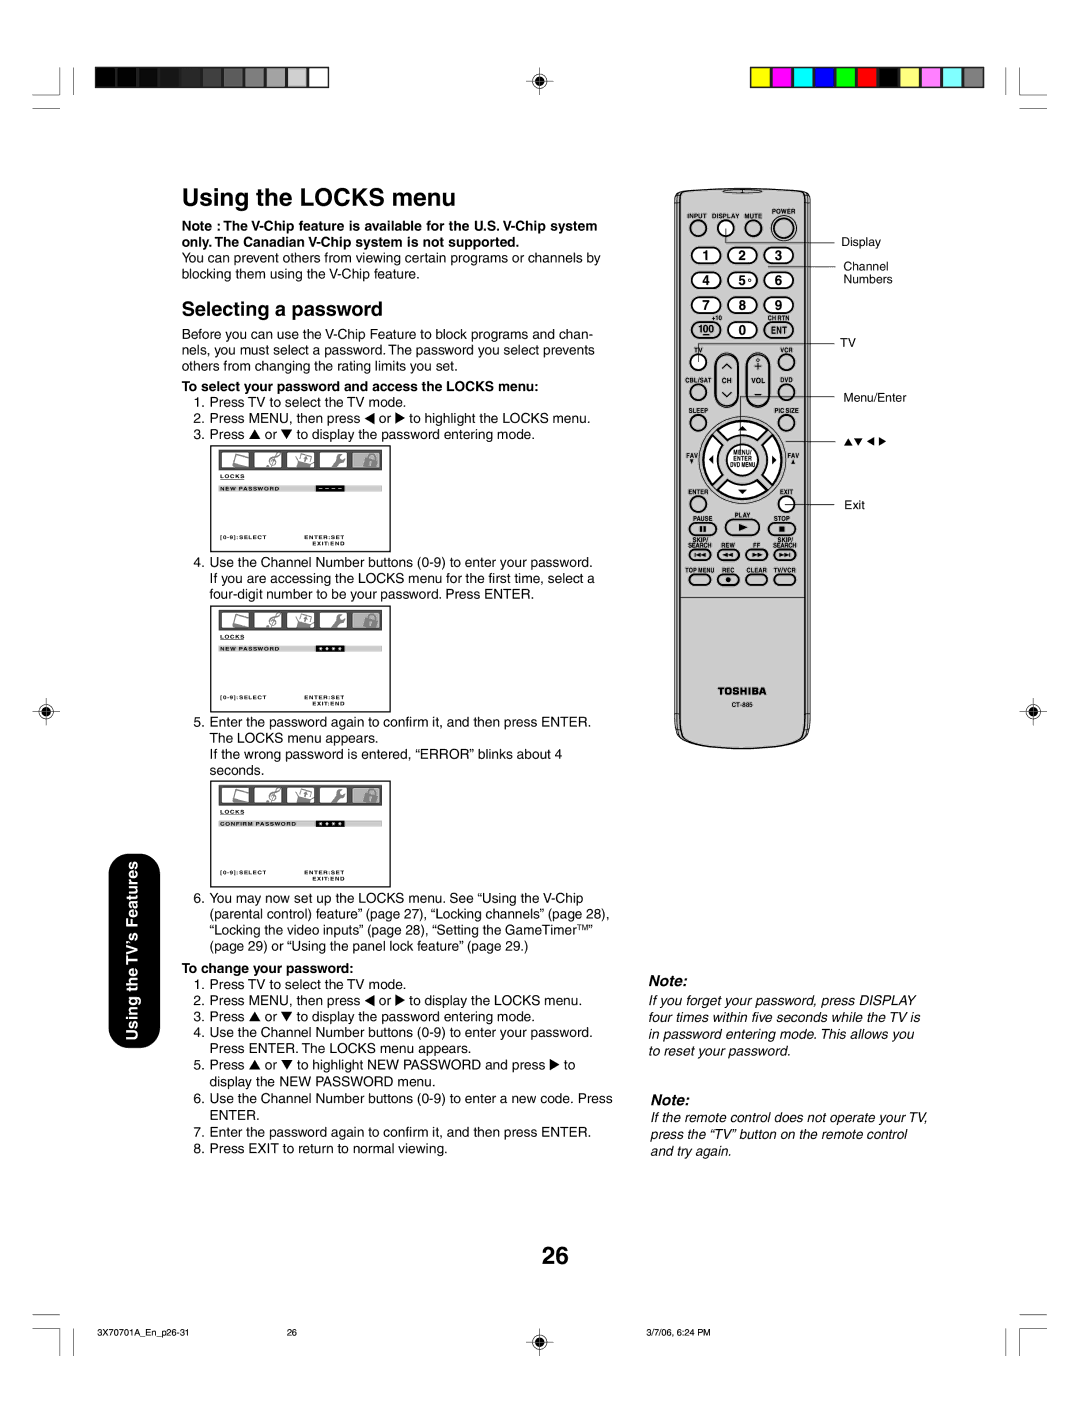
Using the LOCKS menu | 26 |
Selecting a password | 26 |
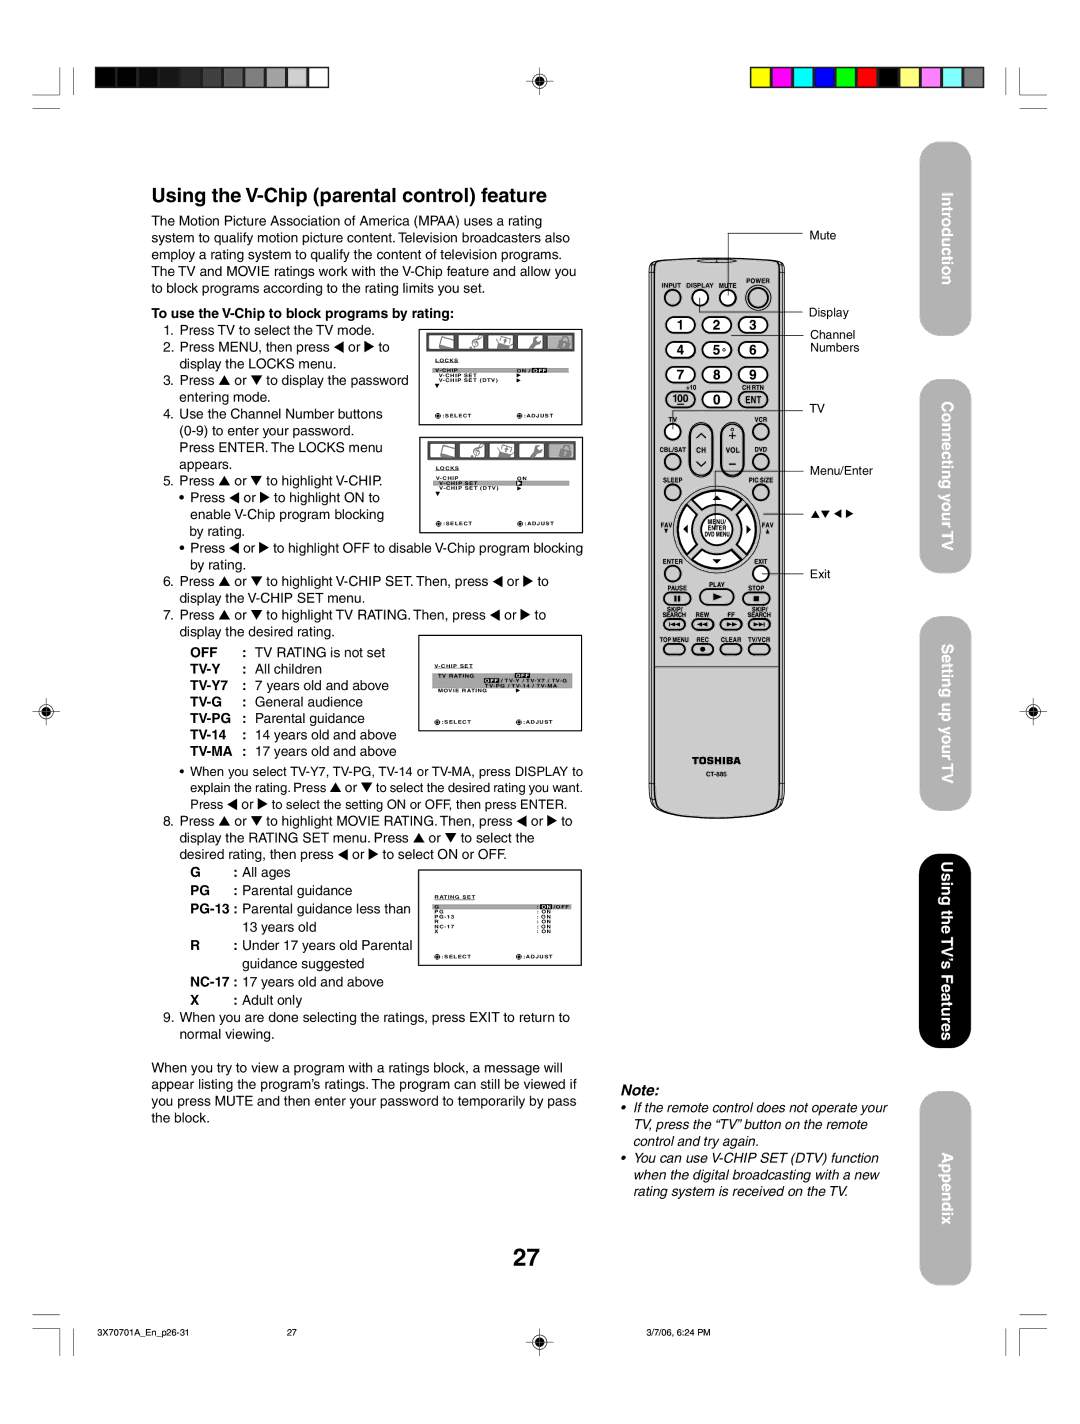
Using the | 27 |
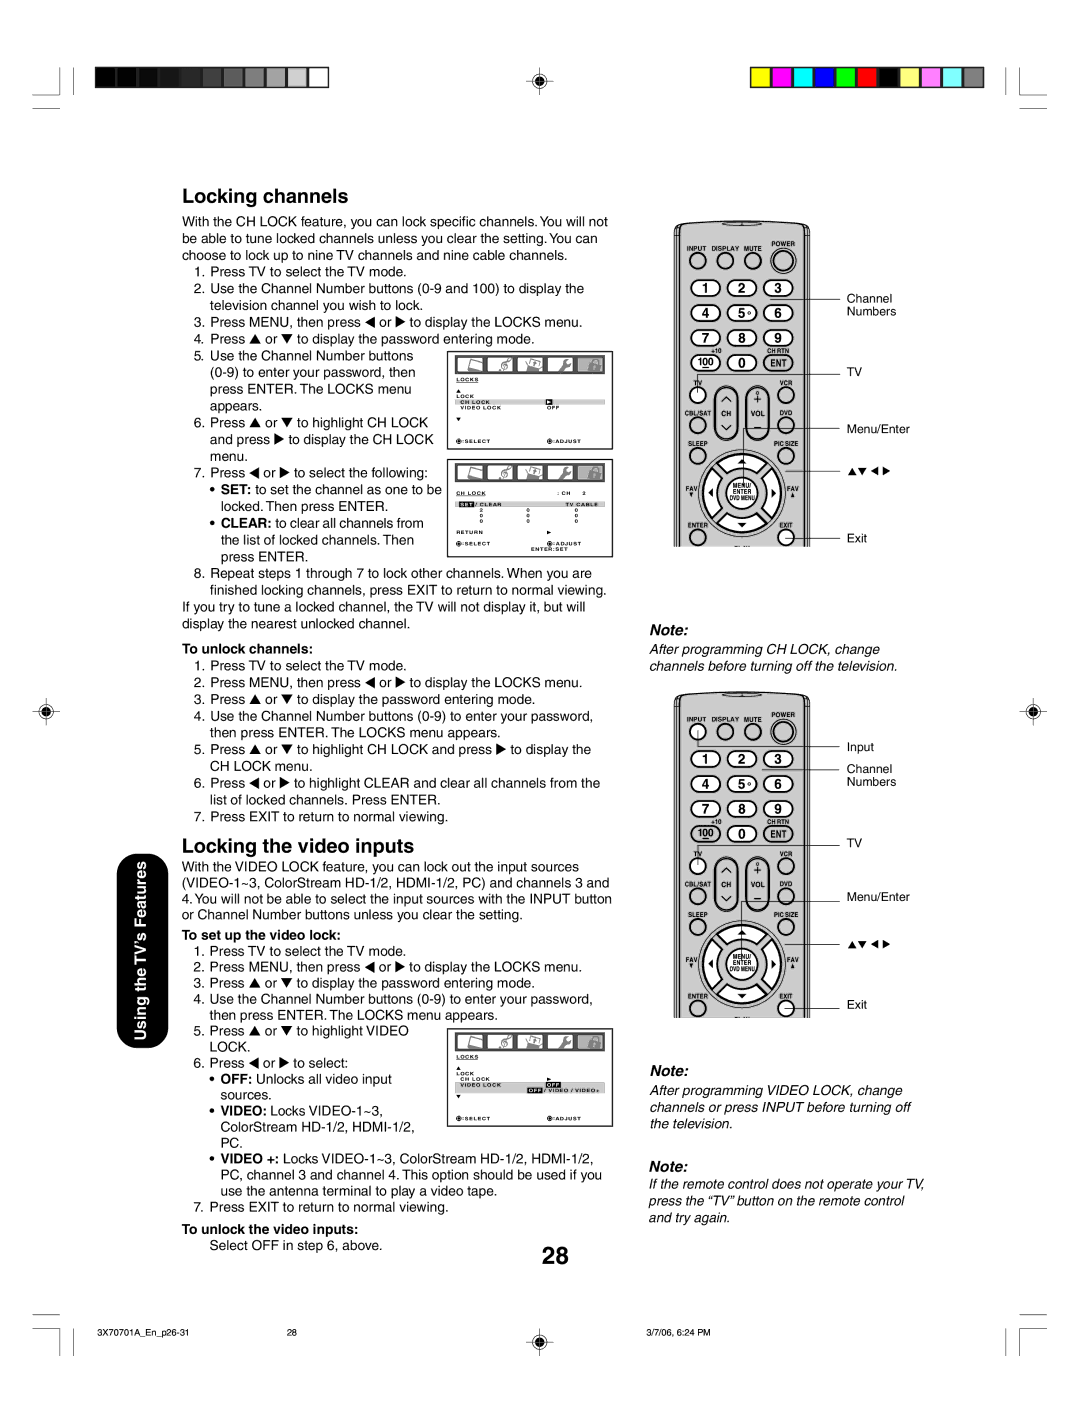
Locking channels | 28 |
Locking the video inputs | 28 |
Setting the GameTimerTM | 29 |
Using the panel lock feature | 29 |
Labeling channels | 30 |
Selecting the video input source | 31 |
Labeling the video input sources | 31 |
Setting the clock | 31 |
Setting the ON timer | 32 |
Setting the sleep timer | 32 |
Viewing the |
|
(480i and 480p signals only) | 33 |
Scrolling the TheaterWide® picture |
|
(TheaterWide 2 and 3 only) | 35 |
Selecting the cinema mode | 36 |
Using the ASPECT feature | 36 |
Using the closed caption feature | 37 |
Using the CC advanced feature | 37 |
Using the Long Life feature | 38 |
Reverse | 38 |
White | 38 |
Picture shift | 38 |
Side panel color | 38 |
Adjusting the picture | 39 |
Selecting the picture mode | 39 |
Adjusting the picture quality | 39 |
Using the CableClear® feature | 40 |
Selecting the color temperature | 40 |
Resetting your picture adjustments | 40 |
Adjusting the sound | 41 |
Muting the sound | 41 |
Selecting stereo/SAP broadcasts | 41 |
Adjusting the sound quality | 41 |
Resetting your audio adjustments | 42 |
Turning off the | 42 |
Using the StableSound® feature | 42 |
Using the SRS WOW™ surround sound |
|
feature | 43 |
Selecting the HDMI audio input source | 43 |
Selecting the audio languages | 44 |
Selecting the digital output format | 44 |
Checking the digital signal strength | 44 |
Displaying TV status information | 44 |
Picture/Audio adjustments in PC mode | 45 |
Resetting your picture/audio adjustments |
|
in PC mode | 45 |
Auto power off | 46 |
Understanding the Power Return feature | 46 |
Appendix | 46 |
Troubleshooting | 46 |
Specifications | 48 |
Limited United States Warranty | 49 |
Limited Canadian Warranty | 50 |
6
6 | 3/7/06, 6:23 PM |