JVC HD-52G456 manual Auto Demo, Language

Page 43

Initial Setup

Auto Demo

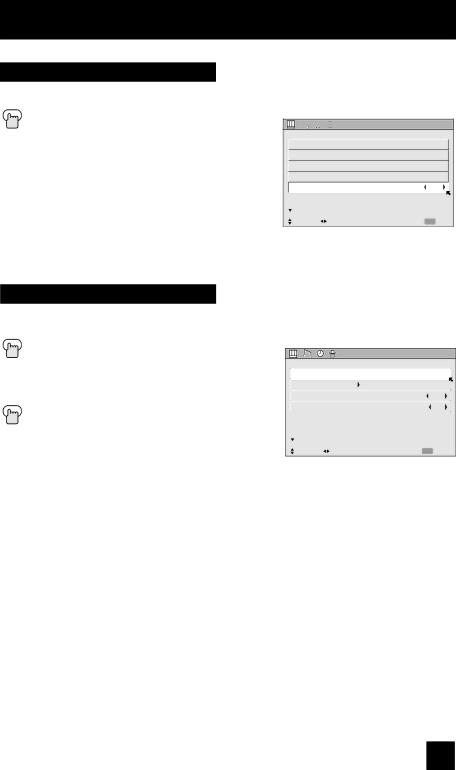
This function lets you preview the Dynamic Gamma demo.

Press the MENU button

π† To AUTO DEMO

è To turn AUTO DEMO ON or OFF

Note:

• To stop auto demo, press the BACK button.

INITIAL SETUP

PREVIOUS

AUTO TUNER SETUP

CHANNEL SUMMARY

V-CHIP

SET LOCK CODE

AUTO DEMO

OFF

NEXT PAGE

(4/5)

SELECT OPERATE

MENU EXIT

Language

The language function is described on page 23 as the interactive plug-in menu. If you need to choose the language again, follow the steps below.

Press the Menu button

π† To LANGUAGE

è To choose a language: ENG. (English), FRAN. (French) or ESP. (Spanish)

Press the MENU button when finished

INITIAL SETUP

PREVIOUS


LANGUAGE

ENG. FRAN. ESP.


CLOSED CAPTION


AUTO SHUT OFF

OFF


XDS ID

ON


NEXT PAGE

(3/5)


SELECT OPERATE

MENU EXIT


43

Image 43
Contents Projection Television Users Guide Risk of Electric Shock Do not Open Important Safety PrecautionsImportant Safety Instructions 200 mm 150 mm Caring for the Screen Caring for the CabinetLamp is a consumable item When the power is turned on, the warming up commencesOrder to use the television for a long time Cooling the inside of the television and the lampDo not replace the lamp immediately after use Television requires a lot of electrical powerILA element characteristics Screen is made of plasticTable of Contents Appendices Digital SetupDigital Button Functions OSD InformationQuick Setup Unpacking your TV Video Cable Coaxial CablesComponent Cables Composite Cables Audio Cables HD-52G456 HD-55G466 HD-55G456 HD-61Z456 Rear Panel DiagramSide Panel Diagram Front Panel DiagramModels HD-52G456 HD-55G466 HD-55G456 HD-61Z456 Quick Setup TV Remote Control Getting Started Remote ControlVideo Cable Component Cables Composite Cables Audio Cables Connecting Your DevicesVCR Connection Diagram #2 Connecting to a Camcorder Connecting to an External Amplifier Connecting to a Digital TV Receiver Connecting to an Hdmi Compatible Device Interactive Plug In Menu Quick Setup Plug-In MenuAuto Clock Set Stop The Quick Setup is complete Remote Programming Setting the CATV, VCR and DVD CodesCable Box or Satellite Codes MGA VCR CodesSMC DVD CodesCable/Satellite Search Codes Function Search CodesVCR/DVD Search Codes Function Onscreen Menus Using the GuideSelected Option Blue Onscreen Menu SystemOnscreen Menu System Selected Option GreenTo Initial Setup Auto Tuner Setup Initial SetupDigital Channels Channel SummaryContinue to follow these directions for all four spaces Chip Channel Guard MessageDirections to Block Unrated Programs Unrated ProgramsUS V-Chip Ratings Directions to set US V-Chip Ratings Setting US V-Chip RatingsDirections to set Movie Mpaa Ratings Movies RatingsDirections to set Canadian V-Chip Ratings Canadian V-Chip RatingsSet Lock Code Language Auto DemoDigital Auto Setting Analog SettingClosed Caption Digital Manual Setting Noise Muting Auto Shut OffFront Panel Lock Video Input Label Power Indicator Position AdjustmentDigital-In Audio Digital-InColor Temperature Picture AdjustPicture Settings Adjust the Picture SettingsColor Management Digital Noise ClearDynamic Gamma Smart Picture ResetSound Settings Sound AdjustAdjust the Sound Settings Set Clock Clock/TimersOn/Off Timer Following message will appear Lamp Timer ResetMulti Screen Function Button FunctionsTwin Select IndexFreeze SwapInput PowerNumber Buttons 10Key Pad TuneSound Return +/TVVideo Status MutingNatural Cinema Sleep Timer Message Sleep TimerDisplay Volume +Channel + Register the favorite channel FavoriteDelete the favorite channel Aspect Ratios AspectBack MenuDVD Buttons TV/CATV Slide SwitchVCR/DVD Slide Switch VCR ButtonsAntenna Level Digital SetupSoftware Version Digital SoundSoftware Update Guide Digital Button FunctionsDigital CH D/A Digital/Analog Sub ChannelOSD Information Weak SignalNo Program Problems Check TroubleshootingFollowing are not malfunctions Changing the Lamp AppendixLamp Message Replacement Lamp KitRemove the lamp unit How to Replace the LampUnplug the television Remove the lamp coverInstall the new lamp unit Lamp LED blinks Power LED blinksPower LED and Lamp LED blink alternately Power LED and Lamp LED blink rapidly simultaneouslyPage Page Specifications subject to change without notice SpecificationsPage Page Page Page JVC Company of America JVC CANADA, INC