Philips DCR 2021 user manual Advanced settings, TV Settings, System Settings

Page 34
Display format
LetterBox

4 Enter your new password again to confirm.

5 Press EXIT.

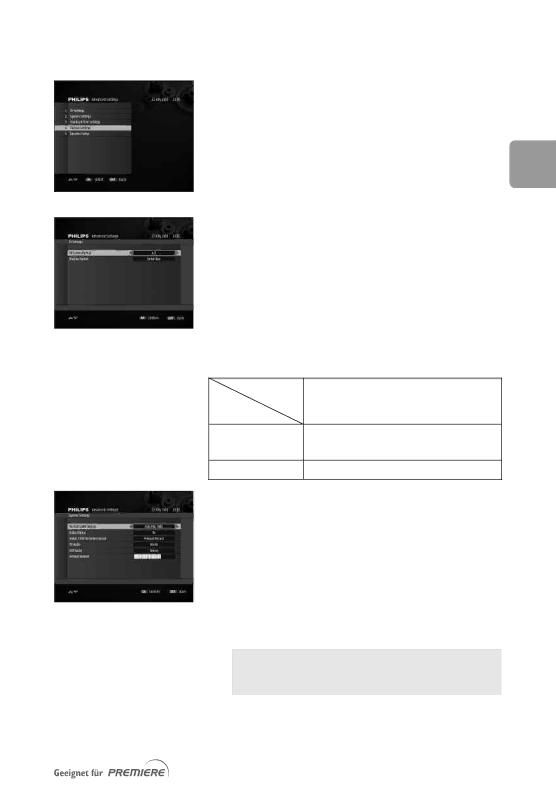
10.5 Advanced settings

The Settings sub menu menu includes the following items:


o TV Settings


o System Settings

EN

o Country & Time Settings

o Factory settings


o Decoder Status


10.5.1 TV Settings


This screen is used to set aspect ratio settings.


1Select values for the following:

TV screen format: default setting is 4:3. If you have a 16:9 screen TV, change this setting to 16:9 for optimal viewing.

Display format: set the way the video is transformed in case the broadcast aspect ratio is 16:9 your TV aspect ratio is 4:3.

2Press OK to confirm.

Aspect TV screen format = 4:3 ratio broadcast format = 16:9

full picture with black bars at the top and bottom

Centre Cut Out picture cut-out on the left and right

10.5.2 System Settings

This screen is used to set your receiver audio/video output settings.

1Select values for the following:

TV/VCR SCART Output: select the SCART output format supported by your TV set and VCR (refer to your TV and VCR user manual for more information)

Dolby Digital: select Yes to enable Dolby Digital sound

If you enable Dolby Digital sound, make sure you use the digital audio output (no signal on the analogue outputs).

Video/DVD Recorder Control: select the recording control feature your recorder supports (refer to your recorder user manual for more information)

81

Image 34
Contents Benutzerhandbuch Foreword Dear CustomerQuick installation Press OK to start scanning for channels Meaning of symbols Safety instructions For future referenceContents Advanced settings Timer ManagerSettings Restoring factory settingsProduct description Front panelRear panel Inserting your Smart Card Insert the smartcard with the golden chip facing upRemote control RED, GREEN,YELLOW BlueConnecting your Digital-receiver Connecting to a TV and VCR both fitted with Scart socketsConnecting to your audio equipment analogue or digital Analogue Connection aConnecting of a video projector to watch digital TV Channel scan First installationFirst installation settings Set your TV display formatSearch failure Before starting a new scanDay-to-day operation Using Low Power modeYour cable receiver is in standby mode Digital radioUsing channel lists Using number keysUsing P+/P- keys PIN codeTo modify your PIN code, refer to paragraph PIN-Code Change Volume control / +Banner To close the banner, press Info a third timeCurrent programme options While watching digital TV or listening to digital radioSetting a timer via the Timer Manager Recording timersSet a timer from the EPG Deleting an active timerSwitching to analogue TV Premiere features Premiere MultifeedMenu Tree Menu treeMenu navigation Changing settingsCancelling/storing changes BasicsSmartcard Premiere Service MenuPIN-Code Change SystemDolby Digital DisplayWake-up channel To delete an existing timer Setting your receiverTimer Manager To set a new timer or edit an existing timerList Organization Channel ManagerMonday to Friday , or Monday to Saturday List Editing Scroll to the channel you want to move using the ty keysChannel List Main TV, which is the only editable list Channel Pool SettingsDisplay options Must not be used as a password To enable Parental LockTo modify your receiver password For ParentsSystem Settings Advanced settingsTV Settings Enter your new password again to confirm Press ExitYou can also access this screen via the Premiere menu Time SettingsFactory settings Decoder StatusYour receiver later, and then press OK to confirm Channel SearchSoon as you set your receiver to standby Changing the remote control configuration Other settingsRestoring factory settings 11.3 VCR/DVD Recorder ControlEXT Digital-Receiver and VCR or DVD settings Recording with the VCR/DVD Recorder Control featurePage Troubleshooting Problem Possible cause ActionChange the TV Scart Output Technical specifications Video decoding3111 176