between the mesh panel and the mattress. Your hand should fit snugly and you should feel resistance. If you do not feel resistance, further tighten the Safety Straps. To do so, unlock the Locking Buckle, pull on the Safety Strap and lock the Locking Buckle. Do not use the Bedrail unless there is a snug fit between the Bedrail and the mattress. If experiencing difficulty, call
Storing Excess Safety Strap Material
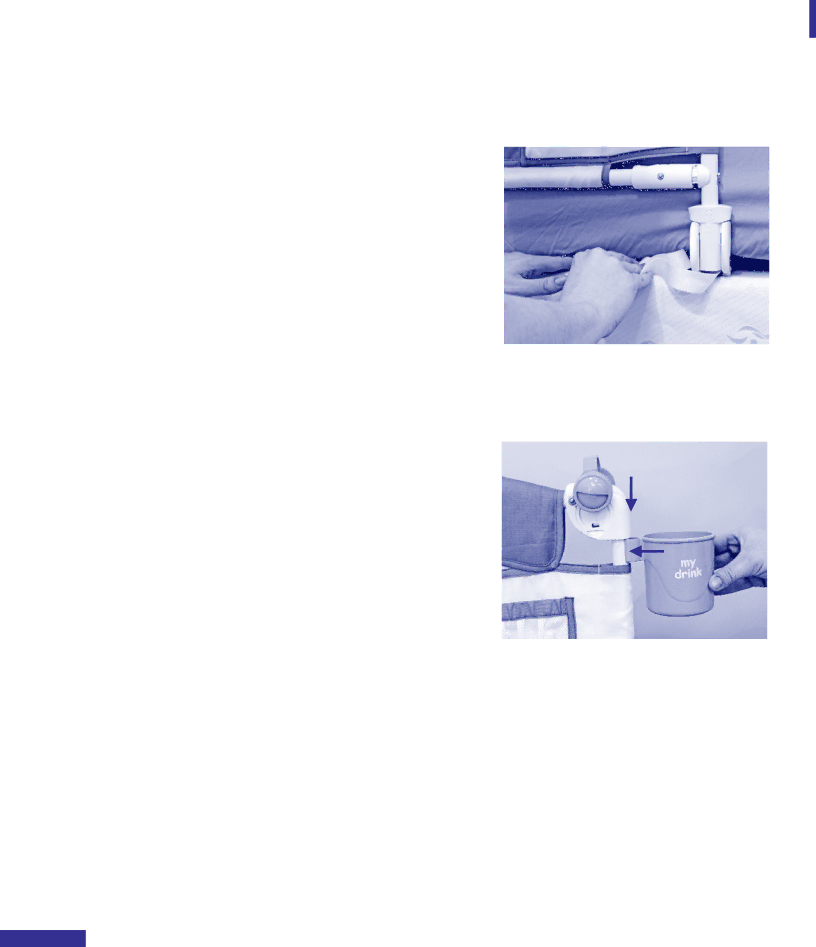
Once complete, tuck the excess Safety Straps between the mattress and the box spring as shown in Fig. 9. Frequently check to make sure that no Safety Straps are hanging off of the bed, particularly after making the bed.
Installing the Accessories
We recommend that the Cup Holder and Nightlight be installed closest to the head of the bed for easy access.
CUP HOLDER: Gently slide the Cup Holder onto the metal part of the side bar as shown in Fig. 10. Do not place directly onto the fabric.
NIGHTLIGHT: Slide the Nightlight into the adjacent circular groove located on the top corner of the Bedrail, as shown in Fig. 10. The light should be facing towards the bed for easy access. Turn the light on and off by pushing directly onto it. The light automatically shuts off after
5 minutes to preserve the battery life. The light can be rotated 360 degrees for optimal illumination. A battery is already installed and can be changed should it run out. To replace the battery, you will need a
SUBSTITUTE CLIP: The substitute clip (without Nightlight) should be placed in the same location on the opposite end of the Bedrail.
Fig. 9
Fig. 10
NOTE – Please complete the following steps after the bedrail has been assembled on bed.
•Make sure that the Safety Straps are pulled tight enough to create significant indentations where the Anchor meets the mattress.
•Make sure there are no gaps or voids between the side of the mattress and bedrail
•Make sure that bedrail is snug against the mattress by sliding your hand between the face of the mattress and the bedrail. Resistance should be felt. This should be done periodically during the use of the bedrail.
•Make sure that the Locking Buckle that holds the Safety Straps in place is in the locked position.
•Make sure that excess straps are NOT hanging off of the bed. If so, tuck straps under the mattress.
Check for loose straps often and after each
5