Installation: Rear Facing
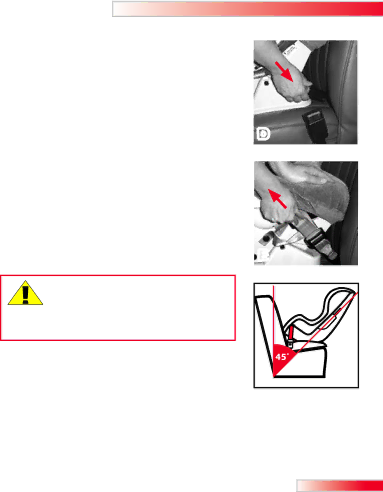
7� Push child restraint firmly into vehicle seat while pulling |
| |
| ||
each LATCH strap tight (fig. E). |
| |
8� Verify all connections are secure and that restraint is |
| |
stable. The restraint is secure when it cannot be moved |
| |
| ||
at belt path. If restraint is not secure, repeat procedure, |
| |
or use an alternate seating location or vehicle belt | D | |
installation method. | ||
• Britax recommends use of the |
| |
| installation. See pages |
|
|
| |
• | The back angle of the child restraint should be |
|
| from vertical (not to exceed 45º from vertical) when car is |
|
| parked on a level surface (fig. F). |
|
• | The proper recline angle can be achieved by placing a |
|
| rolled towel or pool noodle in crease of vehicle seat to |
|
| help level child restraint’s base. |
|
• If there is a problem stabilizing restraint, tighten tether as | E | |
| described on page 24 using anchor point 3. | |
WARNING! Do not raise restraint off front edge of vehicle seat. Doing so will reduce protection for your child and may damage recline adjustment.
Removal
Disconnect the
vehicle seat, press the red release buttons on the LATCH connectors to release. When not in use, always store the LATCH connectors and
13