Installation: Versa-Tether®
Energy-Absorbing Tether*
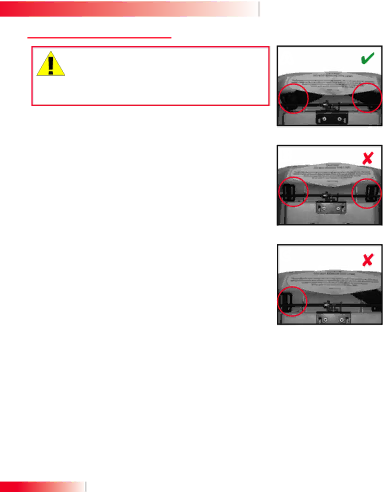
WARNING! The
when child restraint has been in a severe crash and replacement of child restraint is necessary.
Figure A shows the tether when child restraint is acceptable for continued use (provided the restraint has not been involved in a crash). The colored stitching will be intact and webbing will be held under a tether label.
Figures B and C show examples of when child restraint is unacceptable for continued use. If tether label is torn, or if one or both of the loops have pulled through back side of shell and the colored stitching has ripped, child restraint is no longer acceptable for use. Discontinue use of child restraint and contact Britax Consumer Services for further instruction.
IMPORTANT: Regardless of whether loops have pulled through the back side of the shell and the colored stitching has been ripped, discontinue use of restraint if it has been involved in a moderate to severe crash.
*Patent Pending
A
B
C
26