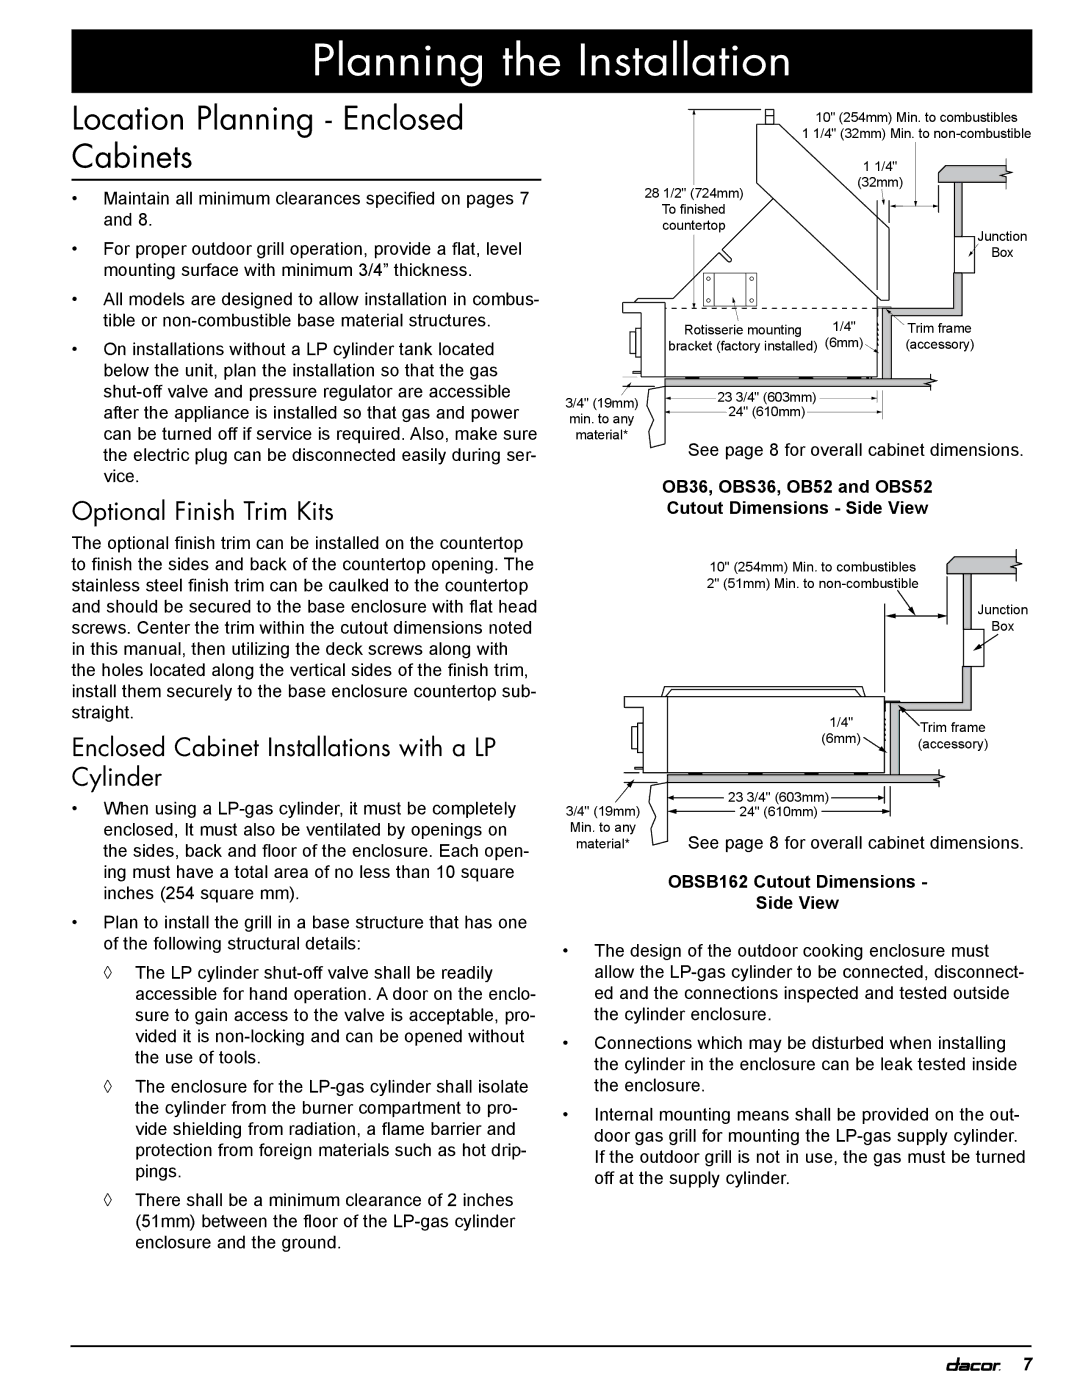
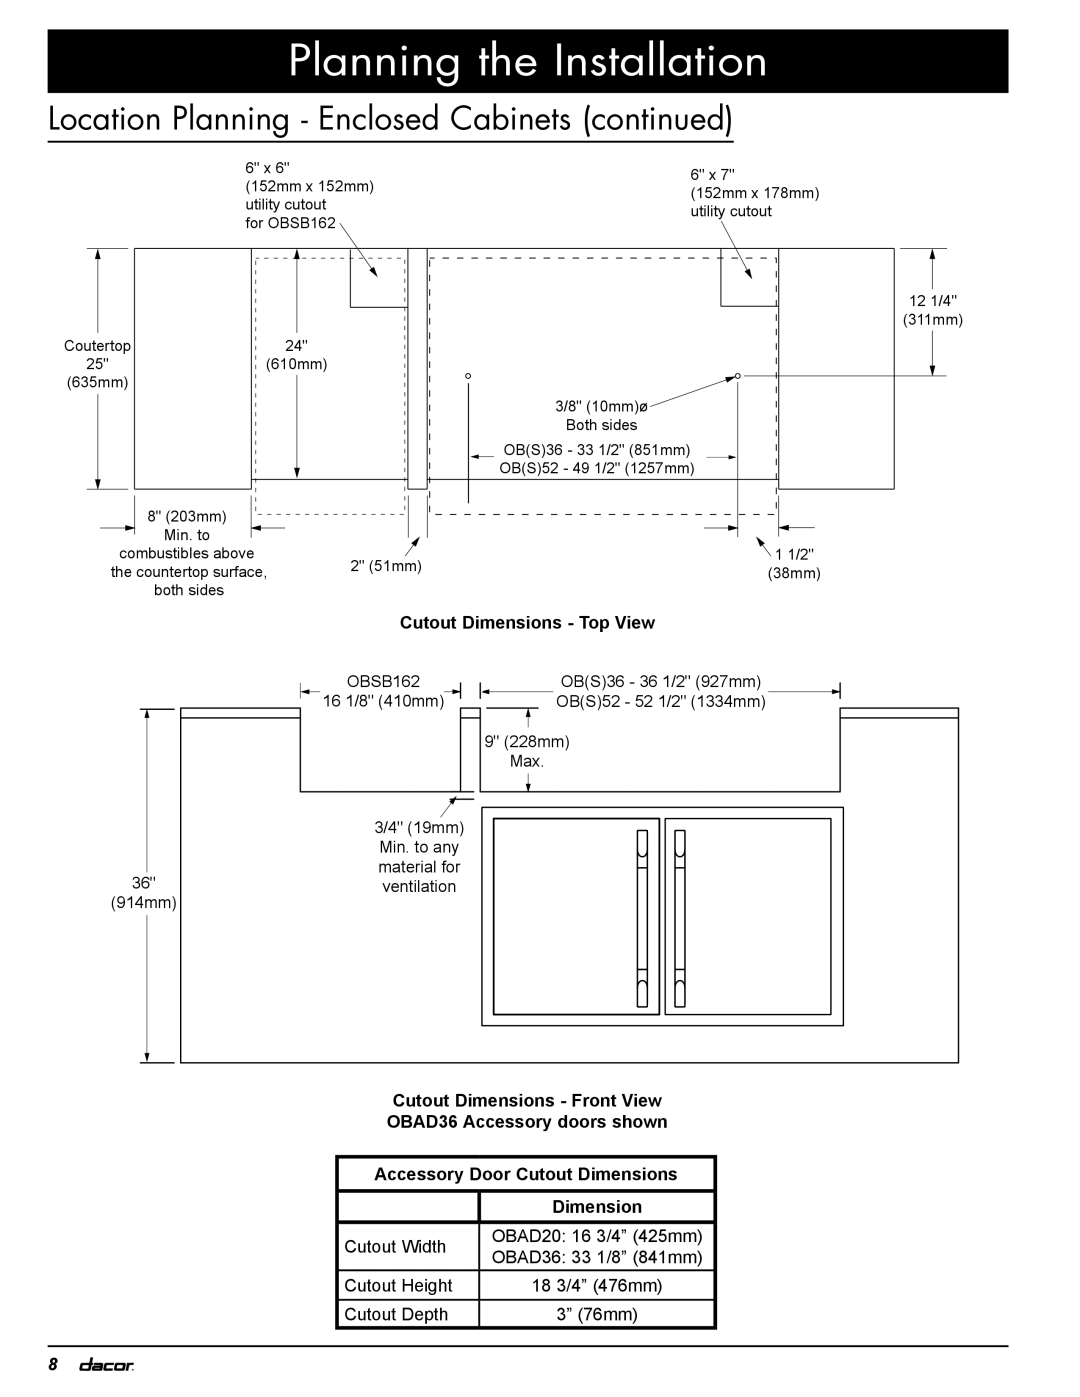
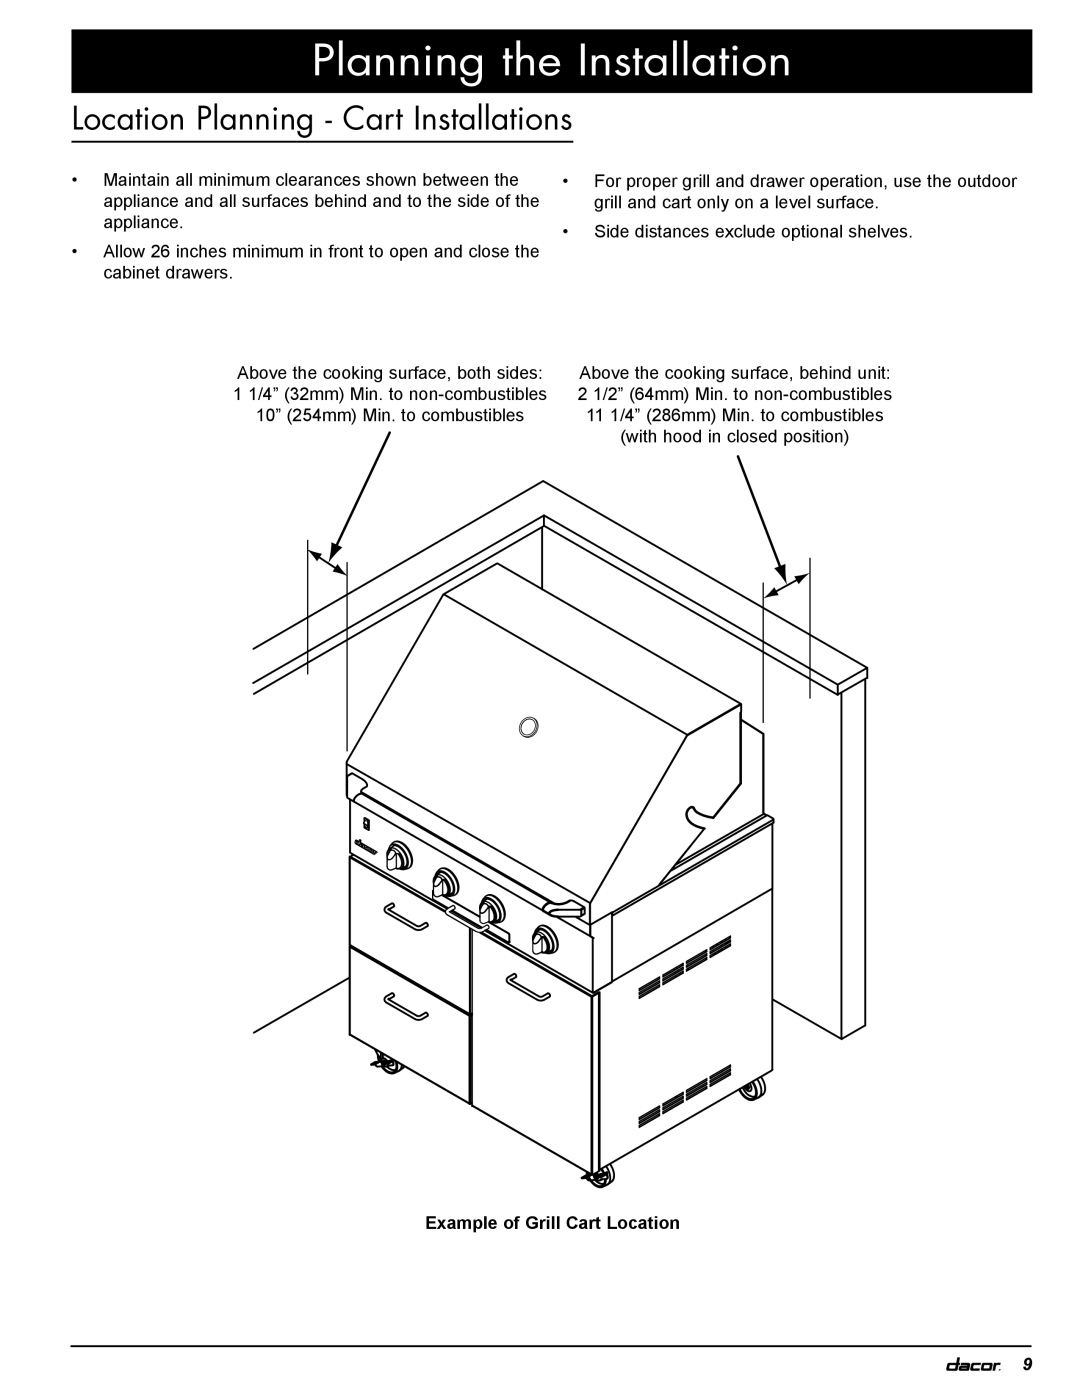
Dacor OBSB162 Preparing for Installation, Parts List, Models OB36, OBS36, OB52 and OBS52

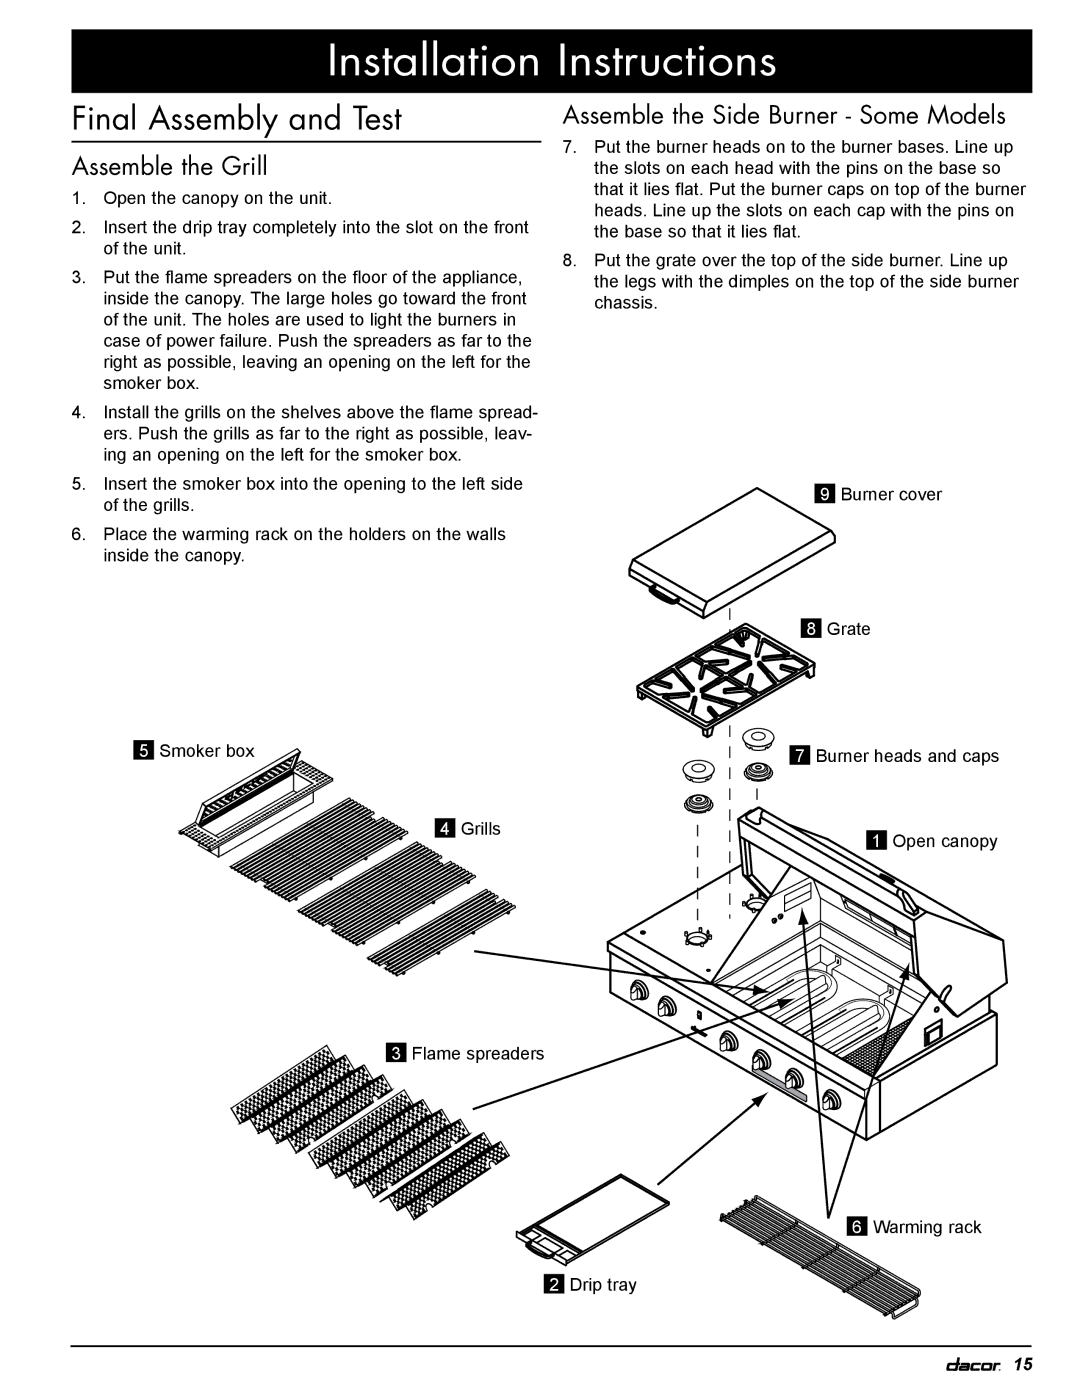
Page 15

Installation Instructions

warning

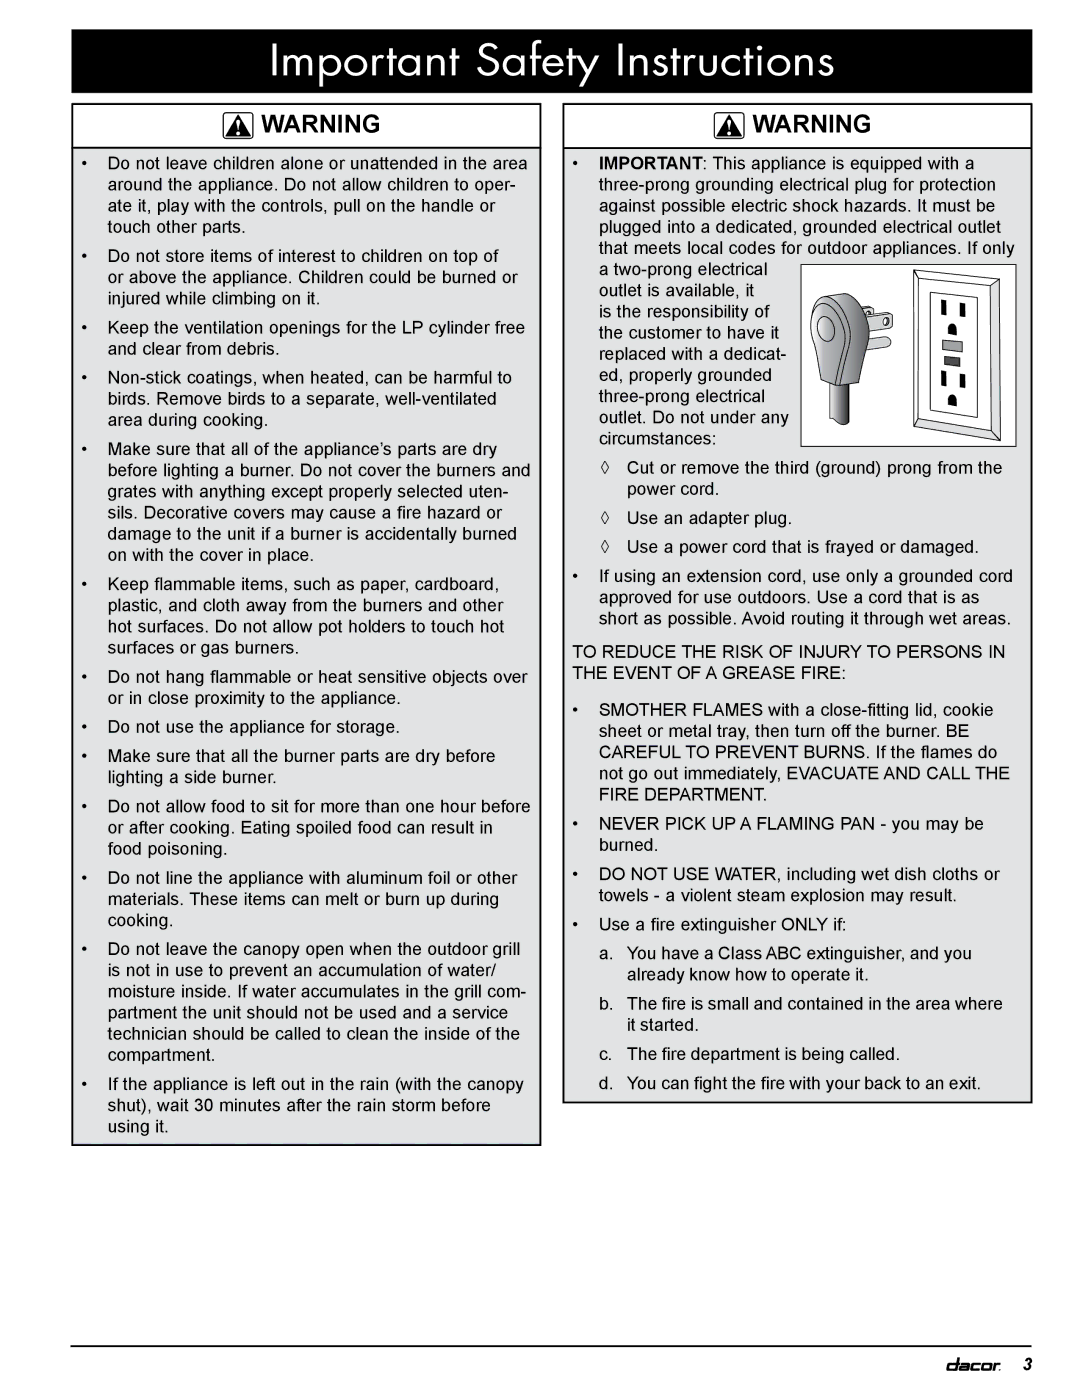
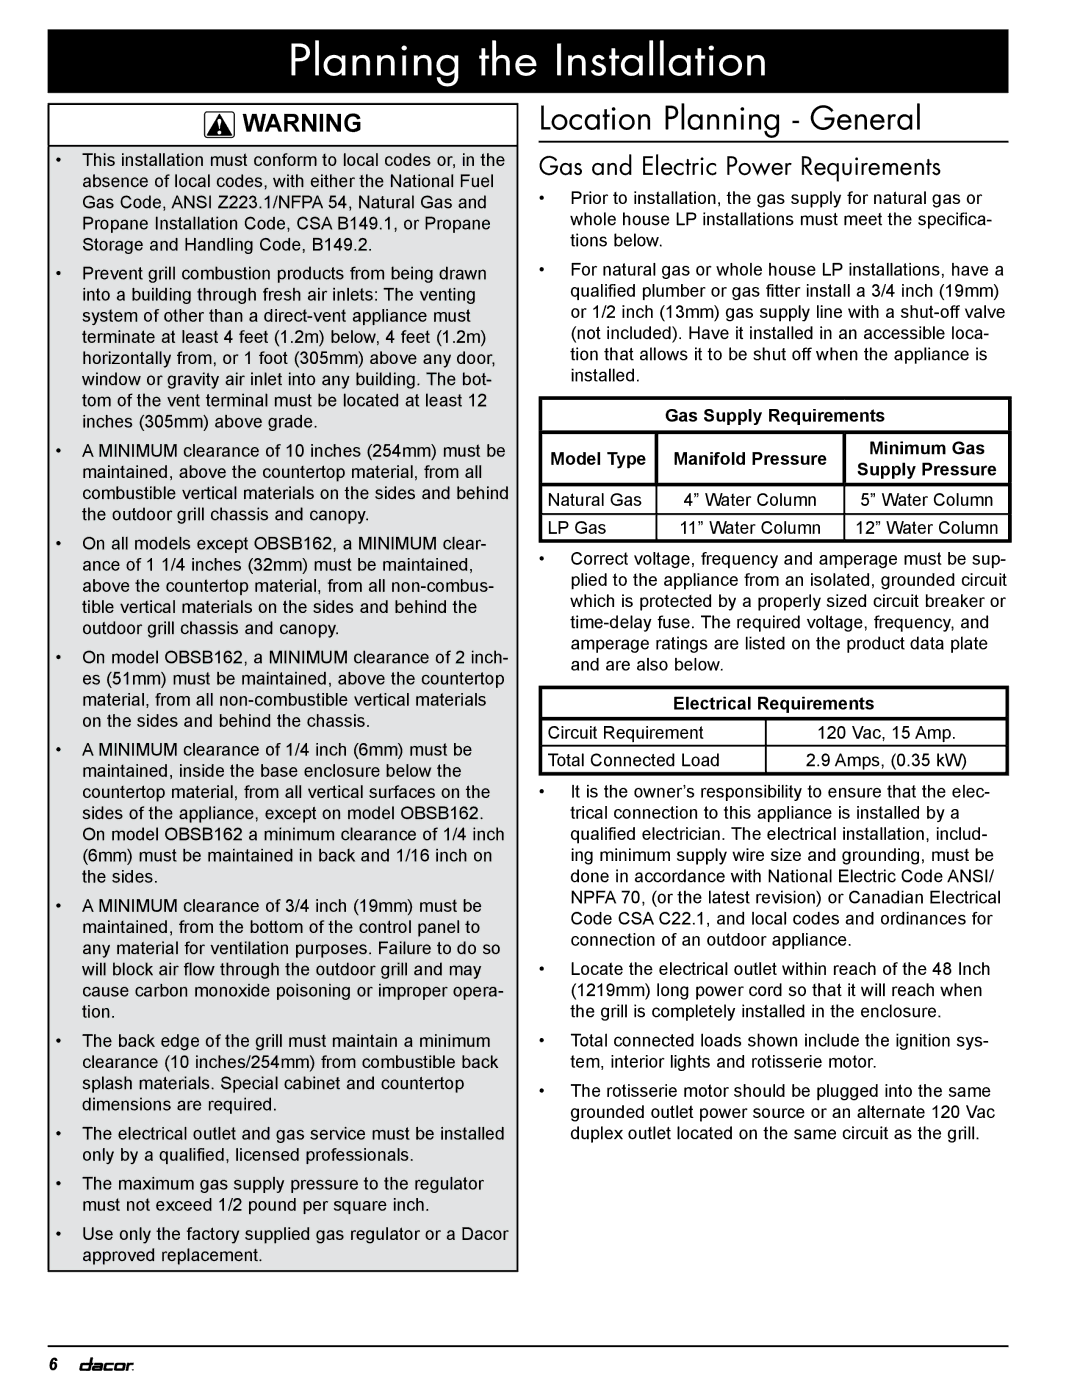
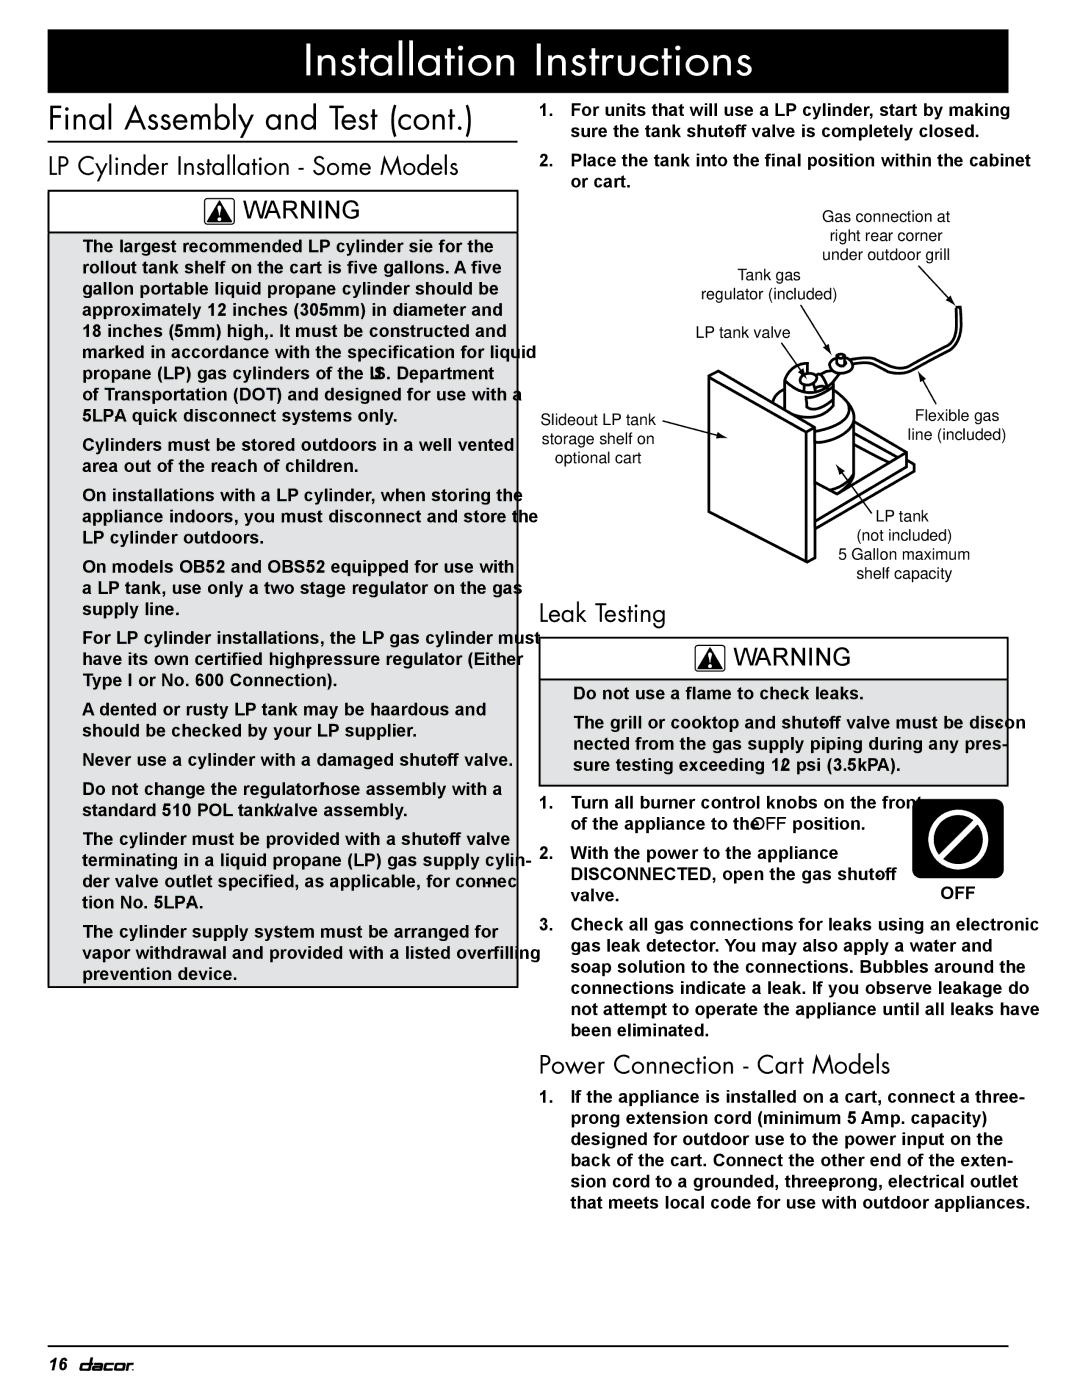
Before installing the appliance, make sure the elec- trical and gas (on tank-less installations) service meets the requirements specified in the Planning the Installation section of this manual.

This appliance must be installed by a licensed plumber or gas fitter when installed within the Commonwealth of Massachusetts.

Excessive weight warning: Since the appliance and grill cart are heavy, install the appliance with the help of at least one other person.

Make sure the power cord is NOT connected to the electrical outlet while connecting the gas line to the appliance.

Do not apply excessive pressure when tightening con- nections and fittings.

Do not use plumber’s putty or Teflon tape on gas com- pression connections. Doing so can defeat the proper sealing of these fittings.

Use only approved gas line thread compound or tape to seal gas connections.

The maximum gas supply pressure to the regulator must not exceed 1/2 pound per square inch.

Preparing for Installation

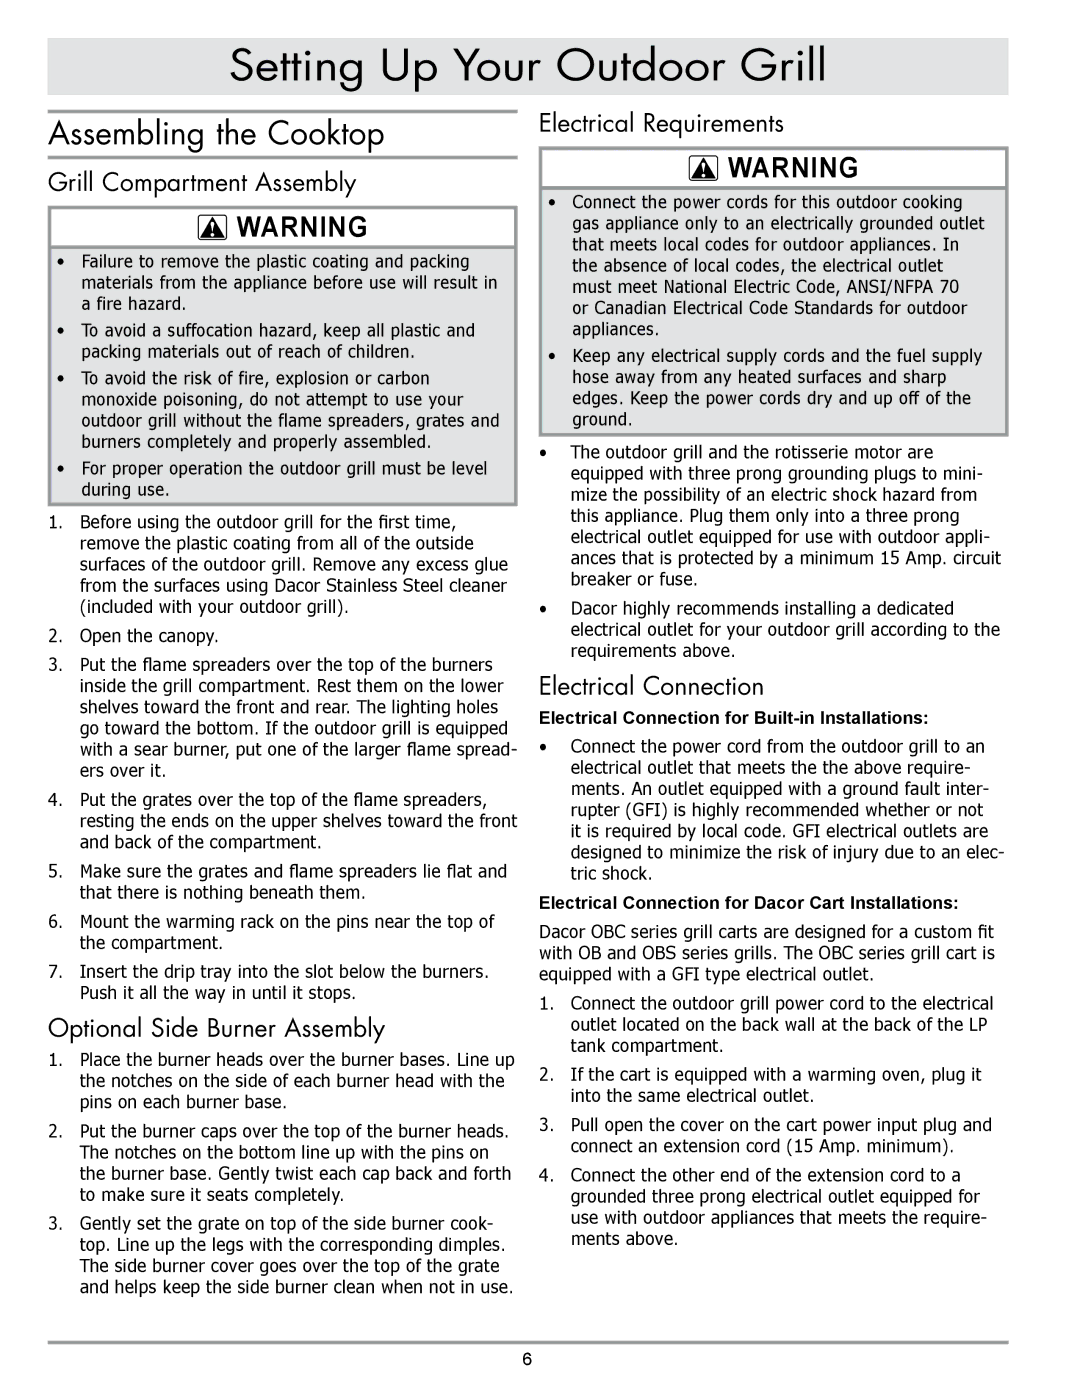
1.Before removing the unit from the box, check the labeling on the box to make sure that the appliance is equipped for the gas type to be used. Liquid petroleum (propane) units are identified by the “LP” designa- tion at the end of the model number. Do not proceed with installation if you do not have the correct model. Conversion in the field from one gas type to another is not permissible.

2.With the help of an assistant, remove the appliance and all the parts from the box. Check to make sure all parts are included.

3.Remove all shipping materials from the appliance and peel off the protective plastic coating.

4.To reduce weight during installation, make sure all loose parts are removed from the grill.

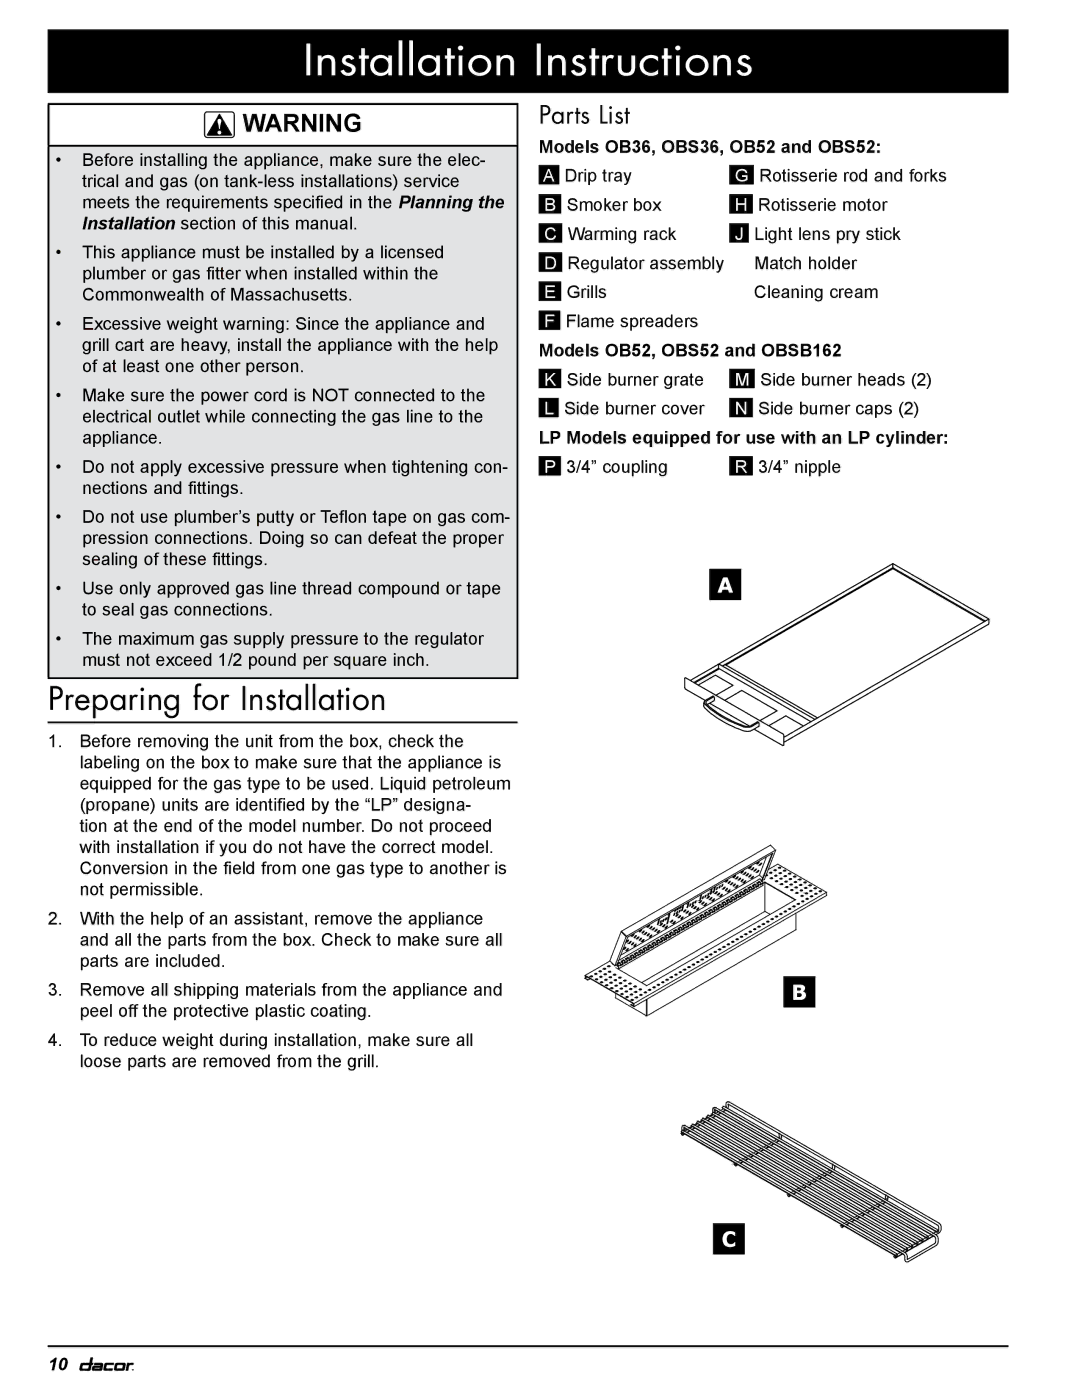
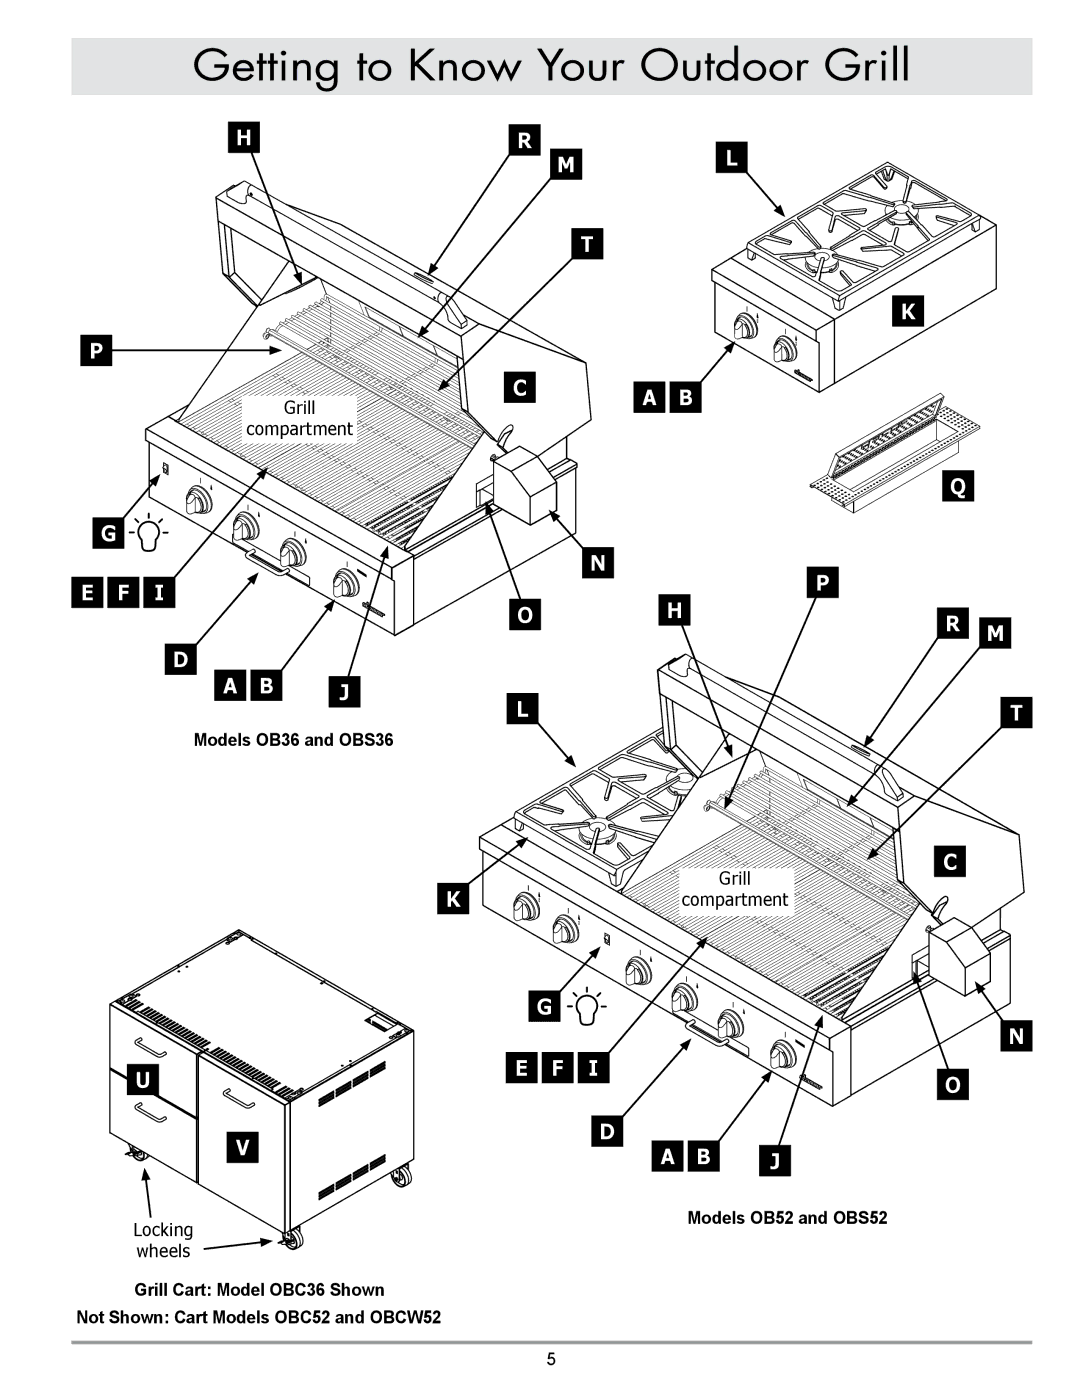
Parts List

Models OB36, OBS36, OB52 and OBS52:

A


Drip tray

G

Rotisserie rod and forks


Smoker box


Rotisserie motor

B


H


Warming rack


Light lens pry stick

C


J


Regulator assembly


Match holder

D


Grills


Cleaning cream

E


FFlame spreaders

Models OB52, OBS52 and OBSB162

K

Side burner grate

M

Side burner heads (2)


Side burner cover


Side burner caps (2)

L

N

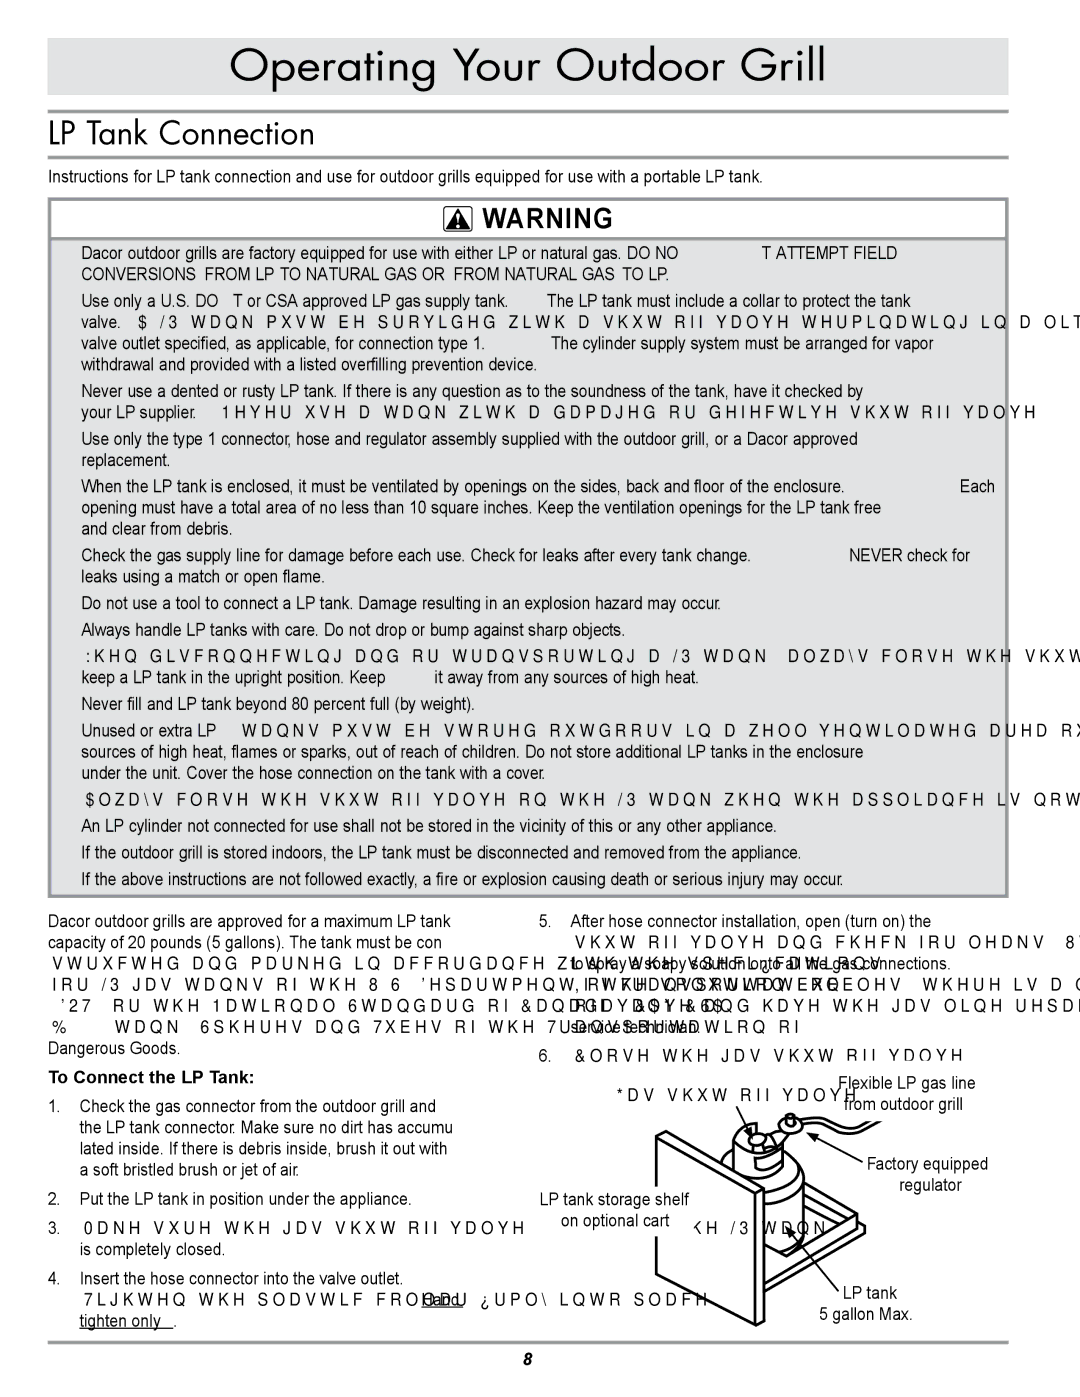
LP Models equipped for use with an LP cylinder:

P

3/4” coupling

R

3/4” nipple

A

B

C

10
Image 15
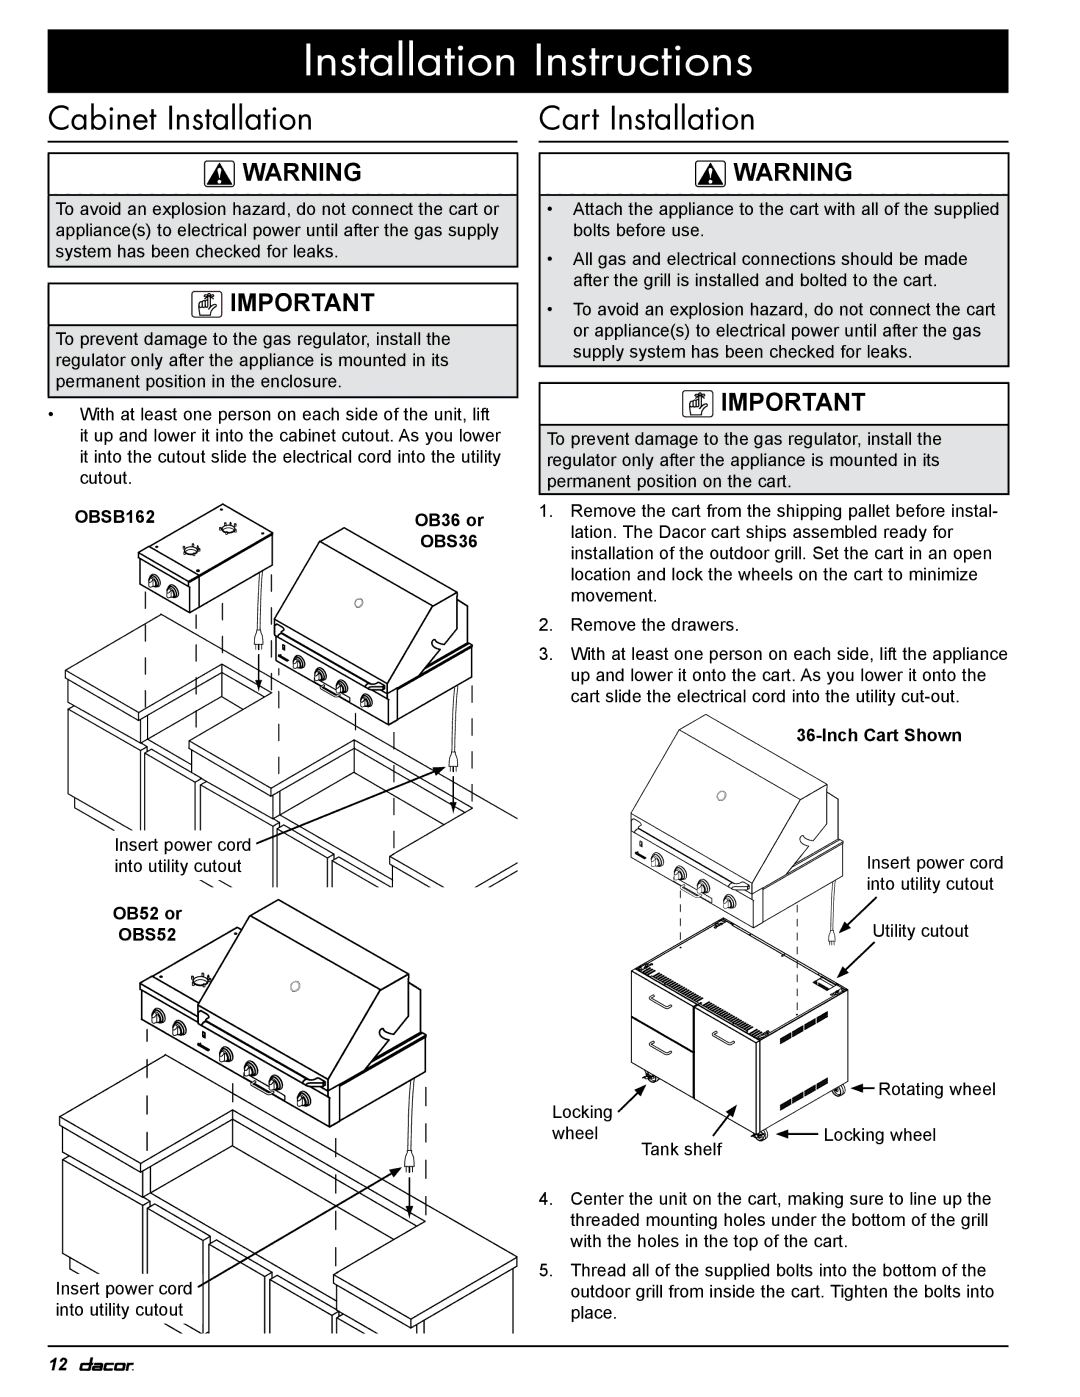
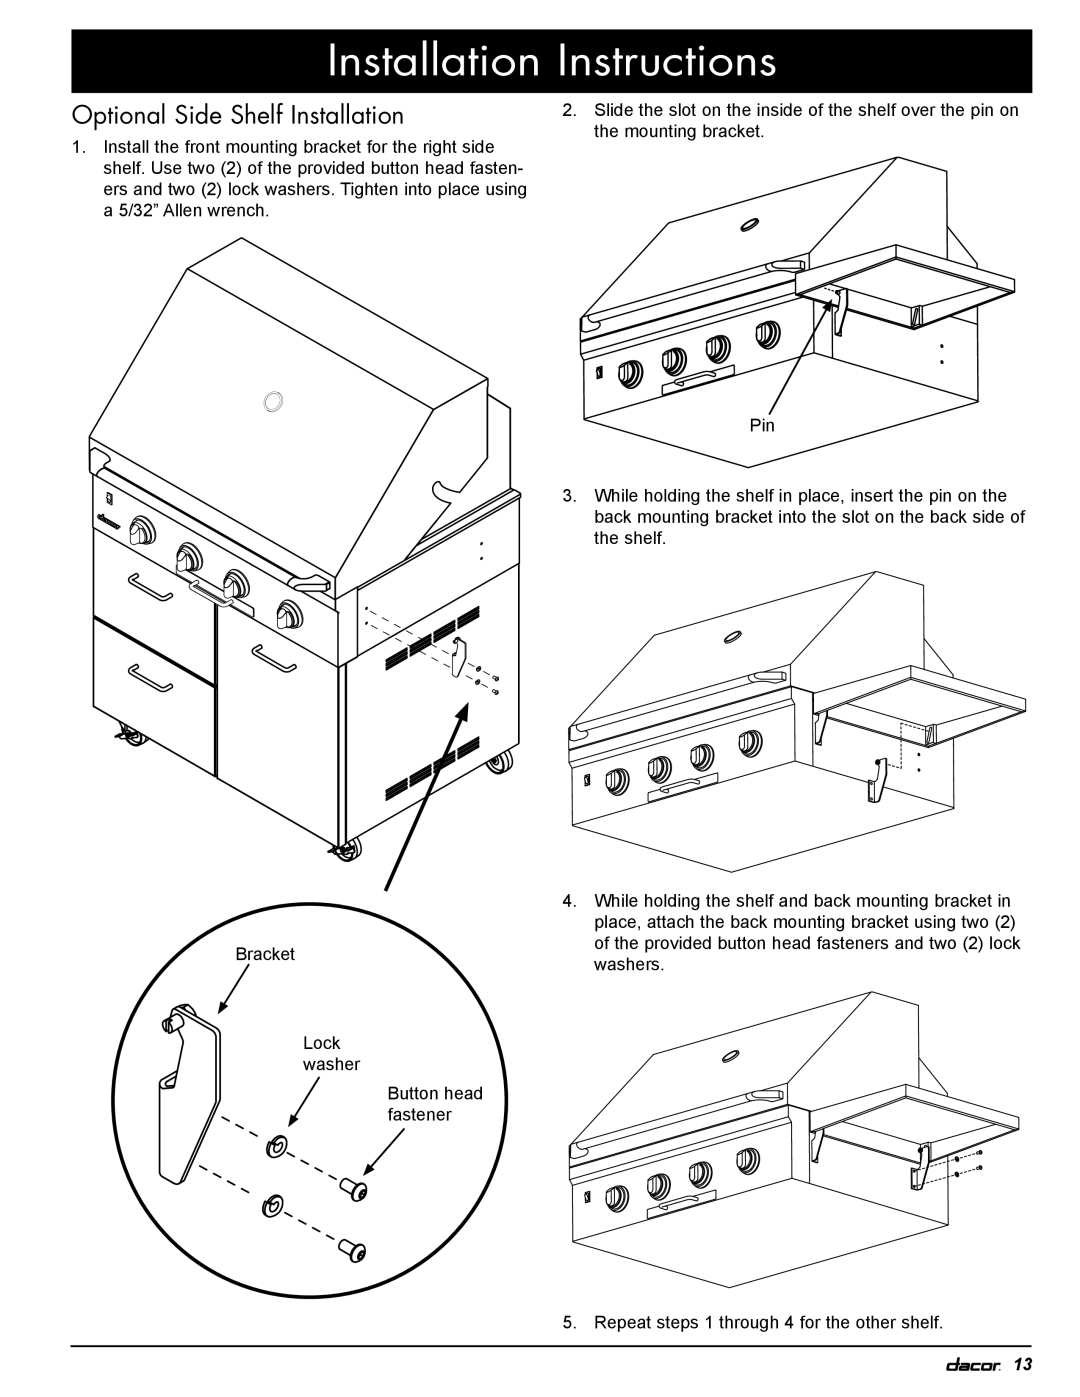
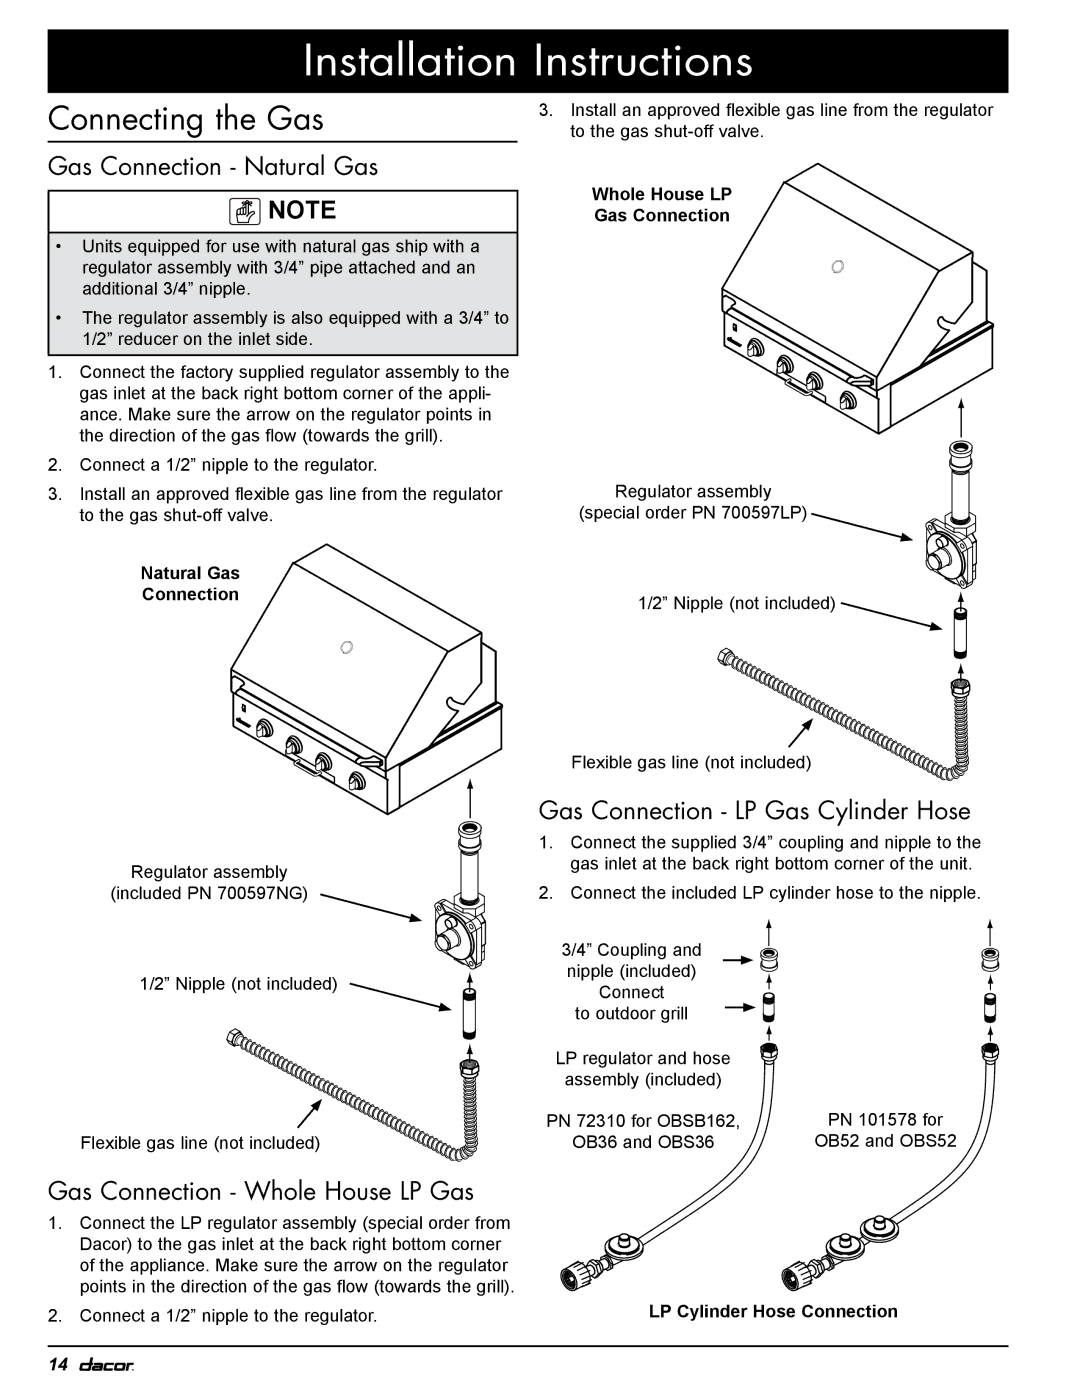
Contents OB36, OB52, OBS36, OBS52, OBSB162 13.2 13.3 Installation Instructions Epicure Outdoor Grill Table of Contents Safety Symbols and Labels Important Information About Safety InstructionsGeneral Safety Precautions Important Safety Instructions Product Dimensions OB36OB52 Number Width Height OverallGas and Electric Power Requirements Location Planning GeneralElectrical Requirements Location Planning Enclosed Cabinets Enclosed Cabinet Installations with a LP CylinderOB36, OBS36, OB52 and OBS52 Cutout Dimensions Side View OBSB162 Cutout Dimensions Side ViewOBSB162 Cutout Dimensions Top ViewExample of Grill Cart Location Location Planning Cart InstallationsModels OB52, OBS52 and OBSB162 Preparing for InstallationParts List Models OB36, OBS36, OB52 and OBS52Installation Instructions OB52 or Cabinet InstallationCart Installation OB36 orOptional Side Shelf Installation Gas Connection Whole House LP Gas Connecting the GasGas Connection Natural Gas Gas Connection LP Gas Cylinder HoseFinal Assembly and Test Assemble the GrillAssemble the Side Burner Some Models LP Cylinder Installation Some Models Leak TestingPower Connection Cart Models Lighting Instructions Power Connection Cabinet InstallationsInstallation Checklist Verifying Proper OperationWiring Diagrams Wiring Diagram OBS52 Page Page Page Back Cover Ta b l e o f C o n t e n t sDacor. all rights reserved Model Number Serial Number Important Safety InstructionsUse an adapter plug Important Safety Instructions Outdoor Grill Features Optional Grill Cart FeaturesGetting to Know Your Outdoor Grill Grill compartment Models OB36 and OBS36Grill compartment Locking wheels Assembling the Cooktop Setting Up Your Outdoor GrillSide burner cover Side burner grate Drip tray Warming rack Outdoor Grill Assembly Model OBS52 shownOperating Your Outdoor Grill LP Tank ConnectionTo Connect the LP Tank After Cooking Selecting and Using Cookware for the Optional Side BurnerTank-less Gas Supply Important Operating InformationLight one burner at a time. Push in on Lighting the BurnersLighting and Preheating Grill Compartment Never use the outdoor grill in windy conditionsLighting the Side Burners OB52, OBS52 and OBSB162 Only Burner Lighting NotesBurner Knob Locations Model OBS52 Shown To manually light one of the optional sear burners Manual Lighting Procedures Grill CompartmentTo manually light the standard U shaped burners To manually light the optional sear burnerRotisserie Operation Rotisserie CookingThings to Know About the Rotisserie Preparing to Use the RotisserieRotisserie burner Electrode Location Manual Lighting Procedure RotisserieAdding more wood chips Using the Smoker BoxSmoker Cooking Smoker Wood Chip TypesModels OBS36 and OBS52 Only Using the Optional Sear BurnerSafe Cooking Temperature Chart To cook using the sear burnerGrates Flame spreaders Care and CleaningCleaning Instructions Cleaning the Grill CompartmentCleaning the Rotisserie Parts Cleaning the Porcelain Grates and Warming RackCleaning the Rotisserie Burner and Optional Sear Burner Cleaning the Smoker BoxRubbing alcohol to help dissolve grime Cleaning the Optional Side BurnersCleaning the Exterior Knobs and Trim RingsLight Bulb Replacement Back of LensLight Fixture Locations Standard U Burner Removal and Replacement Parts and Accessories Problem Solution Guide Before You Call for ServiceWhat Is Not Covered Warranty and ServiceWarranty What Is CoveredBusiness Reply Mail Warranty Information
Related manuals
Manual 12 pages 21.22 Kb