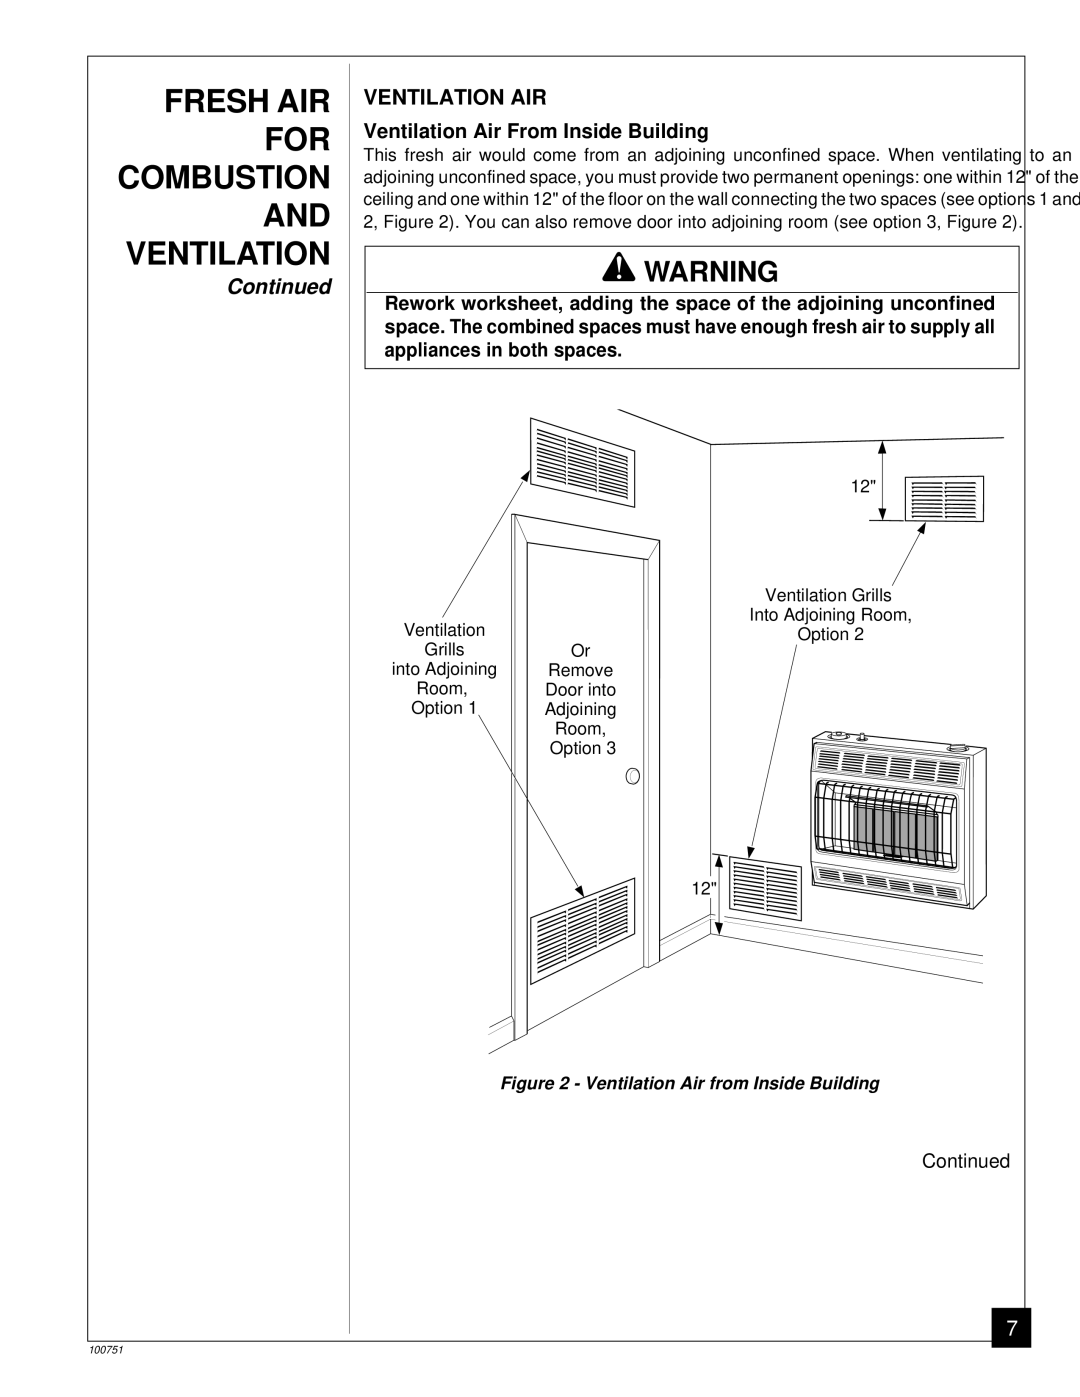
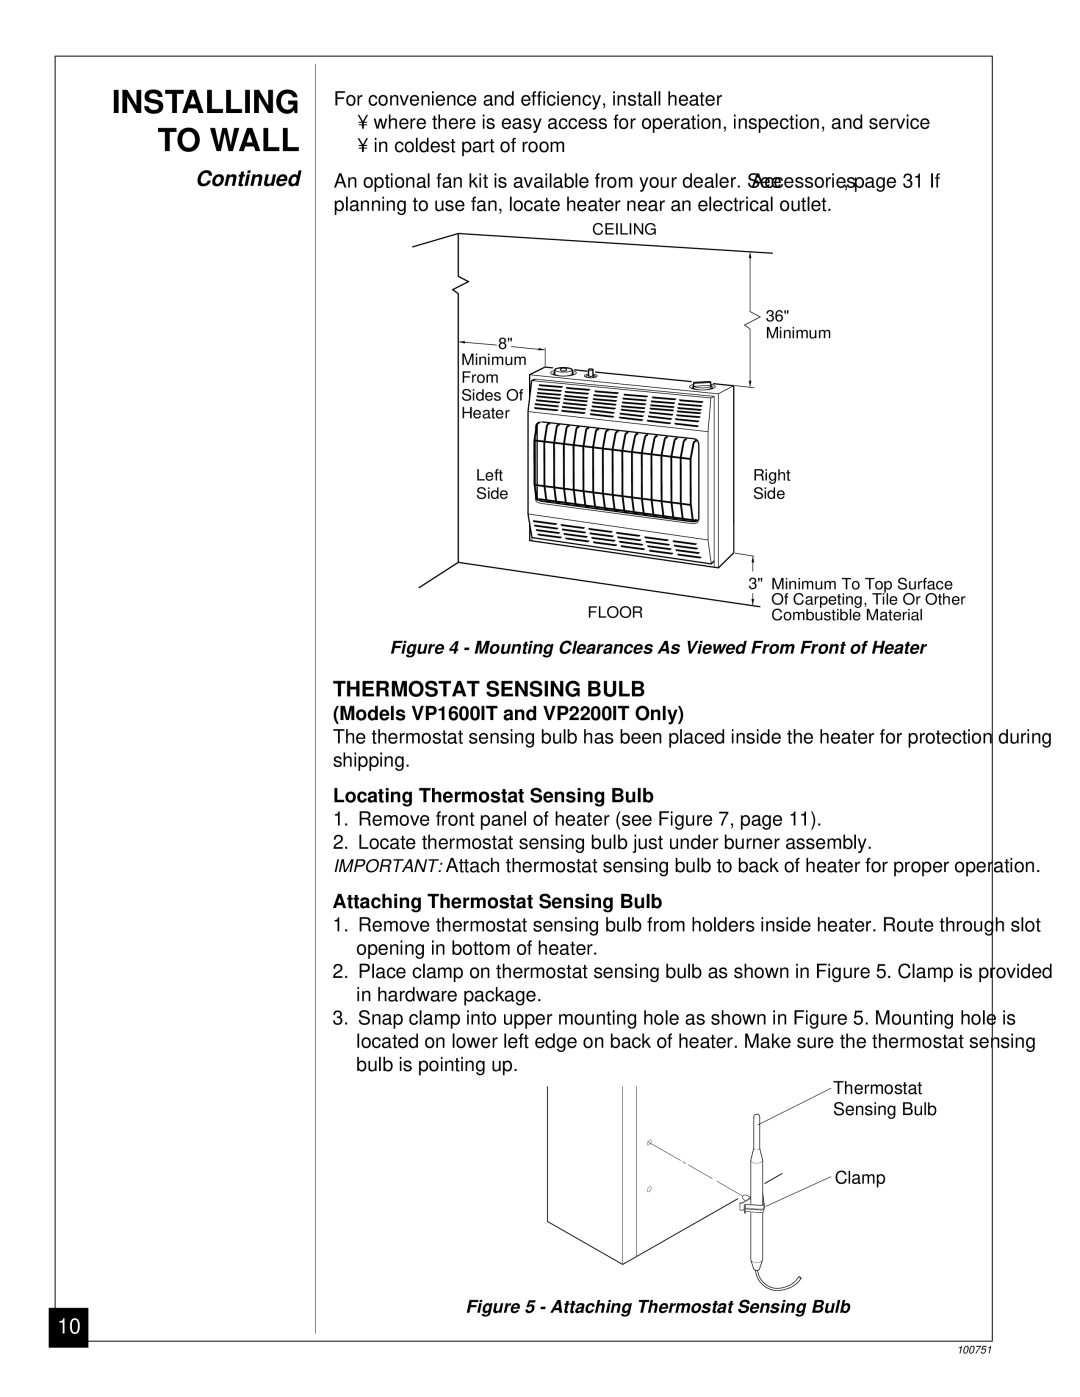
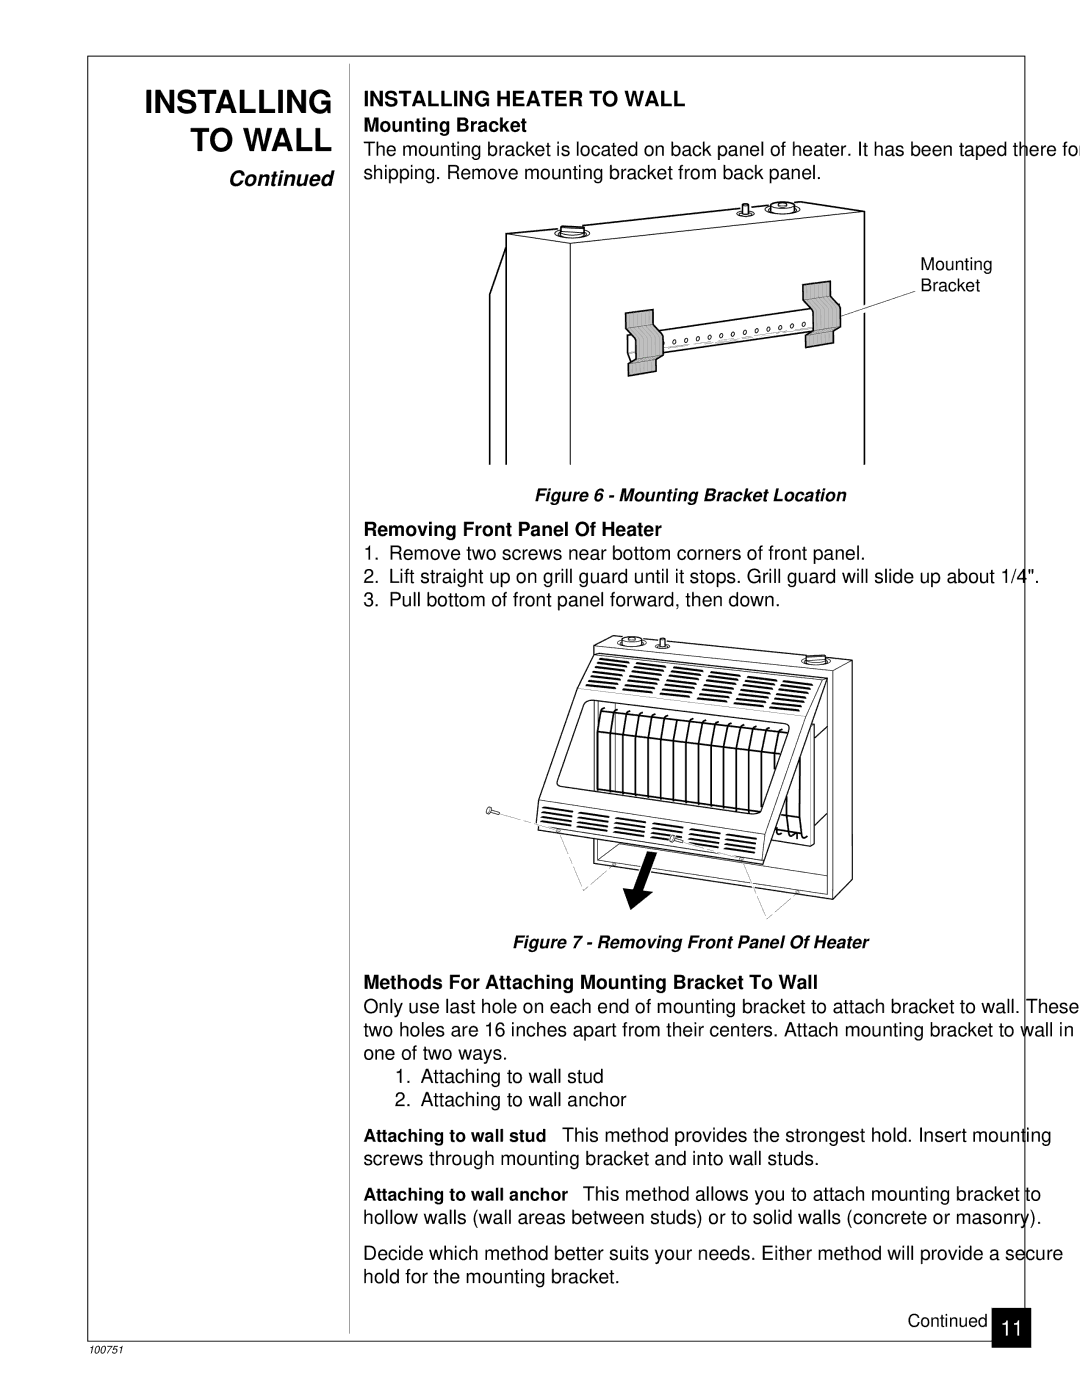
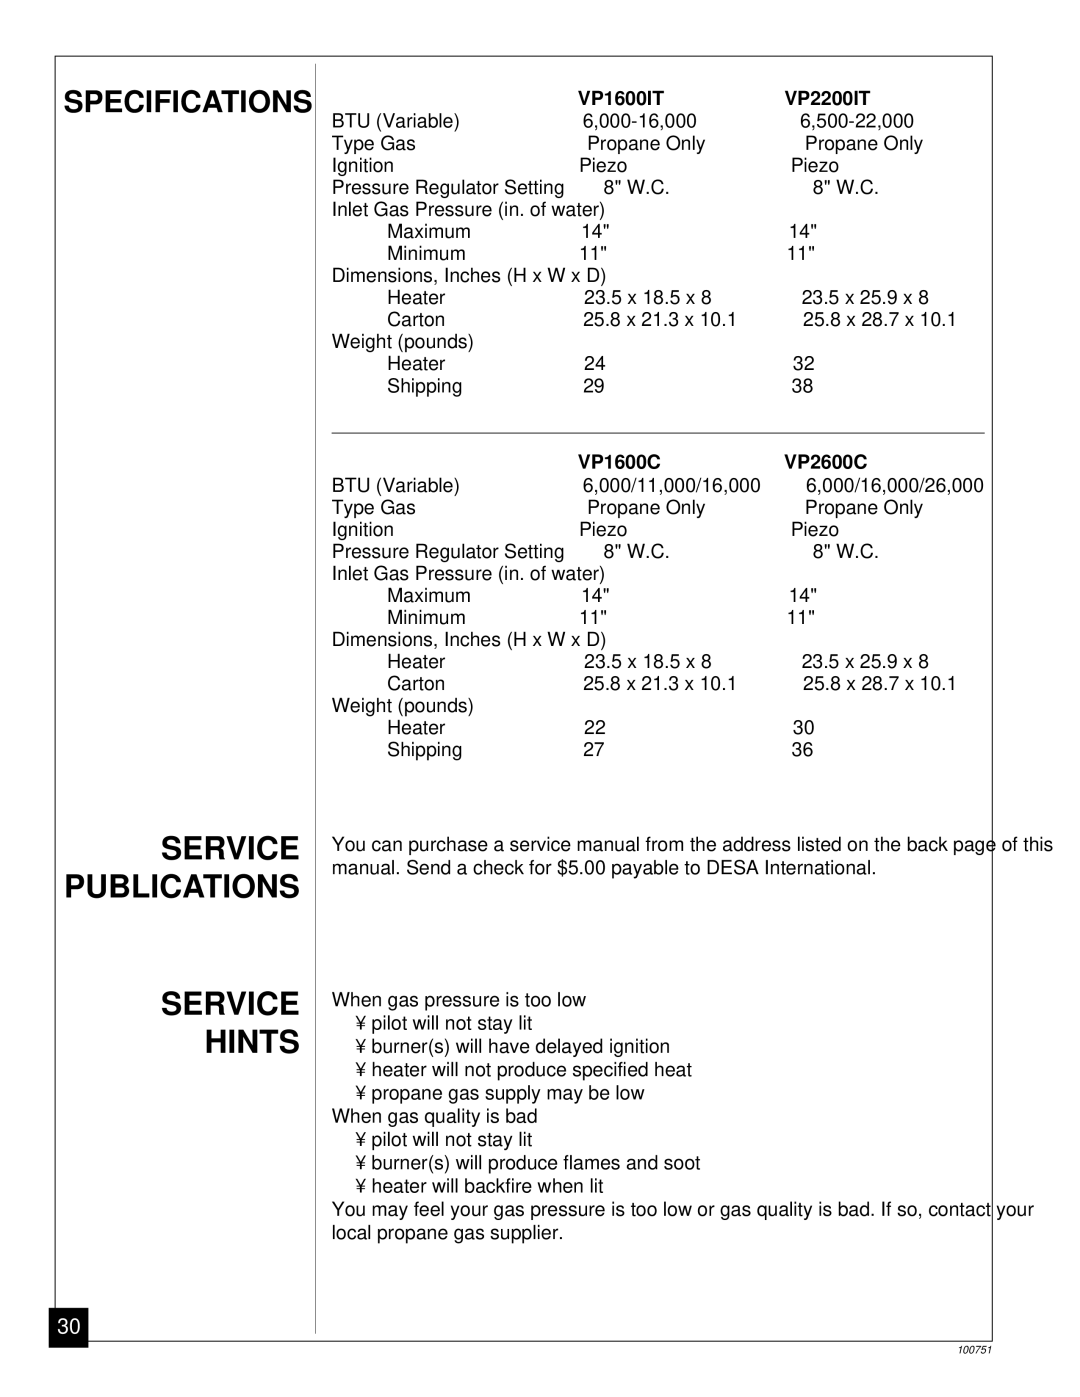
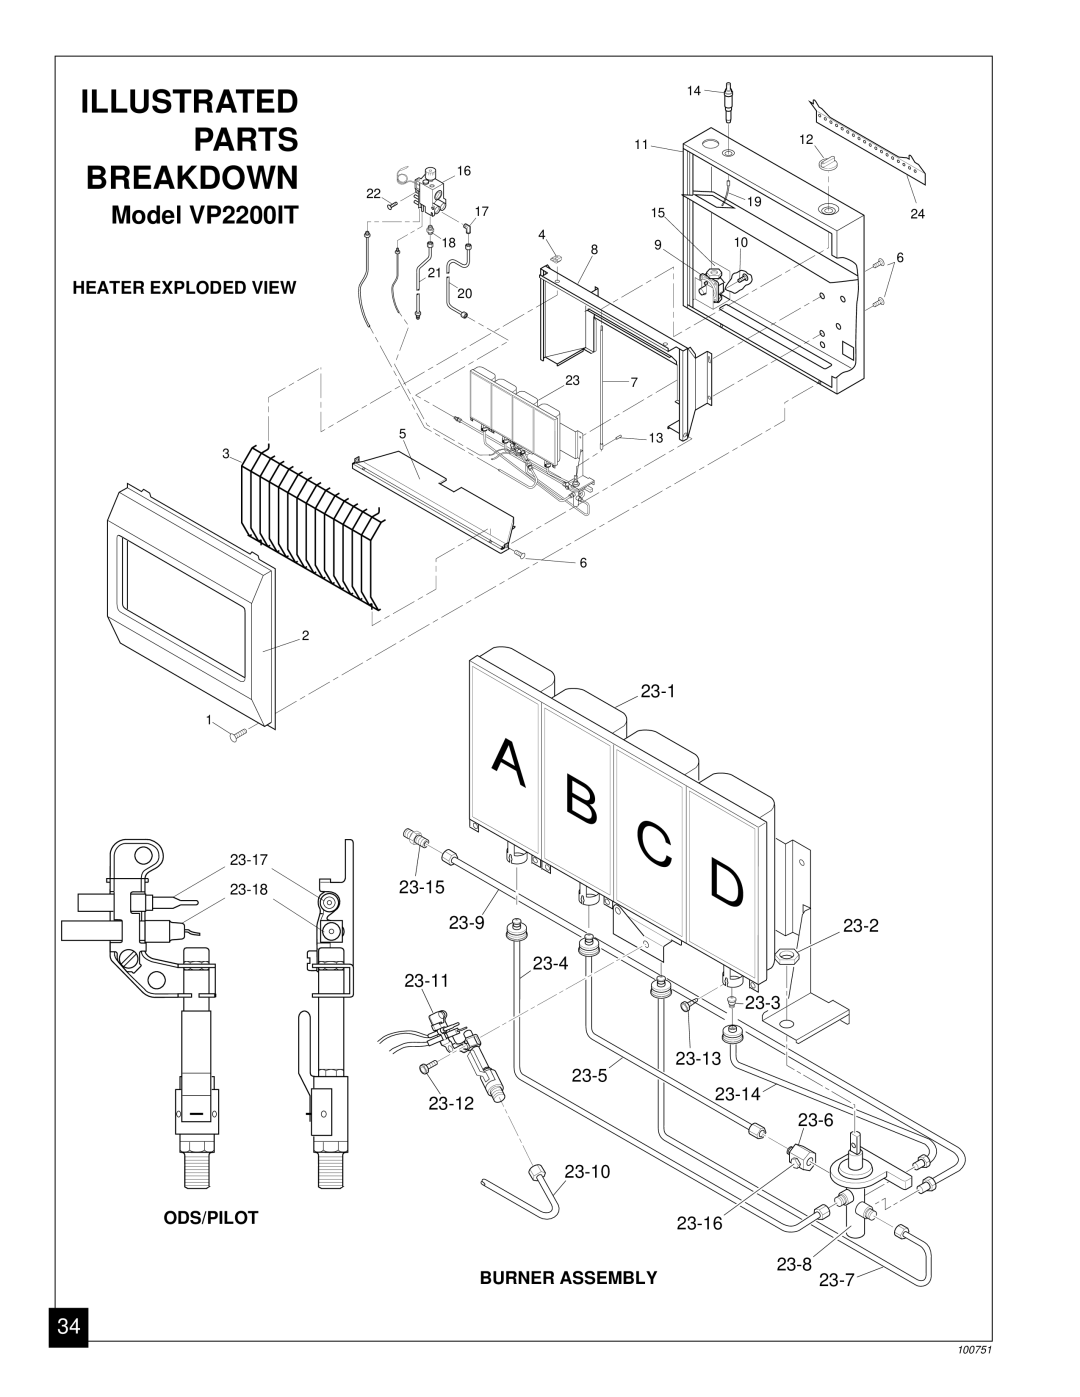
Desa VP2600C, VP1600IT, VP1600C Marking Screw Locations, Attaching Mounting Bracket To Wall

Page 12

12

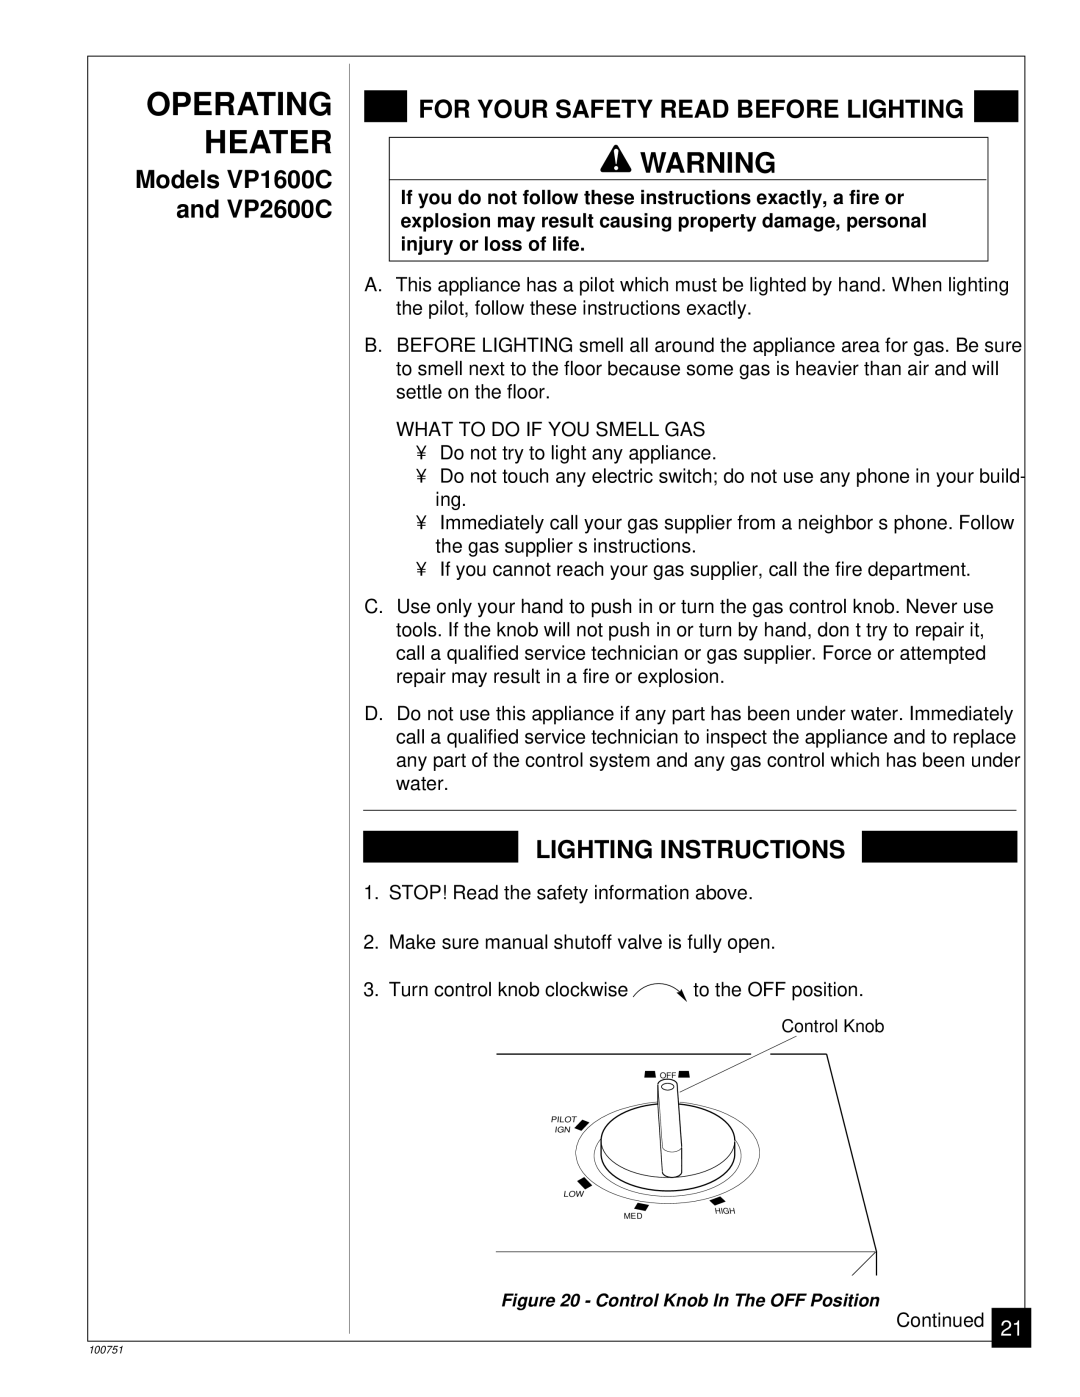
INSTALLING TO WALL

Continued

Marking Screw Locations

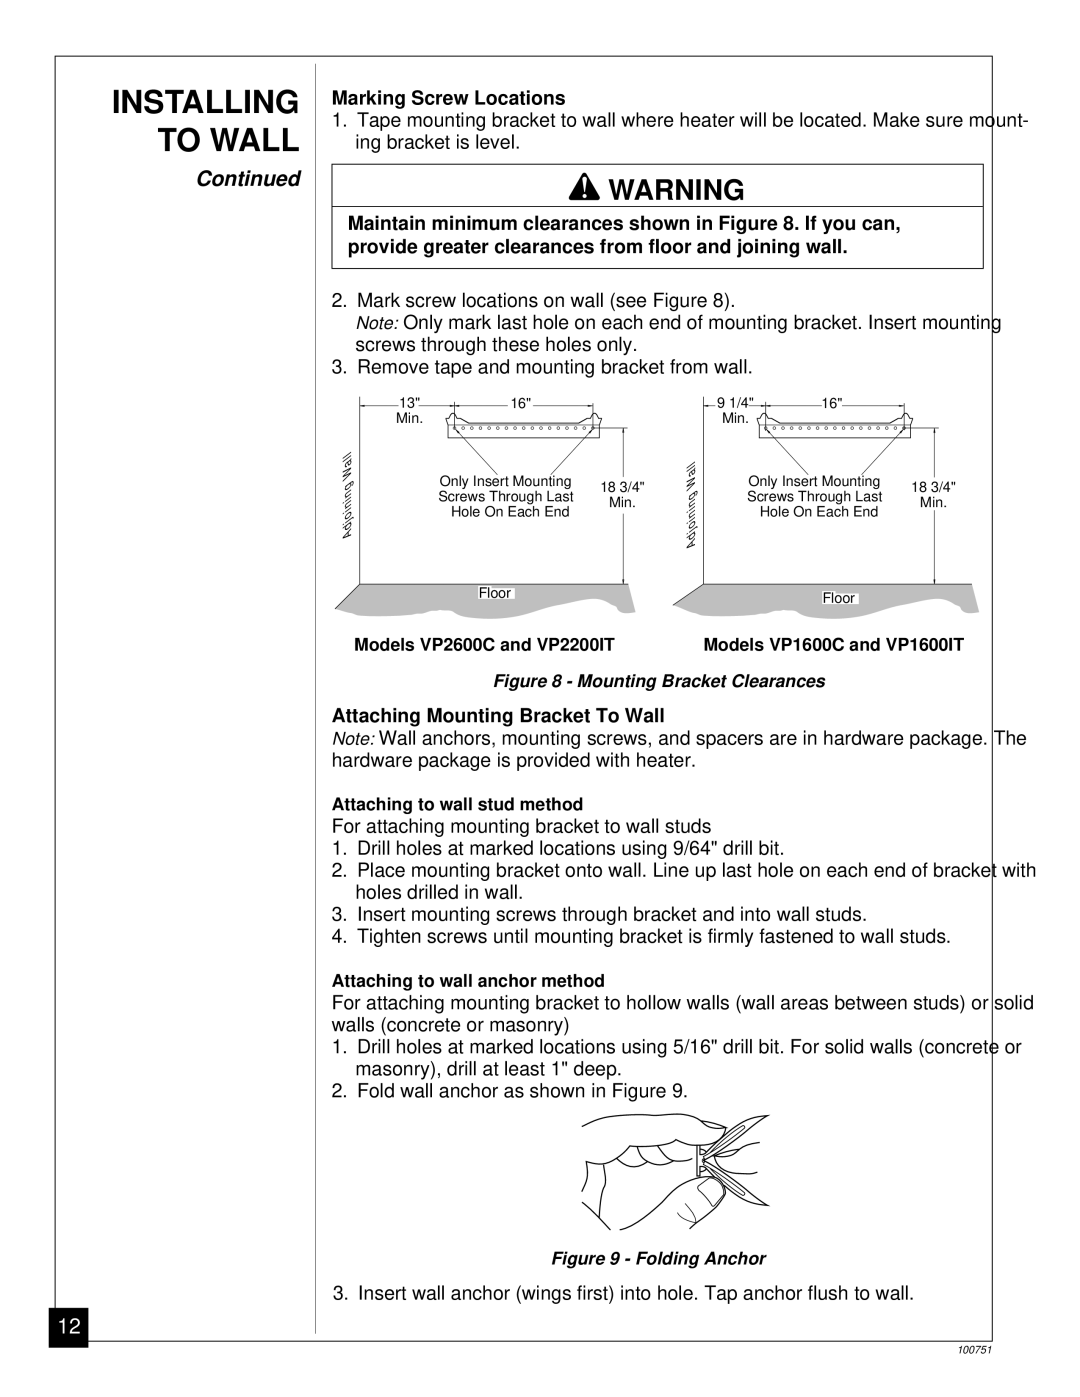
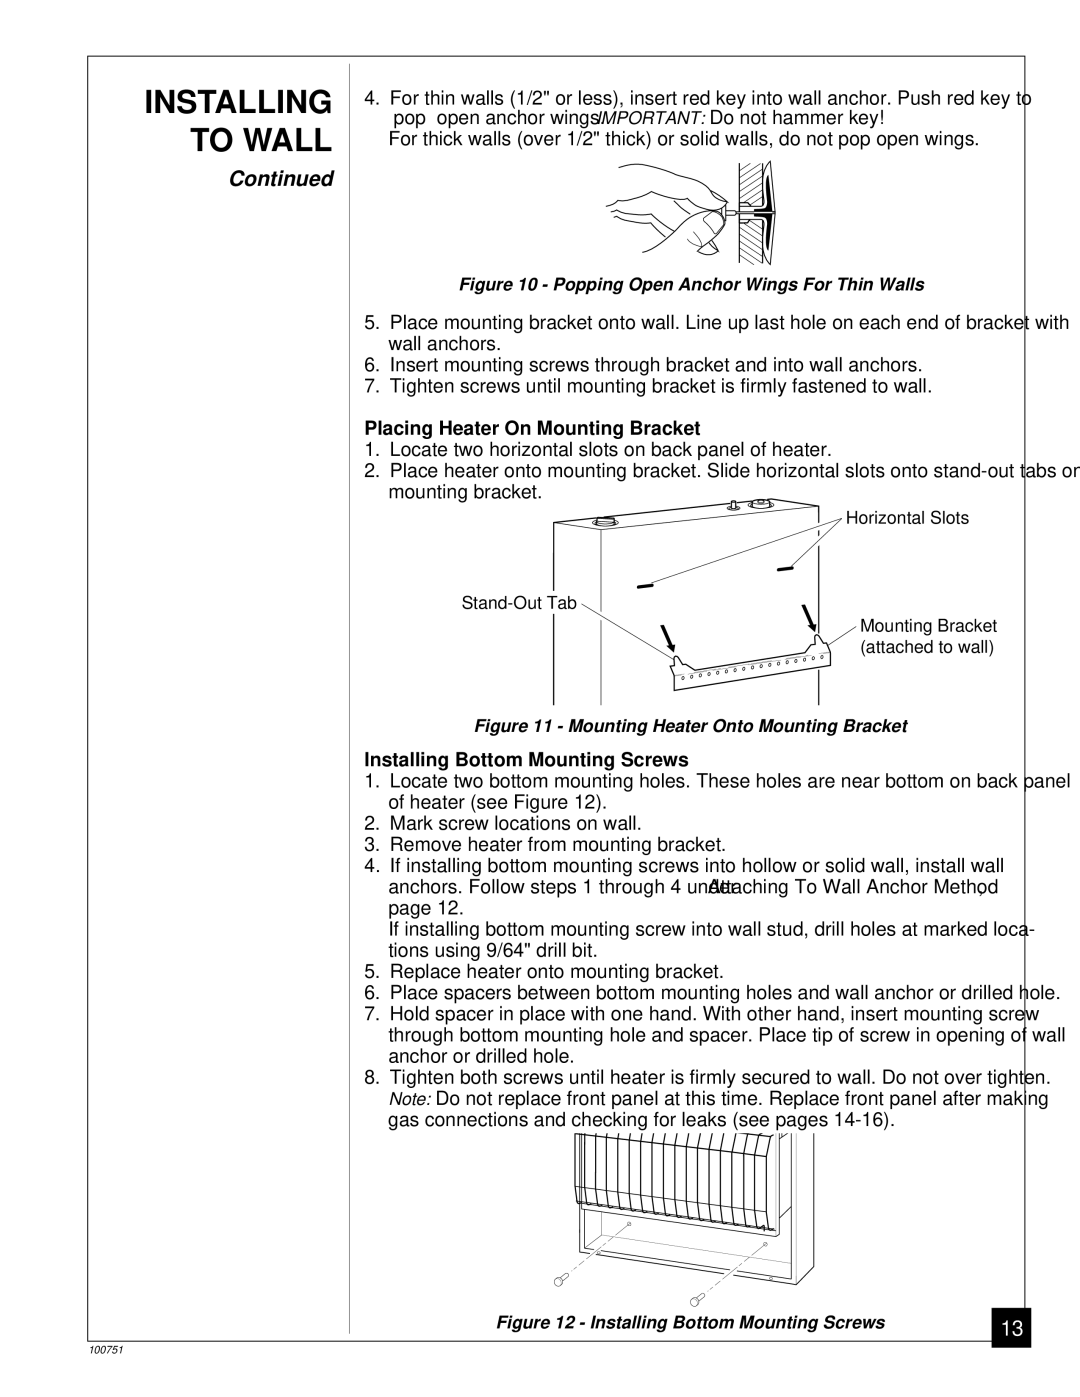
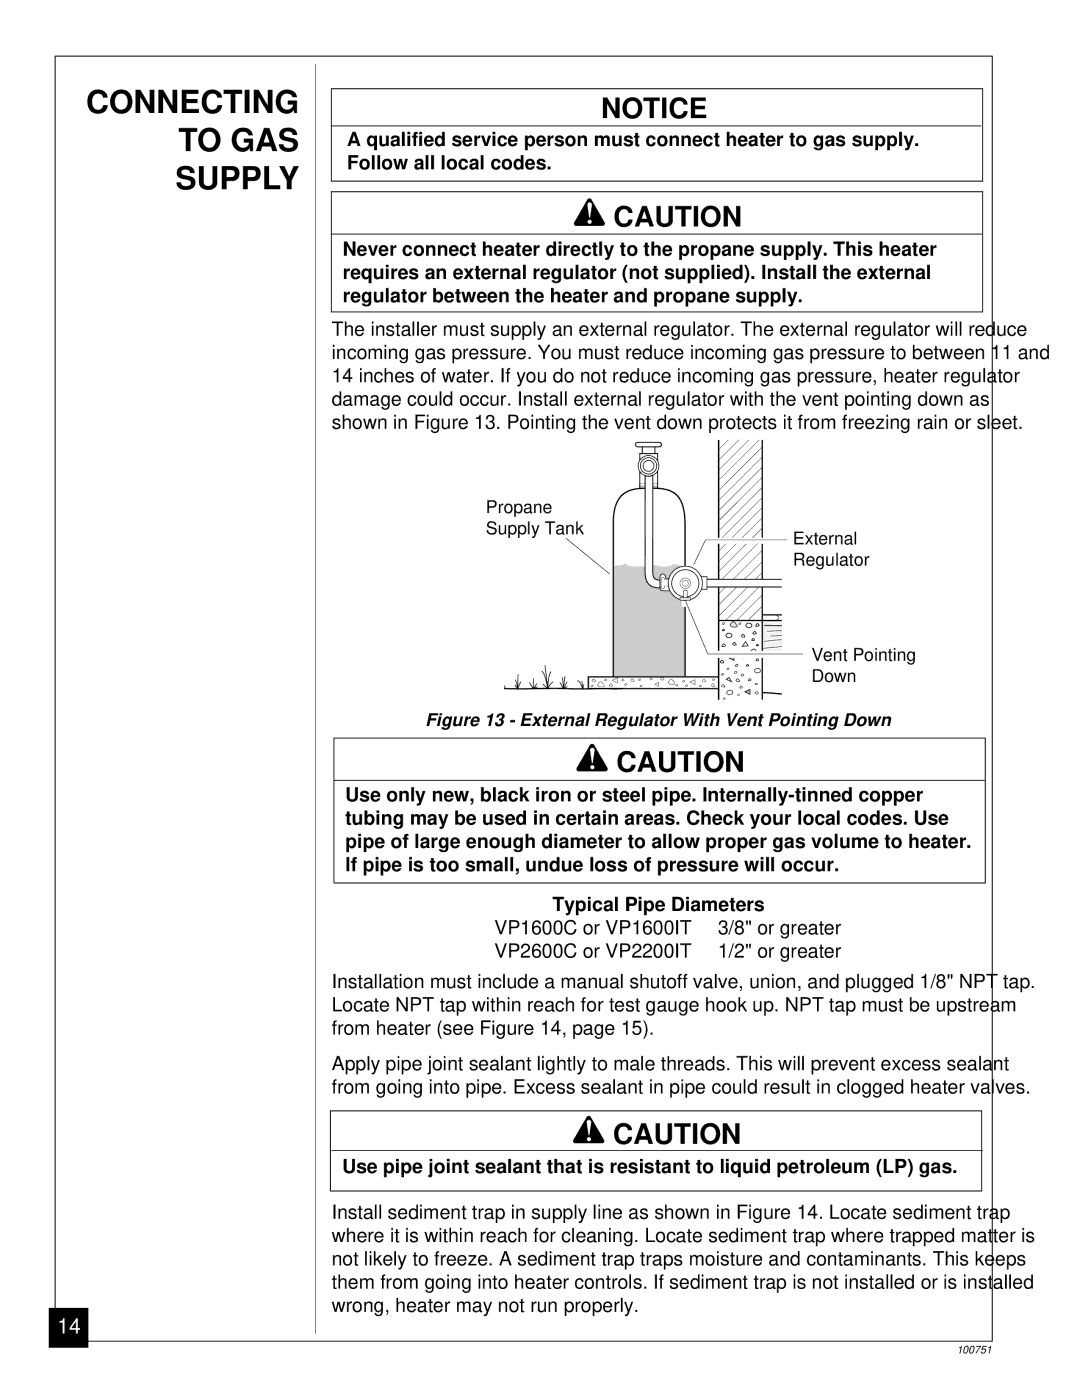
1.Tape mounting bracket to wall where heater will be located. Make sure mount- ing bracket is level.

WARNING

Maintain minimum clearances shown in Figure 8. If you can, provide greater clearances from floor and joining wall.

2.Mark screw locations on wall (see Figure 8).

Note: Only mark last hole on each end of mounting bracket. Insert mounting screws through these holes only.

3.Remove tape and mounting bracket from wall.

13"

16"

9 1/4"

16"

Min.


Min.


AdjoiningWall


AdjoiningWall

Only Insert Mounting


Only Insert Mounting

18 3/4"


18 3/4"

Screws Through Last

Min.


Screws Through Last

Min.

Hole On Each End


Hole On Each End


Floor


Floor


Models VP2600C and VP2200IT


Models VP1600C and VP1600IT

Figure 8 - Mounting Bracket Clearances

Attaching Mounting Bracket To Wall

Note: Wall anchors, mounting screws, and spacers are in hardware package. The hardware package is provided with heater.

Attaching to wall stud method

For attaching mounting bracket to wall studs

1.Drill holes at marked locations using 9/64" drill bit.

2.Place mounting bracket onto wall. Line up last hole on each end of bracket with holes drilled in wall.

3.Insert mounting screws through bracket and into wall studs.

4.Tighten screws until mounting bracket is firmly fastened to wall studs.

Attaching to wall anchor method

For attaching mounting bracket to hollow walls (wall areas between studs) or solid walls (concrete or masonry)

1.Drill holes at marked locations using 5/16" drill bit. For solid walls (concrete or masonry), drill at least 1" deep.

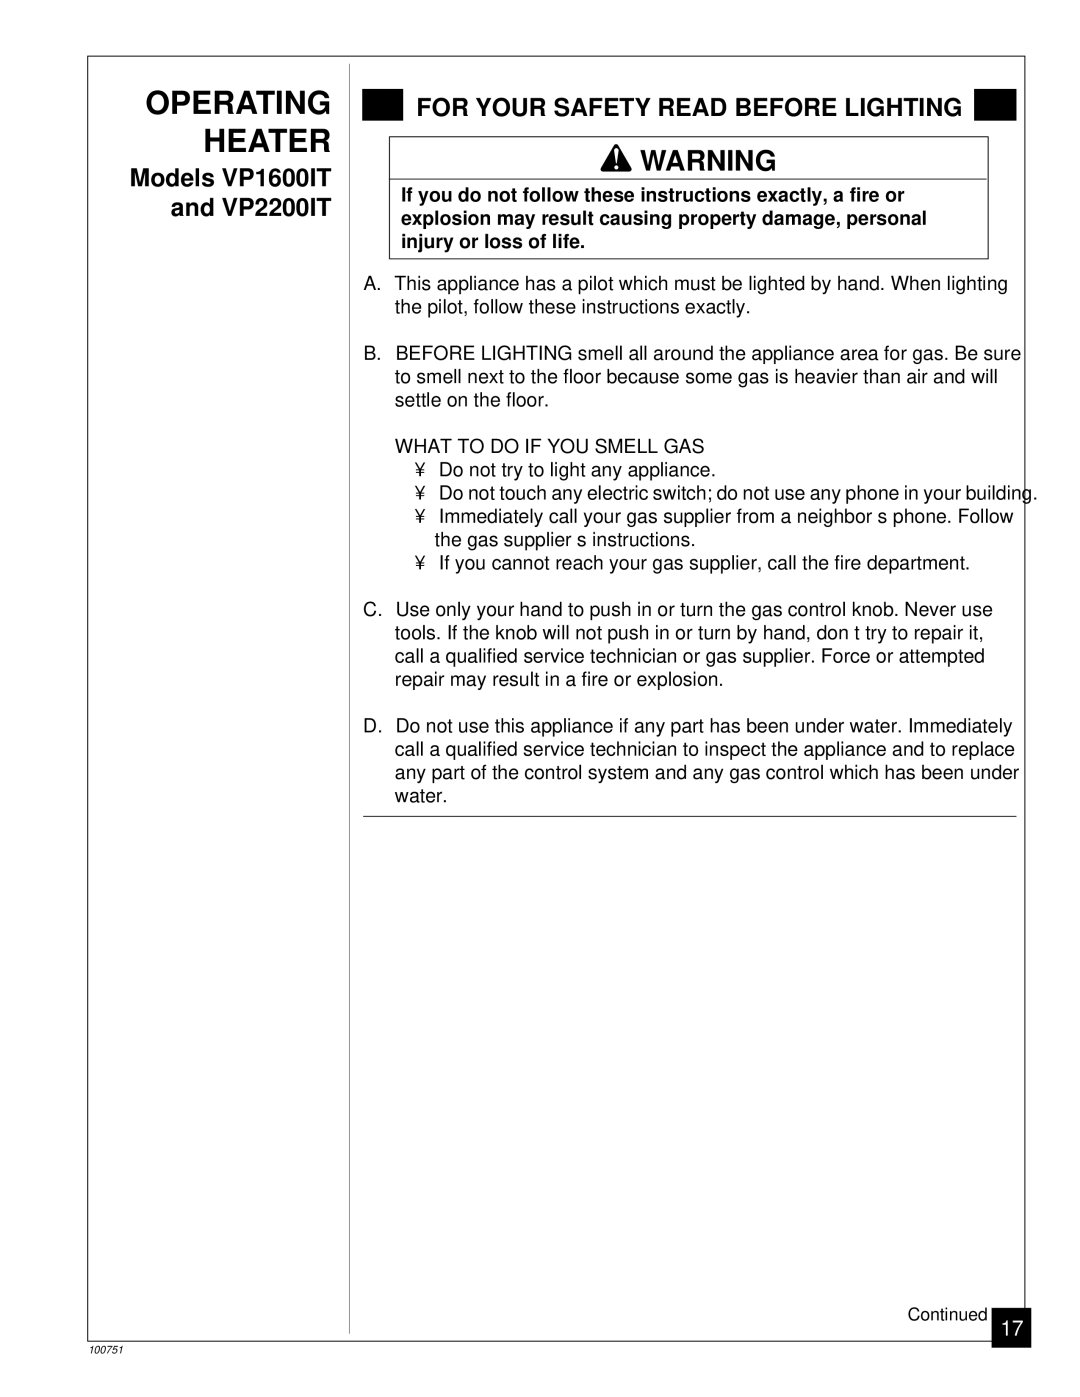
2.Fold wall anchor as shown in Figure 9.

Figure 9 - Folding Anchor

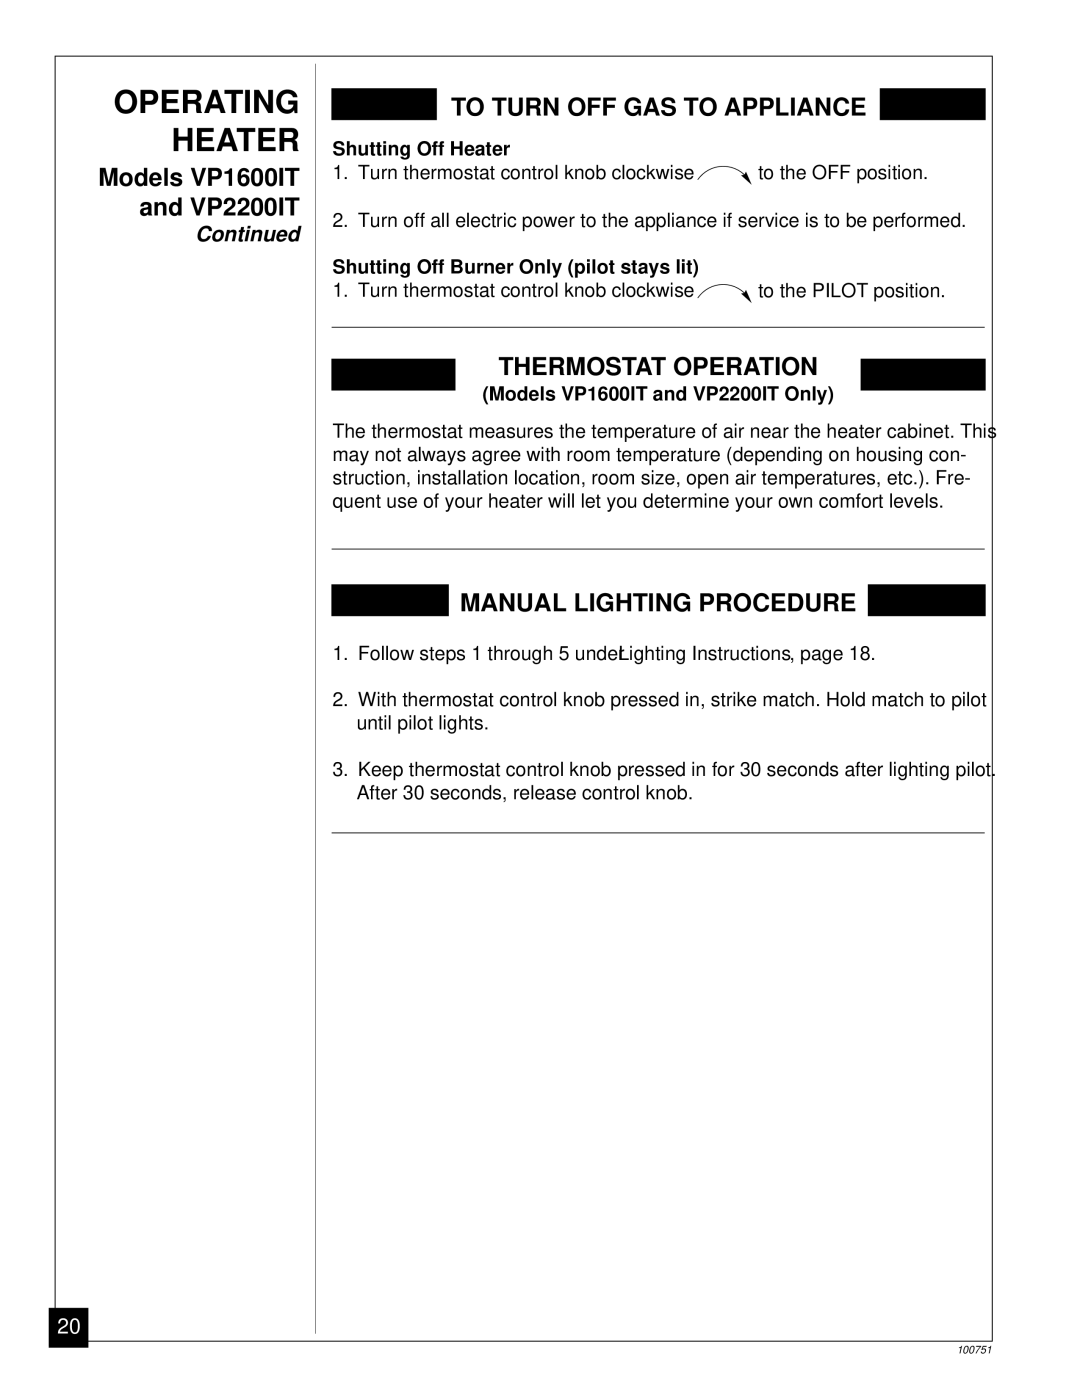
3. Insert wall anchor (wings first) into hole. Tap anchor flush to wall.

100751
Image 12
Contents OWNER’S Operation and Installation Manual What to do if YOU Smell GASContents Safety InformationSafety Information Features IdentificationLocal Codes UnpackingFresh AIR For CombustionVentilation Producing Adequate VentilationFresh AIR Determining FRESH-AIR Flow for Heater LocationDetermining if You Have a Confined or Unconfined Space Fresh AIR for Combustion and Ventilation Ventilation AIRVentilation Air From Inside Building Ventilation AIR Ventilation Air From OutdoorsInstalling To Wall Installation ItemsCheck GAS Type Locating HeaterThermostat Sensing Bulb Models VP1600IT and VP2200IT OnlyLocating Thermostat Sensing Bulb Attaching Thermostat Sensing BulbInstalling Heater to Wall Mounting BracketRemoving Front Panel Of Heater Methods For Attaching Mounting Bracket To WallMarking Screw Locations Attaching Mounting Bracket To WallInstalling Bottom Mounting Screws Placing Heater On Mounting BracketConnecting To GAS Qualified service person must connect heater to gas supplySupply Follow all local codesPressure Testing GAS Supply Piping System Checking GASConnections Servicing. Correct all leaks at onceConnecting Pressure Testing Heater GAS ConnectionsOperating Heater Operating Heater Lighting InstructionsHeater To Select Heating LevelShutting Off Heater Shutting Off Burner Only pilot stays litOperating If you do not follow these instructions exactly, a fire orModels VP1600C and VP2600C LOW MED High Inspecting Burner Pilot Flame PatternBurner Flame Pattern Cleaning MaintenanceTrouble Shooting ODS/PILOT and Burner OrificeCleaning and Mainte TroubleSee Cleaning TROUBLE- ShootingService TechnicalIf you smell gas Shut off gas supplyService Publications Hints VP1600IT VP2200ITVP1600C VP2600C Replacement Parts AccessoriesIllustrated Parts Breakdown Model VP1600ITParts List KEY Part Number Description QTYModel VP2200IT Parts List Model VP1600C Control Position Label Model VP2600C Parts List Warranty Information Keep this Warranty