Fan Tray Assembly Removal and Replacement
The CoreBuilder 9400 is cooled by the fan tray assembly, which contains two
You need no tools to remove the fan tray. You can remove and replace the fan tray with the power on.
To remove and replace the fan tray assembly, follow these steps:
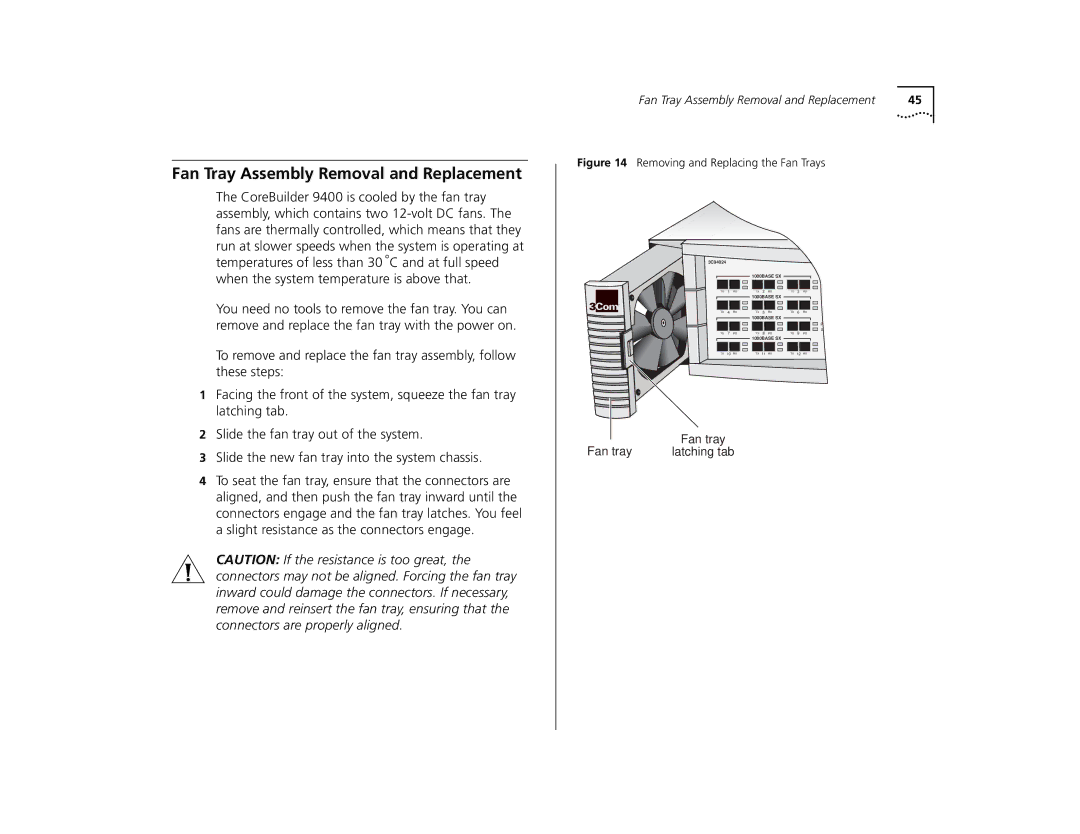
1Facing the front of the system, squeeze the fan tray latching tab.
2Slide the fan tray out of the system.
3Slide the new fan tray into the system chassis.
4To seat the fan tray, ensure that the connectors are aligned, and then push the fan tray inward until the connectors engage and the fan tray latches. You feel a slight resistance as the connectors engage.
CAUTION: If the resistance is too great, the connectors may not be aligned. Forcing the fan tray inward could damage the connectors. If necessary, remove and reinsert the fan tray, ensuring that the connectors are properly aligned.
Fan Tray Assembly Removal and Replacement | 45 |
Figure 14 Removing and Replacing the Fan Trays
3C94024 |
|
|
|
|
|
|
|
|
| 1000BASE SX |
|
|
|
|
|
|
|
|
| PCKT |
| 1 |
| TX 2 RX |
| 3 | STAT |
TX | RX | TX | RX | |||
|
|
| 1000BASE SX |
|
|
|
TX | 4 | RX | TX 5 RX | TX | 6 | RX |
|
|
| 1000BASE SX |
|
|
|
|
|
|
|
|
| PCKT |
| 7 |
| TX 8 RX |
| 9 | STAT |
TX | RX | TX | RX | |||
|
|
| 1000BASE SX |
|
|
|
TX | 10 | RX | TX 11 RX | TX | 12 | RX |
Fan tray | Fan tray |
latching tab |