Use of
Use the following sequence of steps to activate the SFP ports:
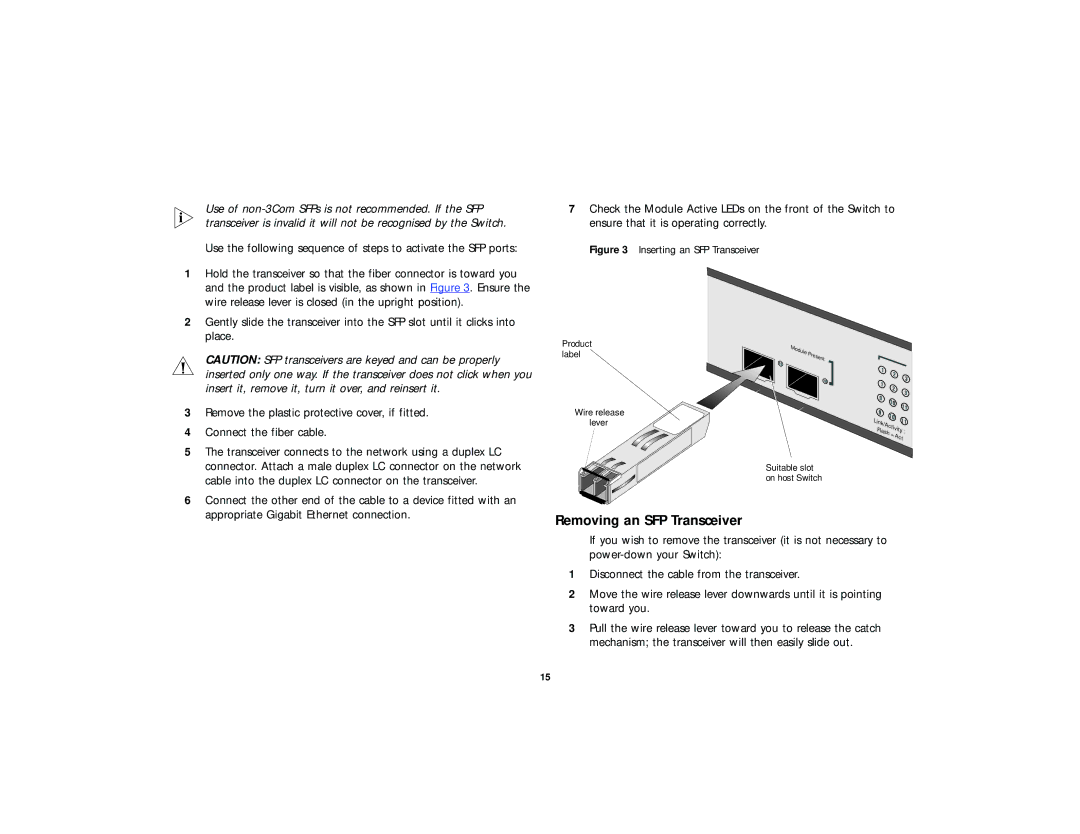
1Hold the transceiver so that the fiber connector is toward you and the product label is visible, as shown in Figure 3. Ensure the wire release lever is closed (in the upright position).
2Gently slide the transceiver into the SFP slot until it clicks into place.
7Check the Module Active LEDs on the front of the Switch to ensure that it is operating correctly.
Figure 3 Inserting an SFP Transceiver
CAUTION: SFP transceivers are keyed and can be properly inserted only one way. If the transceiver does not click when you insert it, remove it, turn it over, and reinsert it.
3 | Remove the plastic protective cover, if fitted. |
4 | Connect the fiber cable. |
5 | The transceiver connects to the network using a duplex LC |
| connector. Attach a male duplex LC connector on the network |
| cable into the duplex LC connector on the transceiver. |
6 | Connect the other end of the cable to a device fitted with an |
| appropriate Gigabit Ethernet connection. |
Product label
Wire release lever
Module | Present |
|
Link/Activity | : |
Flash |
|
= |
|
Act |
|
Suitable slot on host Switch
Removing an SFP Transceiver
If you wish to remove the transceiver (it is not necessary to
1Disconnect the cable from the transceiver.
2Move the wire release lever downwards until it is pointing toward you.
3Pull the wire release lever toward you to release the catch mechanism; the transceiver will then easily slide out.
15
