ENGLISH
6.4 Replacing the Lamp
![]() WARNING
WARNING
To reduce the risk of electrical shock, always turn off projector and disconnect power cord before changing lamp.
![]() Caution
Caution
To reduce the risk of severe burns, allow the projector to cool for at least 30 minutes before replacing the lamp.
To reduce the risk of cuts to fingers and damage to internal components, use caution when removing lamp glass that has failed and shattered into sharp pieces.
✔Note
For maximum lamp life, do not apply shock, handle or scratch the lamp glass when it is hot. Also, do not use an old or previously used lamp as a replacement lamp.
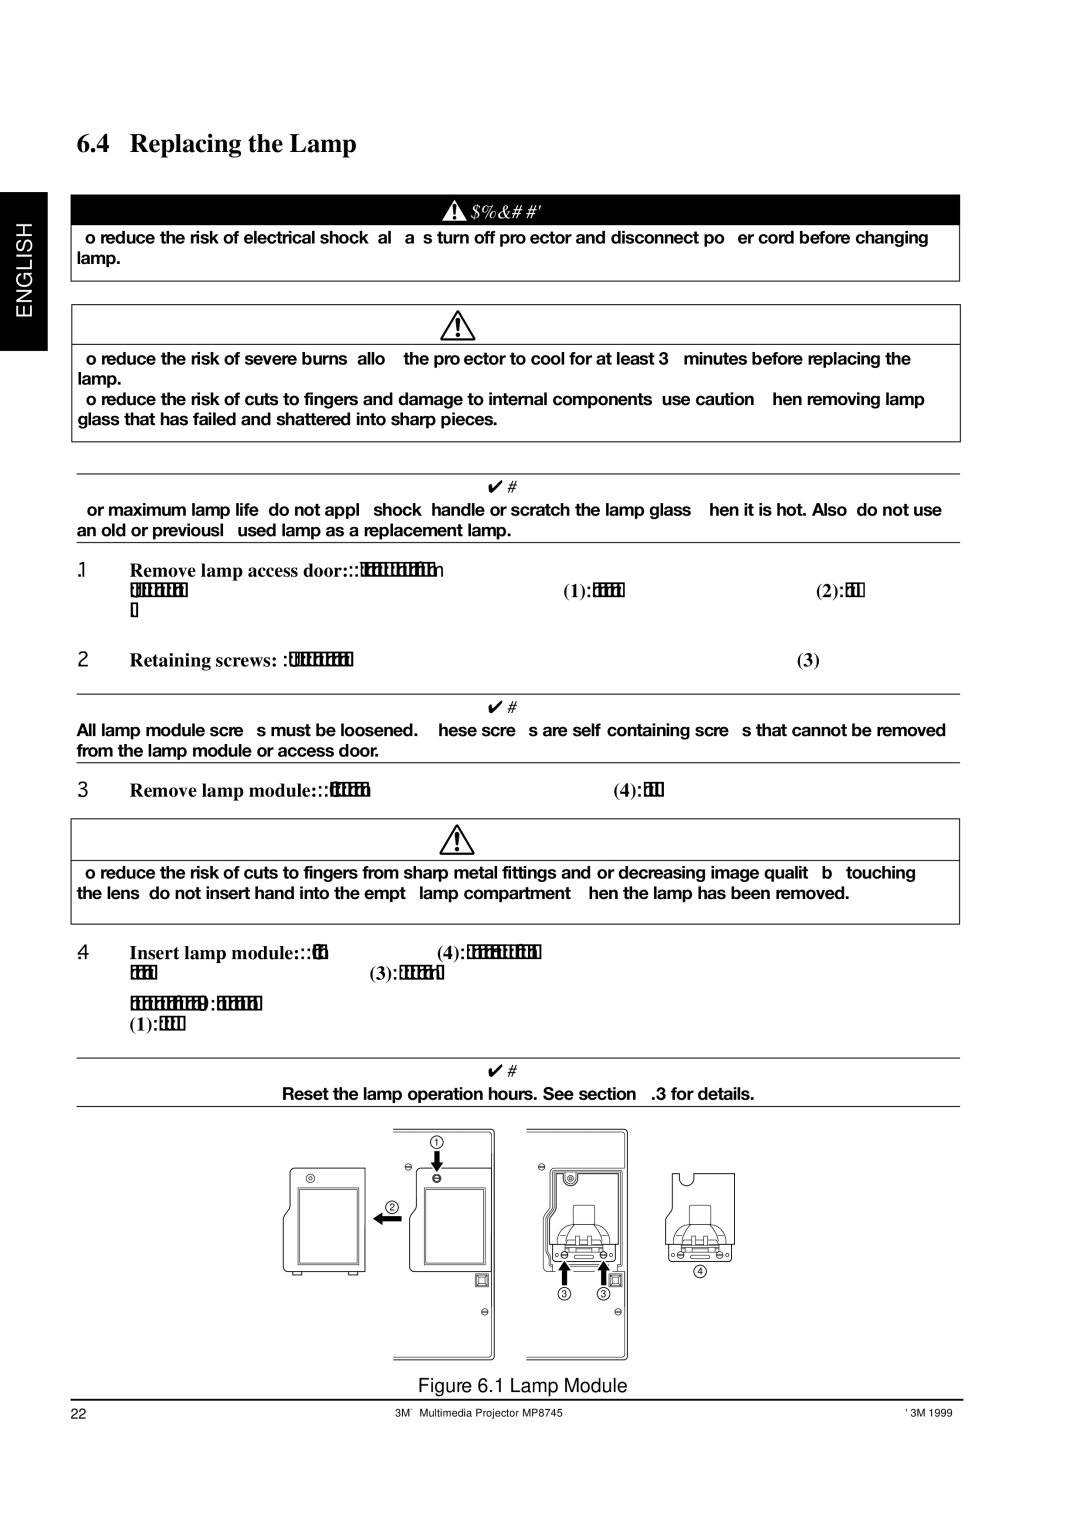
1.Remove lamp access door: The lamp access door is located on the bottom of the machine.
Use a screwdriver to unscrew the cover retaining screw (1) and gently remove the cover (2) and set it aside.
2.Retaining screws: Use a screwdriver to unscrew the lamp module retaining screws. (3)
✔Note
All lamp module screws must be loosened. These screws are
3.Remove lamp module: Carefully slide the lamp module out (4) using steady pressure.
![]() Caution
Caution
To reduce the risk of cuts to fingers from sharp metal fittings and/or decreasing image quality by touching the lens, do not insert hand into the empty lamp compartment when the lamp has been removed.
4.Insert lamp module: Carefully insert (4) the new lamp module. Ensure that it is fully seated. Tighten the lamp module retaining screws (3) to secure the lamp module in place.
Insert the hinge tabs on the bottom of the lamp access door, then close and tighten the retaining screw
(1) to secure the door.
✔Note
Reset the lamp operation hours. See section 6.3 for details.
1
2
4
3 3
Figure 6.1 Lamp Module
22 | 3M™ Multimedia Projector MP8745 | © 3M 1999 |