Getting Started
Your
below steps. Before plugging the ActiLink™ USB Transceiver into your computer:
1.Go to www.wellnessconnected.com/getstarted
2.Choose the service plan that is best for your needs.
3.Purchase that plan.
4.Download the Wellness Connected software that is appropriate for your computer.
5.Run the software and follow the installation process.
6.Enter in the required fields (your health information and product serial numbers).
7.Choose your widgets.
8.Set your goals.
9.Start using Wellness Connected!
Installing the Batteries
You must install 4 type AA (1.5 volt) batteries (included), or use the optional AC Adapter (see page
Battery” symbol appears on display), proceed as follows:
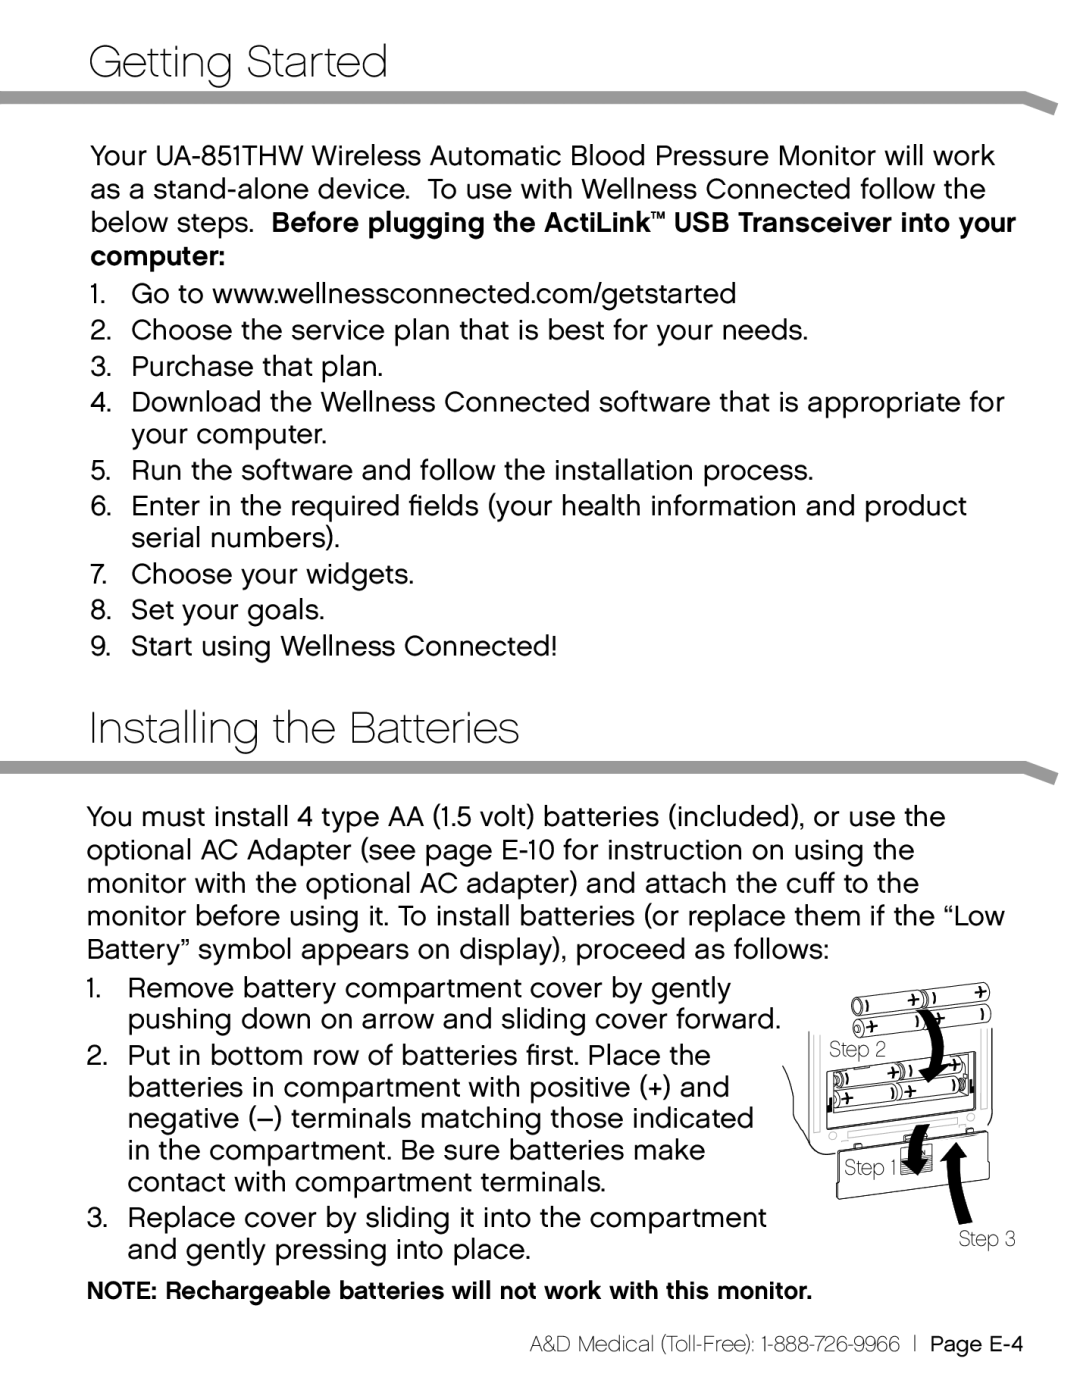
1.Remove battery compartment cover by gently pushing down on arrow and sliding cover forward.
2.Put in bottom row of batteries first. Place the batteries in compartment with positive (+) and negative
3.Replace cover by sliding it into the compartment and gently pressing into place.
NOTE: Rechargeable batteries will not work with this monitor.
Step 2
Step 1 ![]()
Step 3
A&D Medical