Removing the LCD Panel
1.See “Removing the LCD Bezel” on page 86.
2.See “Removing the Inverter Board” on page 88.
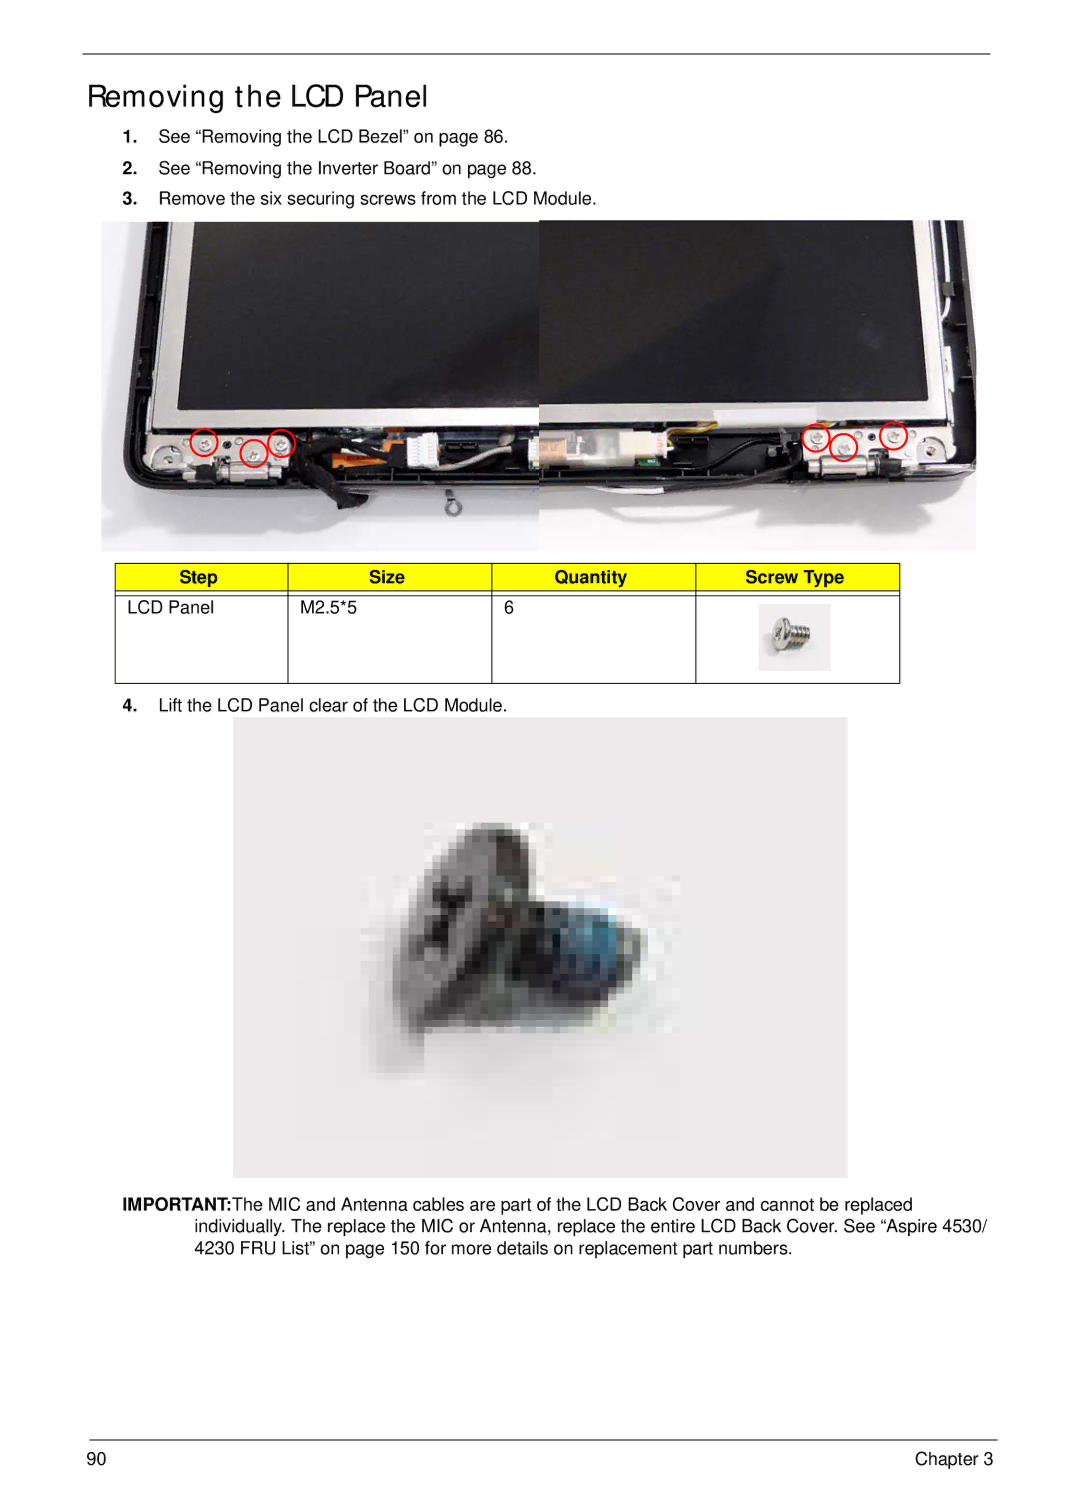
3.Remove the six securing screws from the LCD Module.
Step |
| Size | Quantity | Screw Type |
|
|
|
|
|
LCD Panel | M2.5*5 |
| 6 |
|
|
|
|
|
|
4.Lift the LCD Panel clear of the LCD Module.
IMPORTANT:The MIC and Antenna cables are part of the LCD Back Cover and cannot be replaced individually. The replace the MIC or Antenna, replace the entire LCD Back Cover. See “Aspire 4530/ 4230 FRU List” on page 150 for more details on replacement part numbers.
90 | Chapter 3 |