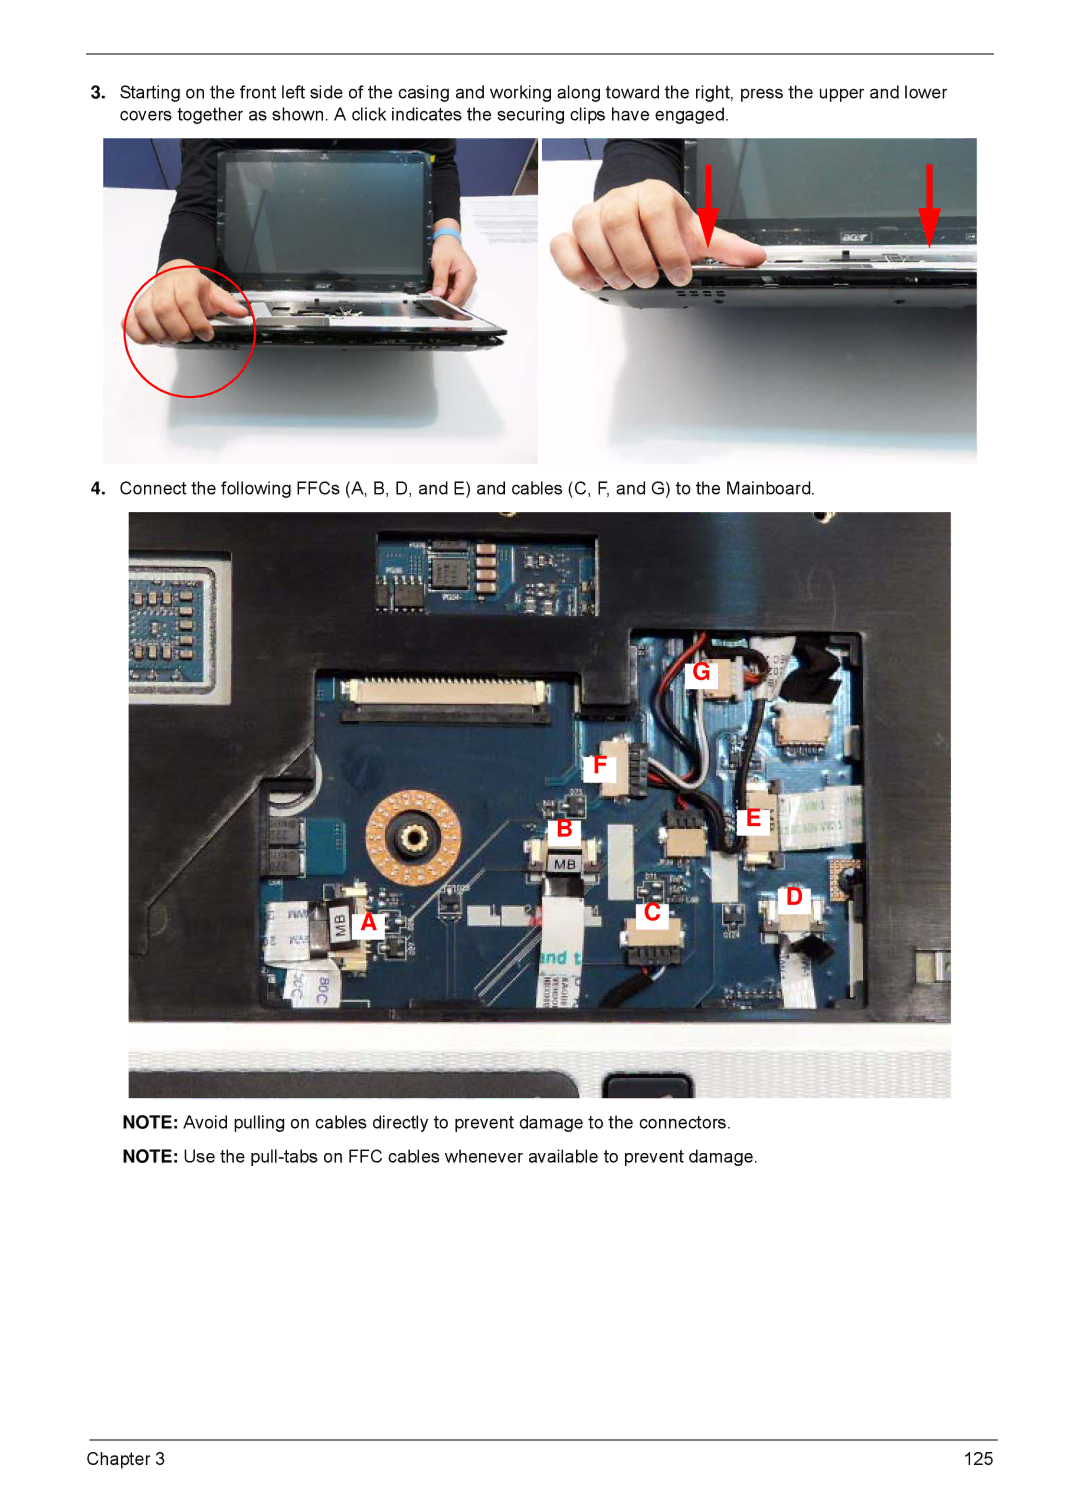
3.Starting on the front left side of the casing and working along toward the right, press the upper and lower covers together as shown. A click indicates the securing clips have engaged.
4.Connect the following FFCs (A, B, D, and E) and cables (C, F, and G) to the Mainboard.
|
|
|
|
|
|
|
|
|
| |||
|
|
|
|
|
|
|
| G | ||||
|
|
|
|
|
|
|
|
|
|
|
| |
|
|
|
| F |
|
|
|
|
|
| ||
|
|
|
|
|
|
|
|
|
|
|
| |
|
|
|
|
|
|
|
|
|
| E | ||
|
| B |
|
|
|
| ||||||
|
|
|
|
|
|
|
|
|
|
|
| |
|
|
|
|
|
|
|
|
|
|
|
|
|
|
|
|
|
|
|
|
|
|
|
|
| D |
|
|
|
|
|
| C | ||||||
A |
|
|
|
|
|
|
|
|
|
|
| |
|
|
|
|
|
|
|
|
|
|
|
| |
NOTE: Avoid pulling on cables directly to prevent damage to the connectors.
NOTE: Use the
Chapter 3 | 125 |
