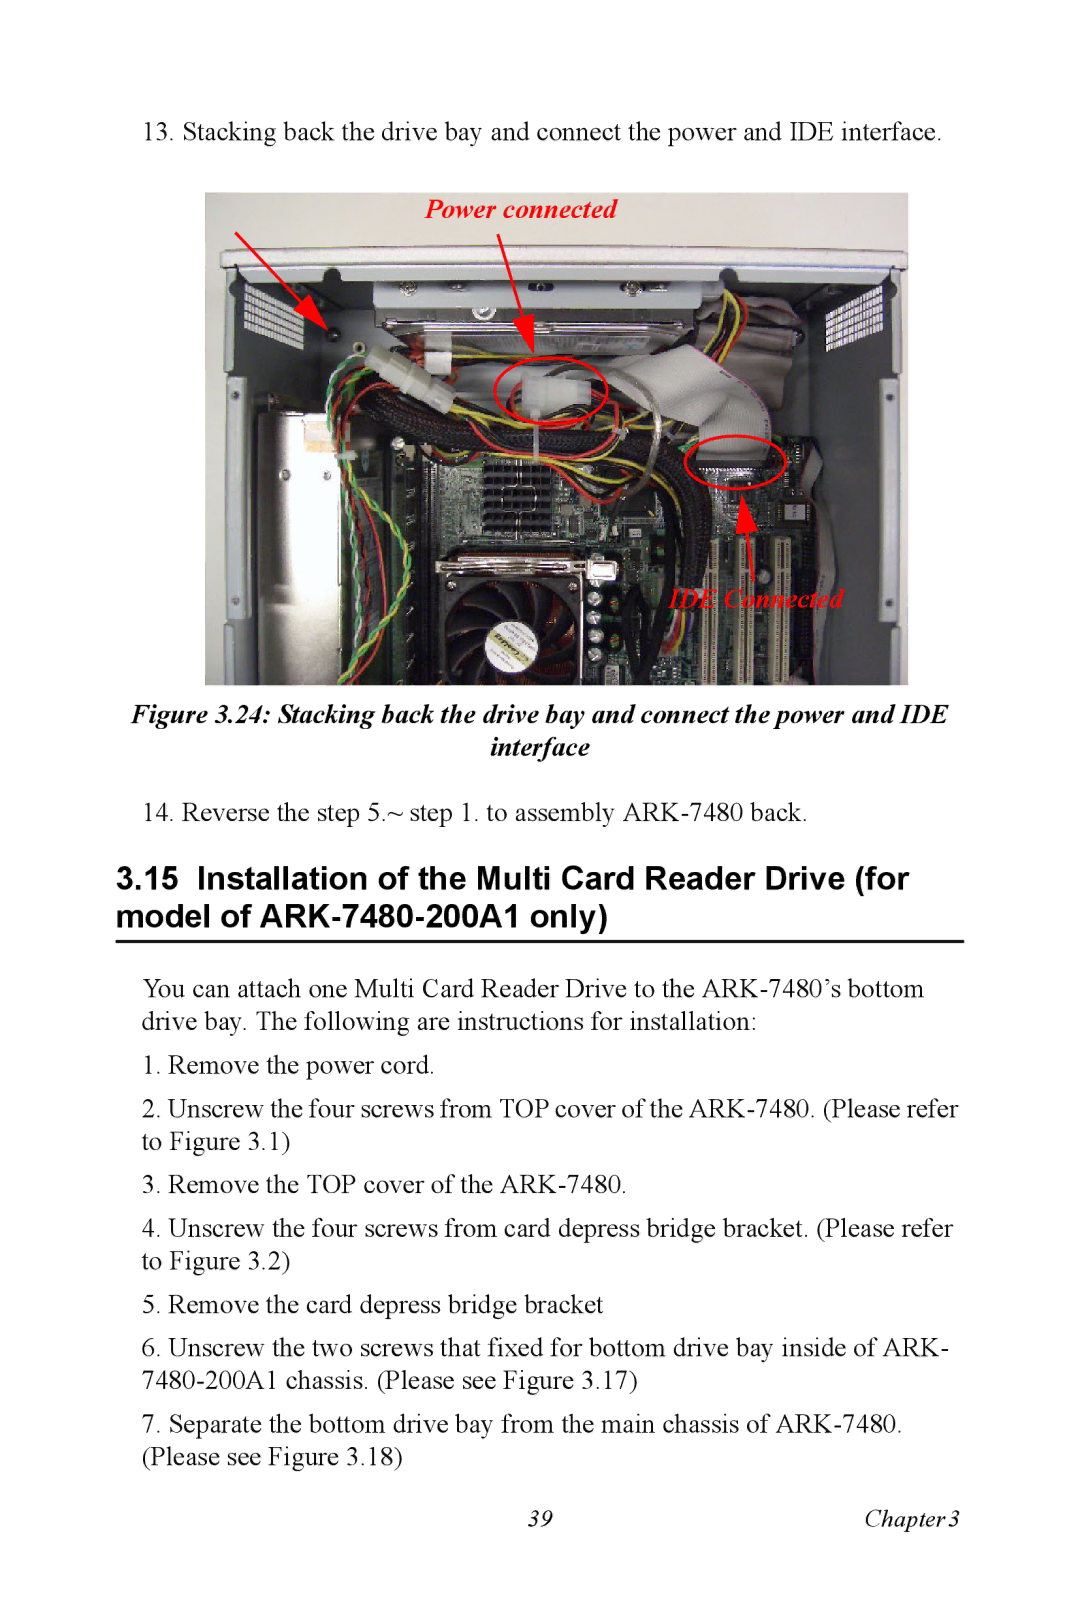
13.Stacking back the drive bay and connect the power and IDE interface.
Power connected
IDE Connected
Figure 3.24: Stacking back the drive bay and connect the power and IDE
interface
14. Reverse the step 5.~ step 1. to assembly
3.15Installation of the Multi Card Reader Drive (for model of
You can attach one Multi Card Reader Drive to the
1.Remove the power cord.
2.Unscrew the four screws from TOP cover of the
3.Remove the TOP cover of the
4.Unscrew the four screws from card depress bridge bracket. (Please refer to Figure 3.2)
5.Remove the card depress bridge bracket
6.Unscrew the two screws that fixed for bottom drive bay inside of ARK-
7.Separate the bottom drive bay from the main chassis of
39 | Chapter3 |