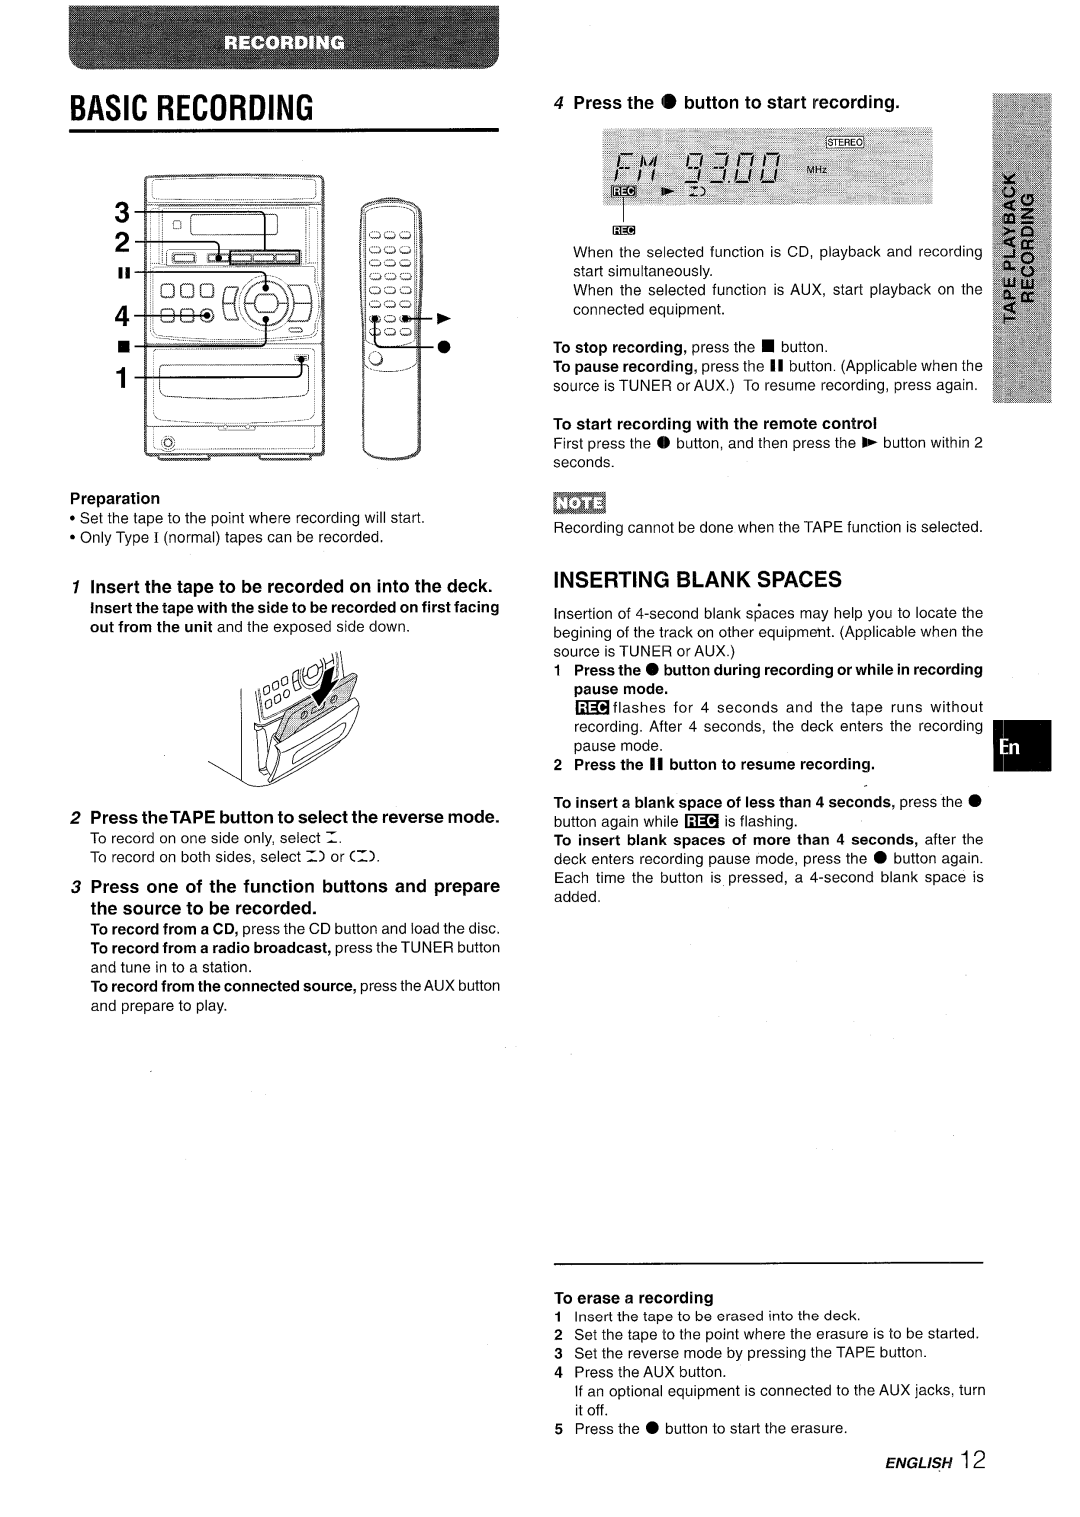
BASIC RECORDING

6 —. —.

?

Preparation

Set the tape to the point where recording will start.

Only Type I (normal) tapes can be recorded.

1Insert the tape to be recorded on into the deck.

Insert the tape with the side to be recorded on first facing out from the unit and the exposed side down.

2Press theTAPE button to select the reverse mode.

To record on one side only, select 1.

To record on both sides, select =) or (1).

3 Press one of the function buttons and prepare the source to be recorded.

To record from a CD, press the CD button and load the disc. To record from a radio broadcast, press the TUNER button

and tune in to a station.

To record from the connected source, press the AUX button

and prepare to play.

4 Press the @ button to start recording.

m

When the selected function is CD, playback and recording start simultaneously.

When the selected function is AUX, start playback on the connected equipment.

To stop recording, press the 9 button.

To pause recording, press the 11 button. (Applicable when the source is TUNER or AUX.) To resume recording, press again.

To start recording with the remote control

First press the ~ button, and then press the > button within 2 seconds.

m

Recording cannot be done when the TAPE function is selected.

INSERTING BLANK SPACES

Insertion of 4-second blank s~aces may help you to locate the begining of the track on other equipmeht. (Applicable when the source is TUNER or AUX.)

1 Press the O button during recording or while in recording

pause

mode.


~flashes

for 4 seconds and the tape

runs without

recording, After 4 seconds, the deck enters the recording

pause

mode.


2 Press the II

button to resume recording.

[m

To insert a blank space of less than 4 seconds, press the @

button again while w is flashing.

To insert blank spaces of more than 4 seconds, after the deck enters recording pause mode, press the button again. Each time the button is pressed, a 4-second blank space is added

To erase a recording

1Insert the tape to be erased into the deck.

2Set the tape to the point where the erasure is to be started.

3Set the reverse mode by pressing the TAPE button.

4Press the AUX button.

If an optional equipment is connected to the AUX jacks, turn it off.

5Press the button to start the erasure.

ENGLISH 12

Page 13
Image 13
Aiwa LCX-350 manual Basic Recording, Inserting Blank Spaces, Insert the tape to be recorded on into the deck

LCX-350 specifications

The Aiwa LCX-350 is a versatile and powerful mini stereo system designed for music enthusiasts who appreciate both style and quality sound. This compact audio unit integrates a range of features that cater to various listening preferences, making it an ideal choice for modern homes or small spaces.

One of the most notable features of the Aiwa LCX-350 is its robust sound system. Equipped with high-performance speakers, this mini stereo system delivers rich, clear audio across different genres of music. The built-in amplifier ensures that the sound is not only loud but also well-balanced, providing a gratifying listening experience whether you are playing a soft ballad or a heavy rock track.

Another significant aspect of the LCX-350 is its compatibility with multiple audio formats and sources. This unit includes CD playback capabilities, allowing users to enjoy their favorite albums with ease. Additionally, it offers USB ports for users to connect their flash drives, which is a convenient feature for those who prefer digital music libraries. The system also supports FM radio, giving users the option to listen to their favorite radio stations.

In terms of user-friendly technology, the Aiwa LCX-350 features a straightforward interface. The control panel is intuitively designed, making it accessible for individuals of all ages. The remote control adds to the convenience, allowing for easy navigation through various settings and audio sources, enhancing the overall user experience.

Furthermore, the LCX-350 is designed with aesthetics in mind. Its sleek, modern design ensures that it can fit seamlessly into any home decor while serving as an attractive centerpiece. The stylish LED display provides essential information and enhances visibility, especially in dimly lit environments.

Portability is another key characteristic of the Aiwa LCX-350. Despite its powerful output, the compact design makes it easy to move from one room to another or even take with you to parties or gatherings. This versatility means that high-quality sound can accompany users wherever they go.

In conclusion, the Aiwa LCX-350 is a well-rounded mini stereo system that combines impressive sound quality, multi-format compatibility, user-friendly controls, and an attractive design. It stands out as a reliable choice for anyone looking to enhance their music experience, making it a notable addition to any audio setup.