1

2,4

1,2,3,4

3

6

The unit can be turned on at a specified time every day with the built-in timer.

Preparation

Make sure the clock is set correctly. (See page 16).

Use the remote control.

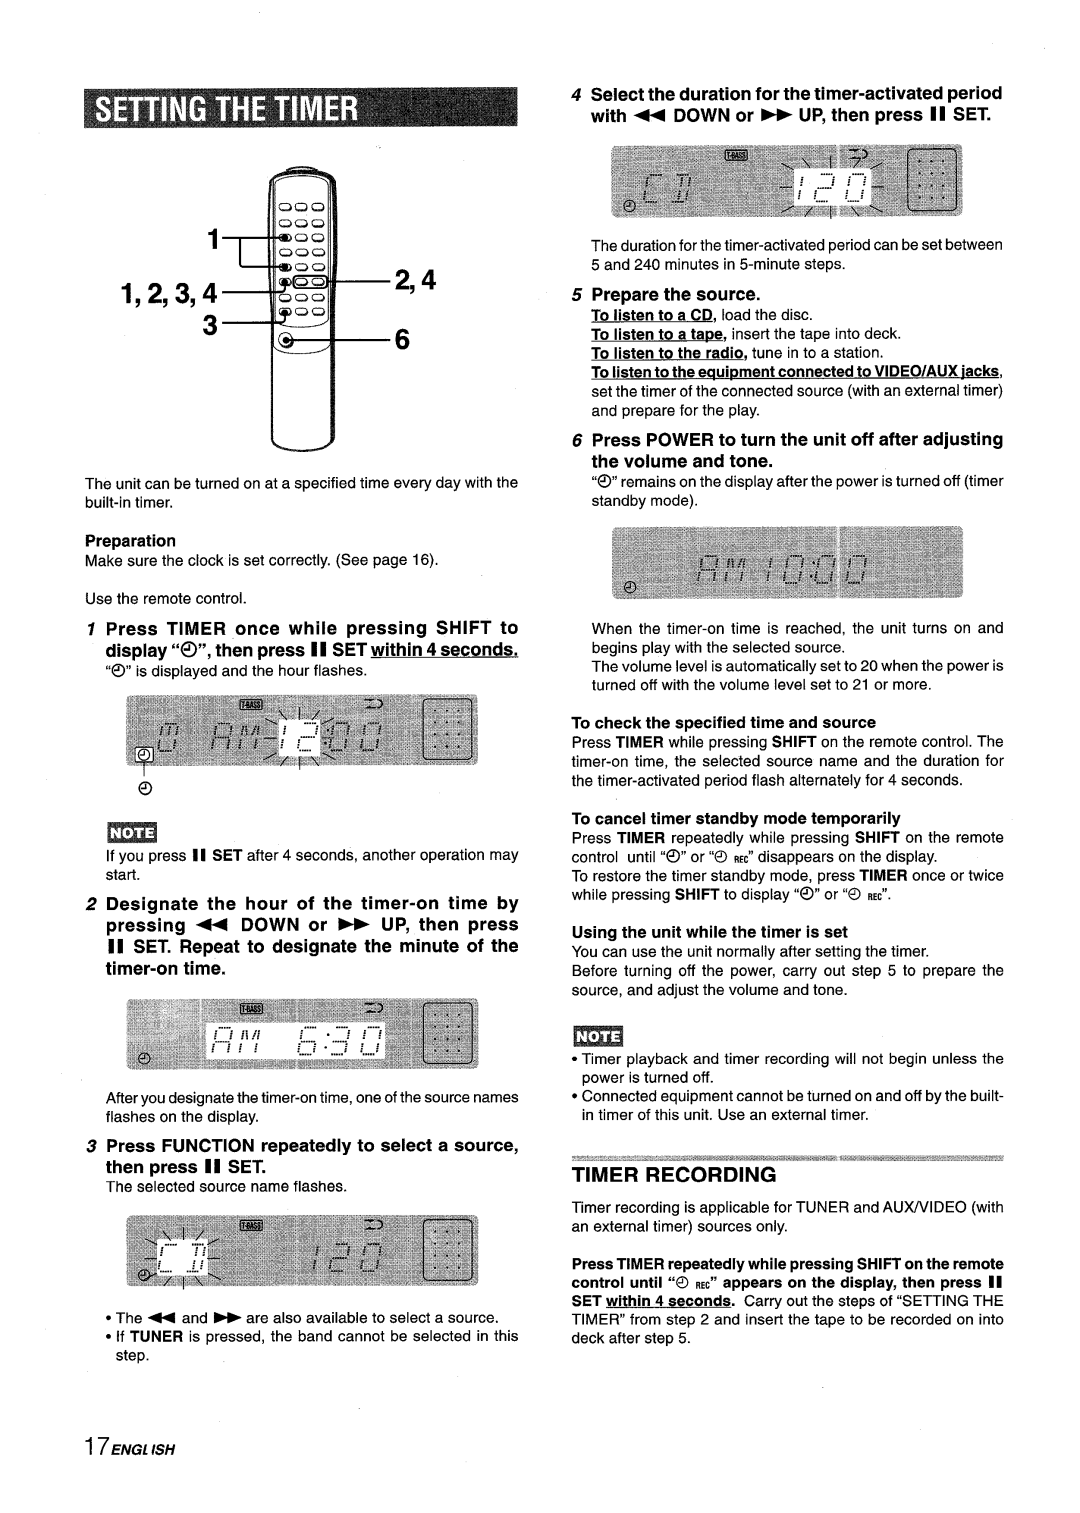
1 Press TIMER once while pressing SHIFT to display “0”, then press 11 SET within 4 seconds.

“O” is displayed and the hour flashes.

If you press 11 SET after 4 seconds, another operation may start.

2 Designate the hour of the timer-on time by

pressing * DOWN or * UP, then press

IISET. Repeat to designate the minute of the timer-on time.

After you designate the timer-on time, one of the source names flashes on the display.

3 Press FUNCTION repeatedly to select a source, then press II SET.

The selected source name flashes

The - and ~ are also available to select a source.

If TUNER is pressed, the band cannot be selected in this step.

4 Select the duration for the timer-activated period

with U DOWN or _ UP, then press 11 SET.

The duration for the timer-activated period can be set between 5 and 240 minutes in 5-minute steps.

5 Prepare the source.

To listen to a CD, load the disc.

To listen to a ta~e, insert the tape into deck. To listen to the radio, tune in to a station.

To listen to the eaui~ment connected to VIDEO/AUX jacks, set the timer of the connected source (with an external timer)

and prepare for the play.

6 Press POWER to turn the unit off after adjusting the volume and tone.

“@”remains on the display after the power is turned off (timer standby mode).

When the timer-on time is reached, the unit turns on and begins play with the selected source.

The volume level is automatically set to 20 when the power is turned off with the volume level set to 21 or more.

To check the specified time and source

Press TIMER while pressing SHIFT on the remote control. The timer-on time, the selected source name and the duration for the timer-activated period flash alternately for 4 seconds.

To cancel timer standby mode temporarily

Press TIMER repeatedly while pressing SHIFT on the remote control until “0” or “O REC” disappears on the display.

To restore the timer standby mode, press TIMER once or twice while pressing SHIFT to display “@” or”0 REC”.

Using the unit while the timer is set

You can use the unit normally after setting the timer.

Before turning off the power, carry out step 5 to prepare the source, and adjust the volume and tone.

Timer playback and timer recording will not begin unless the power is turned off.

Connected equipment cannot be turned on and off by the built- in timer of this unit. Use an external timer.

.Wb,............M

*&,@,~ ,,_W,&—=~8,.*,&-~..&

&,~~~~~>-*,,:~.~

.m., .. .....h..._..=...Q_.e.w.

..>-ww.m.mwY.,.~>~.

TIMER RECORDING

Timer recording is applicable for TUNER and AUWVIDEO (with an external timer) sources only.

Press TIMER repeatedly while pressing SHIFT on the remote control until “0 REC” appears on the display, then press II

SET within 4 seconde. Carry out the steps of “SETTINGTHE TIMER from step 2 and insert the tape to be recorded on into deck after step 5.

17EPK2LSH

Page 18
Image 18
Aiwa XM-M25 manual Prepare the source, To listen to a CD, load the disc, To check the specified time and source

XM-M25 specifications

The Aiwa XM-M25 is a versatile and compact stereo system that offers a multitude of features designed for audiophiles and casual listeners alike. This model is known for its sleek lines and modern design, making it a stylish addition to any home setting. One of the standout characteristics of the XM-M25 is its impressive sound quality, which is made possible by Aiwa's advanced audio technologies.

At the heart of the Aiwa XM-M25 is its integrated amplifier, delivering powerful audio output that can easily fill a room. The system boasts a total power output of up to 70 watts, ensuring that it can handle various genres of music with clarity and depth. The frequency response range is commendable, allowing listeners to enjoy deep bass notes as well as crisp highs.

Another key feature of the XM-M25 is its built-in CD player, which supports various formats including CD-R and CD-RW. This functionality ensures that users can easily play their favorite albums without worrying about compatibility issues. Additionally, the system is equipped with a cassette deck, enabling playback of classic tape recordings, a nostalgic touch for older music enthusiasts. This dual-format capability broadens the range of media that users can enjoy.

The Aiwa XM-M25 also includes a digital tuner with a preset function, allowing listeners to save their favorite radio stations for easy access. The tuner receives both AM and FM signals, providing a wide variety of radio programming. Users can expect clear reception and sound quality, thanks to Aiwa's engineering.

Connectivity is another highlight of the XM-M25. The system features auxiliary inputs, making it simple to connect external devices such as smartphones or portable music players. A headphone jack adds convenience for those who wish to enjoy their music privately.

The design of the Aiwa XM-M25 is both functional and attractive, with an intuitive control layout that makes navigation simple. The LCD display provides clear visibility of the track information and settings, enhancing the user experience.

In conclusion, the Aiwa XM-M25 stands out as a compact powerhouse for music playback. Its combination of a CD player, cassette deck, digital tuner and robust audio performance makes it a versatile choice for any music lover. Whether enjoying classic tunes on cassette or streaming the latest hits, the XM-M25 delivers an engaging listening experience.