Name and function of parts
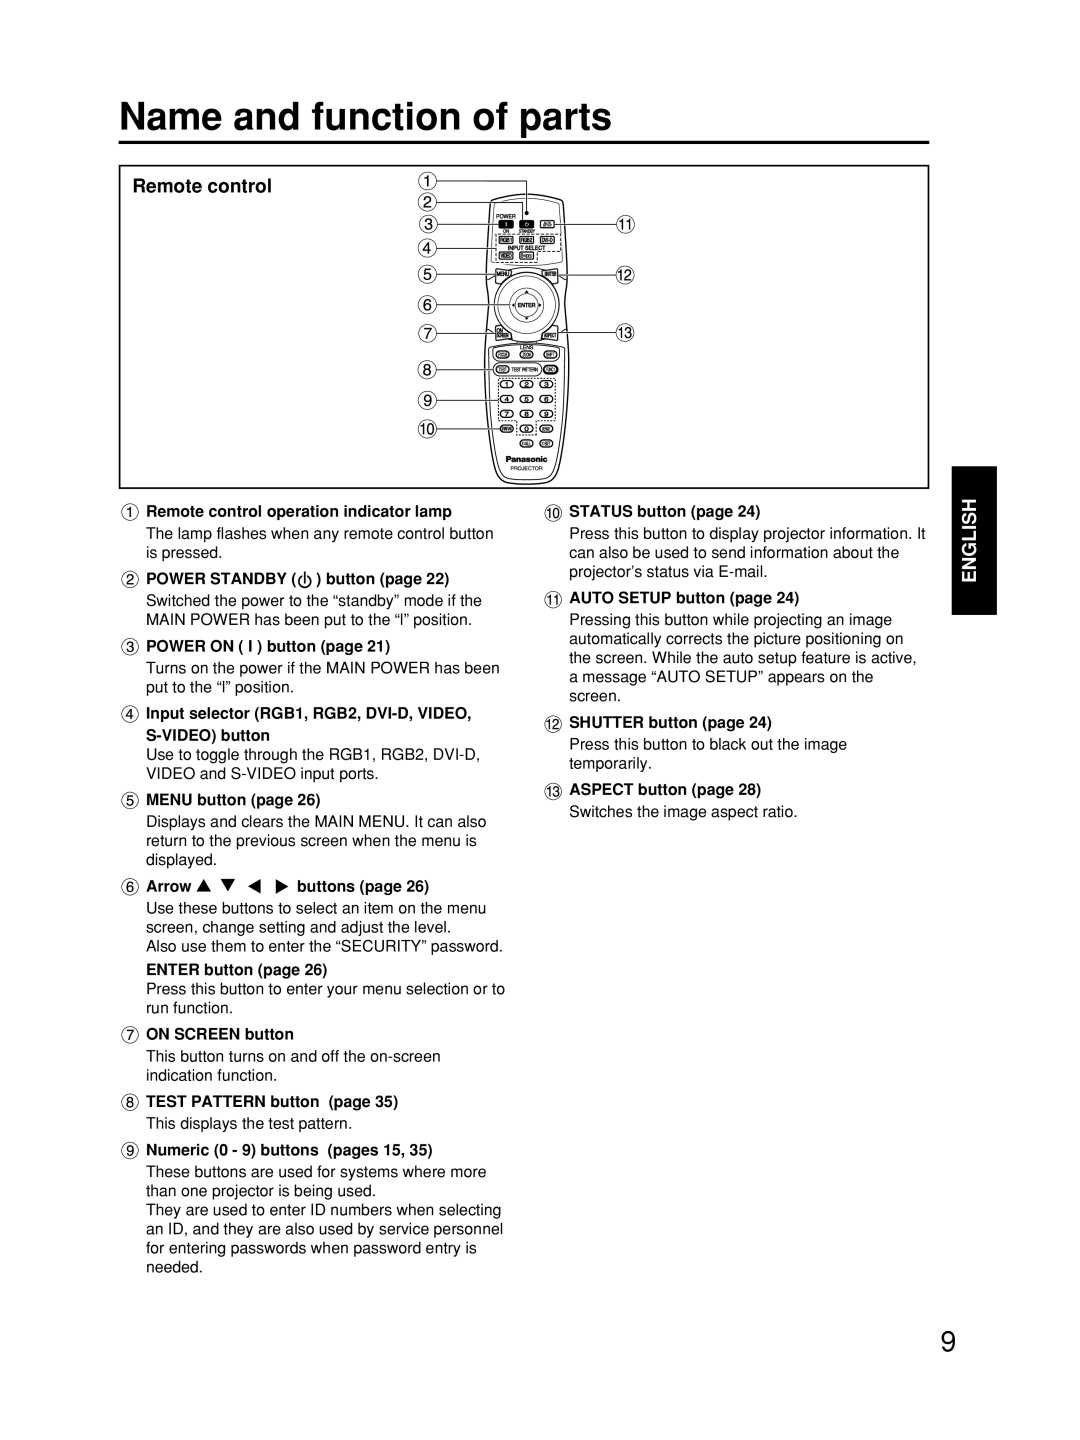
Remote control
![]() Remote control operation indicator lamp
Remote control operation indicator lamp
The lamp flashes when any remote control button is pressed.
![]() POWER STANDBY (
POWER STANDBY ( ![]() ) button (page 22)
) button (page 22)
Switched the power to the “standby” mode if the MAIN POWER has been put to the “l” position.
![]() POWER ON ( I ) button (page 21)
POWER ON ( I ) button (page 21)
Turns on the power if the MAIN POWER has been put to the “l” position.
![]() Input selector (RGB1, RGB2,
Input selector (RGB1, RGB2,
Use to toggle through the RGB1, RGB2,
 MENU button (page 26)
Displays and clears the MAIN MENU. It can also return to the previous screen when the menu is displayed.
 Arrow
Arrow 


 buttons (page 26)
Use these buttons to select an item on the menu screen, change setting and adjust the level.
Also use them to enter the “SECURITY” password.
ENTER button (page 26)
Press this button to enter your menu selection or to run function.
![]() ON SCREEN button
ON SCREEN button
This button turns on and off the
![]() TEST PATTERN button (page 35)
TEST PATTERN button (page 35)
This displays the test pattern.
 Numeric (0 - 9) buttons (pages 15, 35)
These buttons are used for systems where more than one projector is being used.
They are used to enter ID numbers when selecting an ID, and they are also used by service personnel for entering passwords when password entry is needed.
 STATUS button (page 24)
Press this button to display projector information. It can also be used to send information about the projector’s status via
 AUTO SETUP button (page 24)
Pressing this button while projecting an image automatically corrects the picture positioning on the screen. While the auto setup feature is active, a message “AUTO SETUP” appears on the screen.
![]() SHUTTER button (page 24)
SHUTTER button (page 24)
Press this button to black out the image temporarily.
![]() ASPECT button (page 28)
ASPECT button (page 28)
Switches the image aspect ratio.
ENGLISH
9