Alienware user manual Alienware Area-51 m5550 Technical Reference

Models: m5550

1 92
Download 92 pages 27.07 Kb
Page 59
Image 59
10.Put the HDD cover back and re-attach 2 Screw A’s.

Alienware Area-51 m5550 Technical Reference

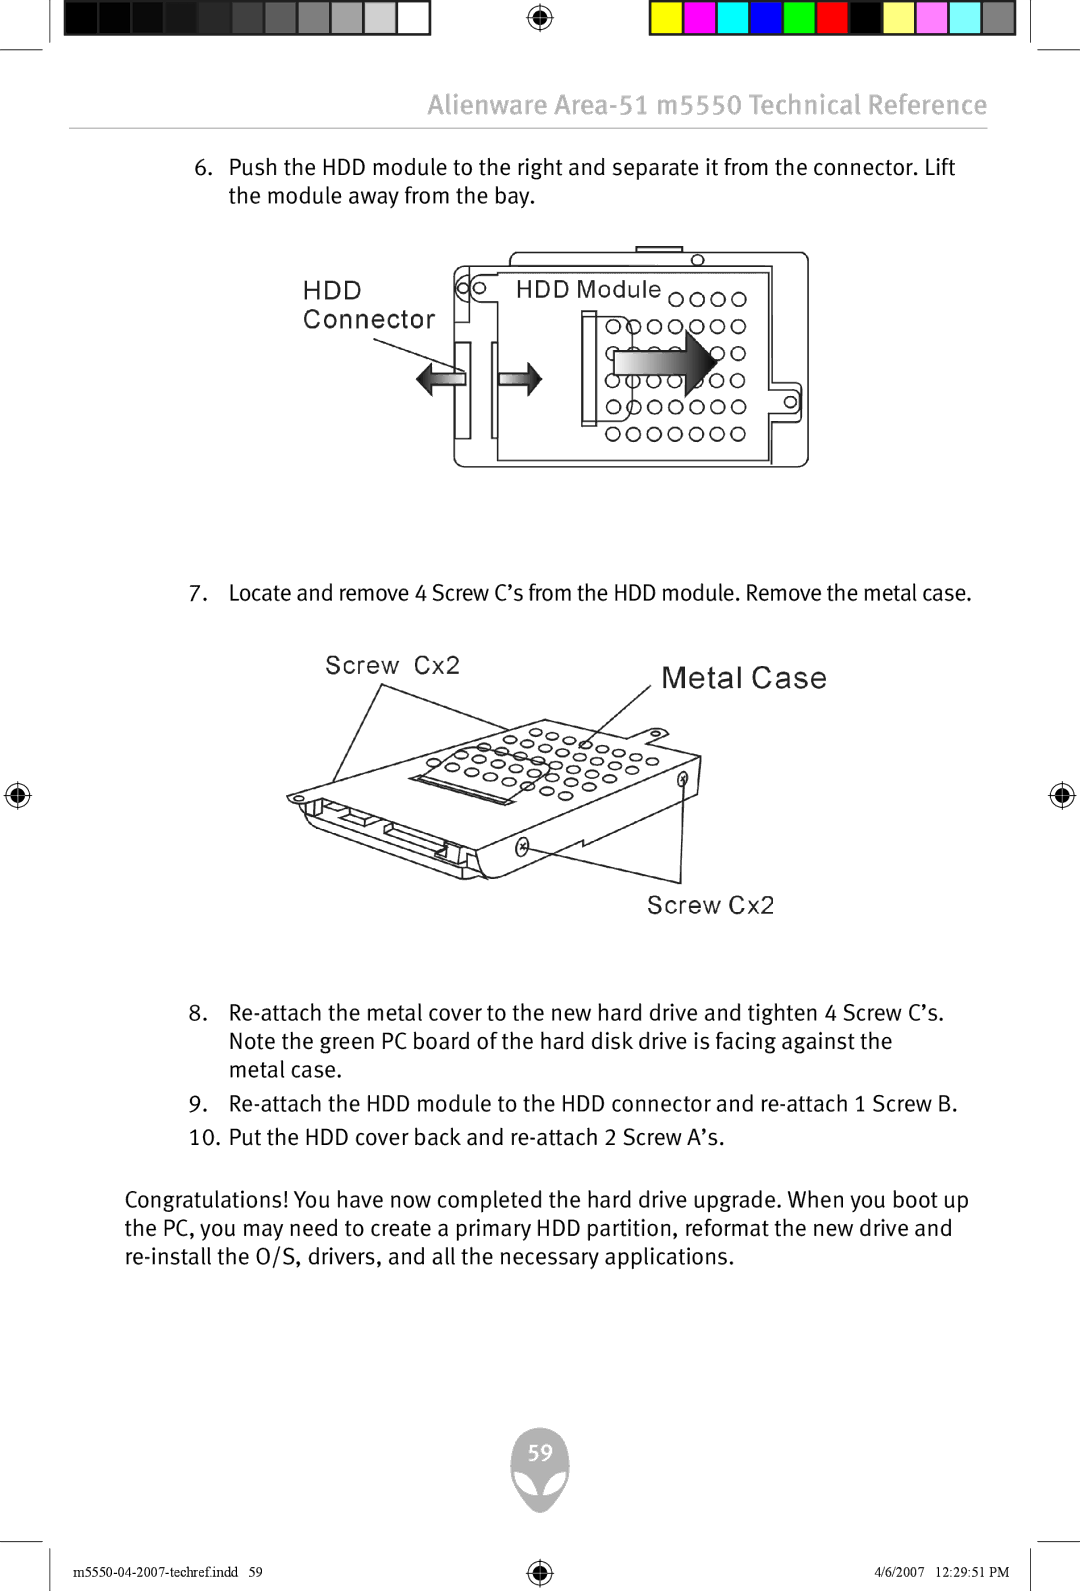
6.Push the HDD module to the right and separate it from the connector. Lift the module away from the bay.

7. Locate and remove 4 Screw C’s from the HDD module. Remove the metal case.

8.Re-attach the metal cover to the new hard drive and tighten 4 Screw C’s. Note the green PC board of the hard disk drive is facing against the metal case.

9.Re-attach the HDD module to the HDD connector and re-attach 1 Screw B.

10.Put the HDD cover back and re-attach 2 Screw A’s.

Congratulations! You have now completed the hard drive upgrade. When you boot up the PC, you may need to create a primary HDD partition, reformat the new drive and re-install the O/S, drivers, and all the necessary applications.

59

m5550-04-2007-techref.indd 59

4/6/2007 12:29:51 PM

Page 59
Image 59
Alienware user manual Alienware Area-51 m5550 Technical Reference, Put the HDD cover back and re-attach 2 Screw A’s