Installation
Accessory List
Monitor. . . . . . . . . . . . . . . . . . . . . . . . . . . . . . . . . . . . . . . . . . . . . . . . .1 Display cable (2.5m)/Power Cable. . . . . . . . . . . . . . . . . . . . . . . . . . . .1 Cord clamp . . . . . . . . . . . . . . . . . . . . . . . . . . . . . . . . . . . . . . . . . . . . . .3 Monitor stand . . . . . . . . . . . . . . . . . . . . . . . . . . . . . . . . . . . . . . . . . . . .1 Fixing Screw (M4×12) . . . . . . . . . . . . . . . . . . . . . . . . . . . . . . . . . . . . .3 Cloth. . . . . . . . . . . . . . . . . . . . . . . . . . . . . . . . . . . . . . . . . . . . . . . . . . .1 Bracket Center . . . . . . . . . . . . . . . . . . . . . . . . . . . . . . . . . . . . . . . . . . .1 Bracket Side (L/R) . . . . . . . . . . . . . . . . . . . . . . . . . . . . . . . . . . . . . . . .2 Screw (M5×8) . . . . . . . . . . . . . . . . . . . . . . . . . . . . . . . . . . . . . . . . . . .8 Owner's Manual . . . . . . . . . . . . . . . . . . . . . . . . . . . . . . . . . . . . . . . . . .1
Attaching the monitor and stand
![]() CAUTION
CAUTION
Do not install the monitor near the front passenger seat air bag system.
1 Remove the main unit attachment fitting.
Pull this part to release.
Main unit attachment fitting
2 Loosen the main unit attachment fitting with a coin etc., slide it into the track on the rear of the main unit and temporarily fasten it. Then fix it to the stand.
![]() Slide in an upward direction.
Slide in an upward direction.
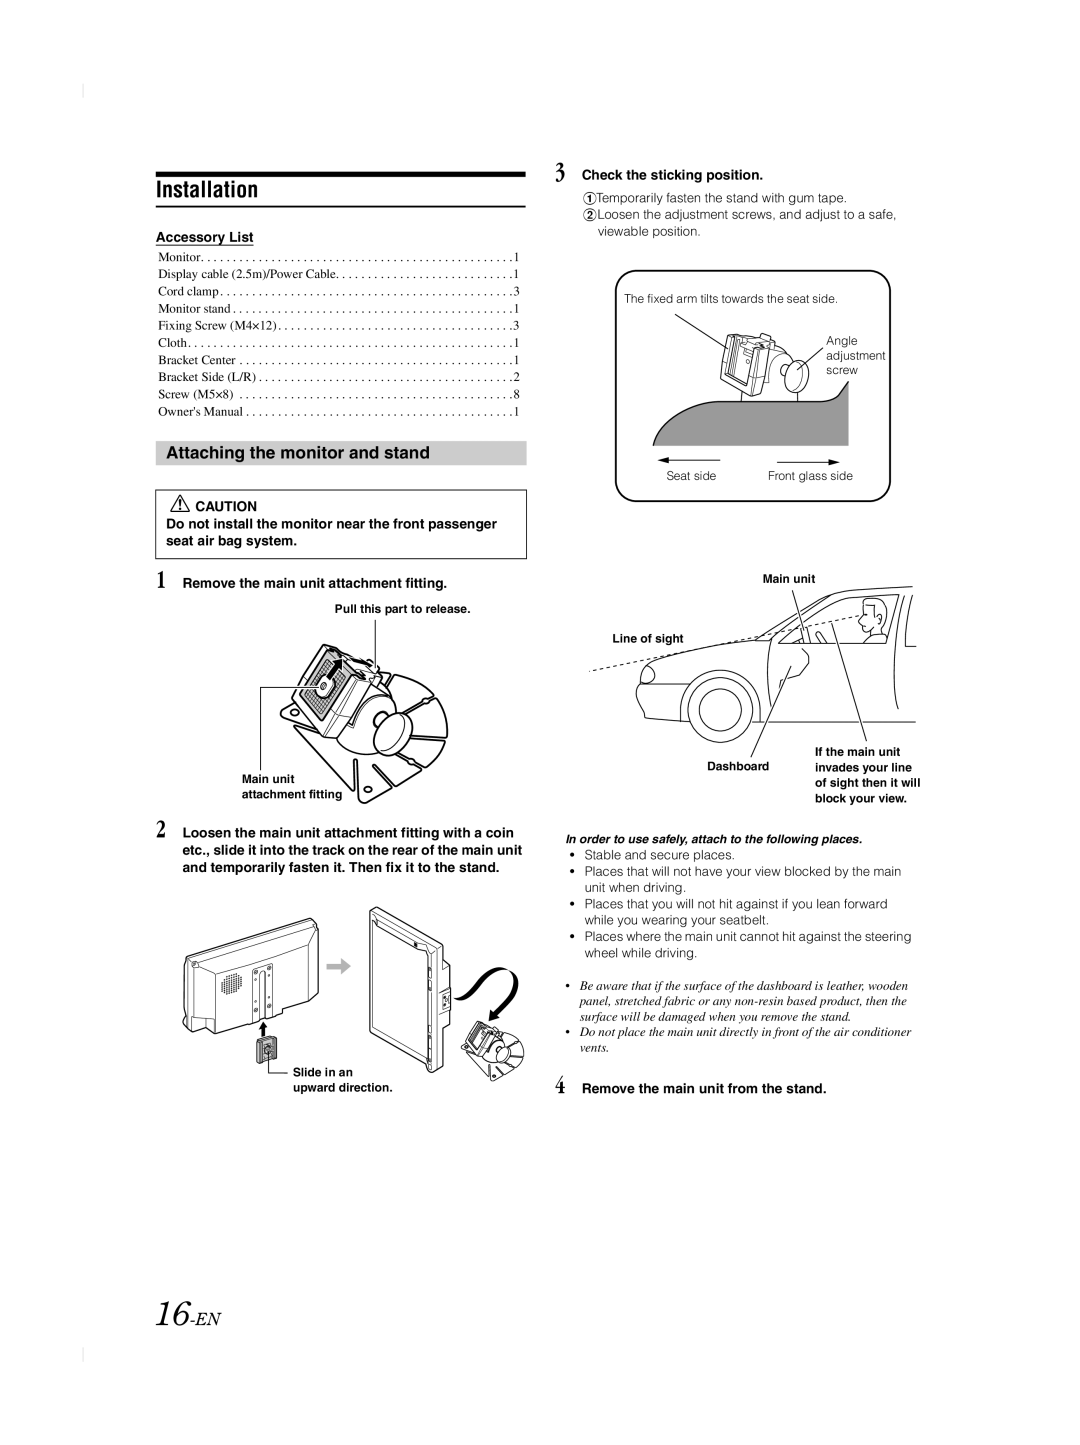
3 Check the sticking position.
ATemporarily fasten the stand with gum tape.
BLoosen the adjustment screws, and adjust to a safe, viewable position.
The fixed arm tilts towards the seat side.
Angle adjustment screw
Seat side | Front glass side |
Main unit
Line of sight
If the main unit
Dashboard invades your line of sight then it will block your view.
In order to use safely, attach to the following places.
•Stable and secure places.
•Places that will not have your view blocked by the main unit when driving.
•Places that you will not hit against if you lean forward while you wearing your seatbelt.
•Places where the main unit cannot hit against the steering wheel while driving.
•Be aware that if the surface of the dashboard is leather, wooden panel, stretched fabric or any
•Do not place the main unit directly in front of the air conditioner vents.
4 Remove the main unit from the stand.