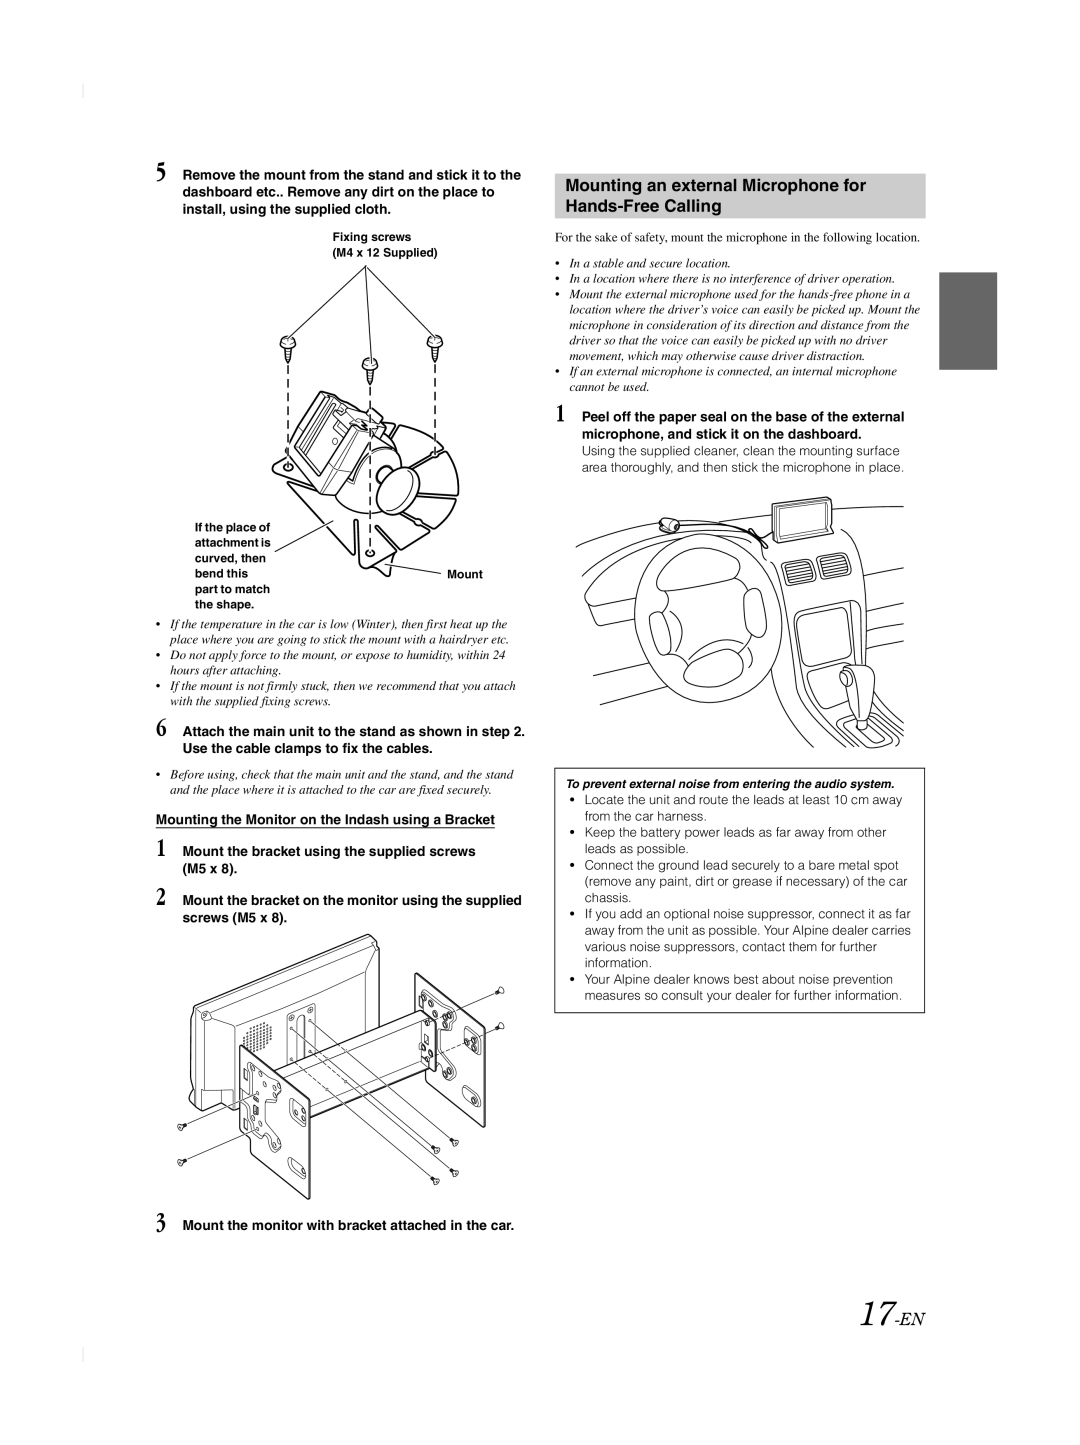
5 Remove the mount from the stand and stick it to the
dashboard etc.. Remove any dirt on the place to install, using the supplied cloth.
Fixing screws
(M4 x 12 Supplied)
If the place of attachment is curved, then
bend this | Mount |
part to match the shape.
•If the temperature in the car is low (Winter), then first heat up the place where you are going to stick the mount with a hairdryer etc.
•Do not apply force to the mount, or expose to humidity, within 24 hours after attaching.
•If the mount is not firmly stuck, then we recommend that you attach with the supplied fixing screws.
6 Attach the main unit to the stand as shown in step 2. Use the cable clamps to fix the cables.
•Before using, check that the main unit and the stand, and the stand and the place where it is attached to the car are fixed securely.
Mounting the Monitor on the Indash using a Bracket
1 Mount the bracket using the supplied screws
(M5 x 8).
2 Mount the bracket on the monitor using the supplied screws (M5 x 8).
Mounting an external Microphone for Hands-Free Calling
For the sake of safety, mount the microphone in the following location.
•In a stable and secure location.
•In a location where there is no interference of driver operation.
•Mount the external microphone used for the
•If an external microphone is connected, an internal microphone cannot be used.
1 Peel off the paper seal on the base of the external microphone, and stick it on the dashboard.
Using the supplied cleaner, clean the mounting surface area thoroughly, and then stick the microphone in place.
To prevent external noise from entering the audio system.
•Locate the unit and route the leads at least 10 cm away from the car harness.
•Keep the battery power leads as far away from other leads as possible.
•Connect the ground lead securely to a bare metal spot (remove any paint, dirt or grease if necessary) of the car chassis.
•If you add an optional noise suppressor, connect it as far away from the unit as possible. Your Alpine dealer carries various noise suppressors, contact them for further information.
•Your Alpine dealer knows best about noise prevention measures so consult your dealer for further information.
