4.Remove bushing, pulley, and key.
5.Assemble bushing and sheave as shown in figure "B". When cap screws are loosely inserted, bushing remains fully expanded to provide a sliding fit on the shaft.
6.Insert key on the shaft, then slide sheave to desired position with cap screw heads to the outside.
7.Tighten cap screws progressively. There should remain a gap between the sheave hub and the flange of the bushing.
IMPORTANT: Tighten screws evenly and progressively. Never allow the sheave to be drawn in contact with the flange of the bushing. This gap should measure from 1/8" to 1/4". Proper cap screw torque is 6
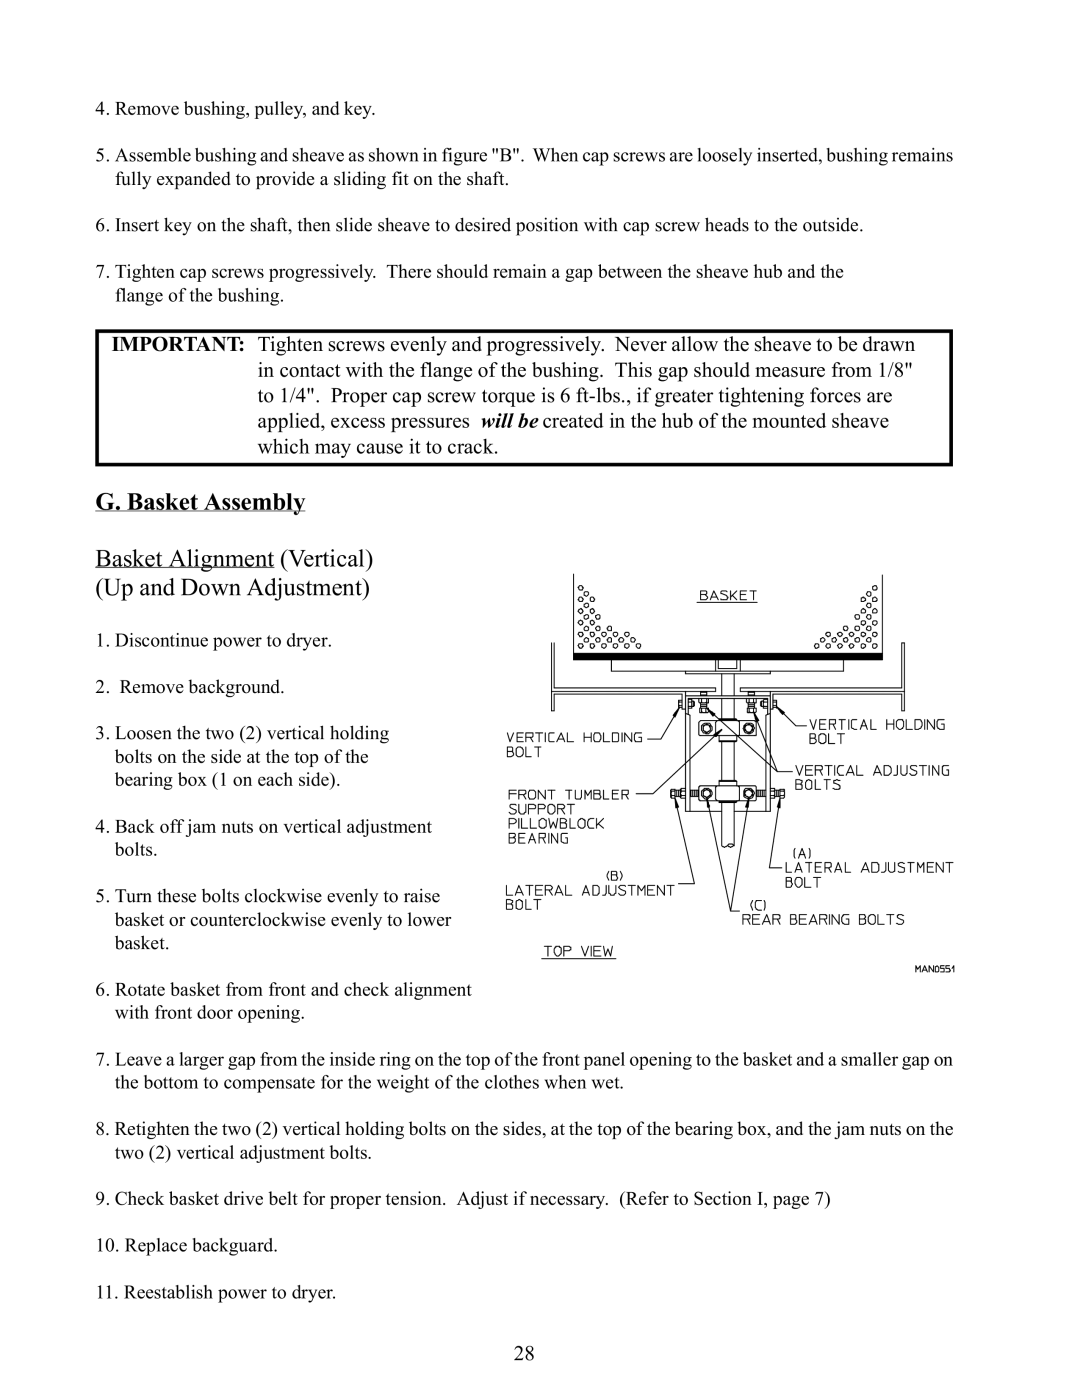
G. Basket Assembly
Basket Alignment (Vertical)
(Up and Down Adjustment)
1. Discontinue power to dryer.
2. Remove background.
3. Loosen the two (2) vertical holding
bolts on the side at the top of the bearing box (1 on each side).
4. Back off jam nuts on vertical adjustment bolts.
5. Turn these bolts clockwise evenly to raise basket or counterclockwise evenly to lower basket.
6.Rotate basket from front and check alignment with front door opening.
7.Leave a larger gap from the inside ring on the top of the front panel opening to the basket and a smaller gap on the bottom to compensate for the weight of the clothes when wet.
8.Retighten the two (2) vertical holding bolts on the sides, at the top of the bearing box, and the jam nuts on the two (2) vertical adjustment bolts.
9.Check basket drive belt for proper tension. Adjust if necessary. (Refer to Section I, page 7)
10.Replace backguard.
11.Reestablish power to dryer.
28