10.3Battery Replacement Procedure (450 through 1400 VA models)
Note: Please read the cautions in section 10.1.
Battery replacement is a safe procedure, isolated from electrical hazards. You may leave the unit and loads on for the following procedure.
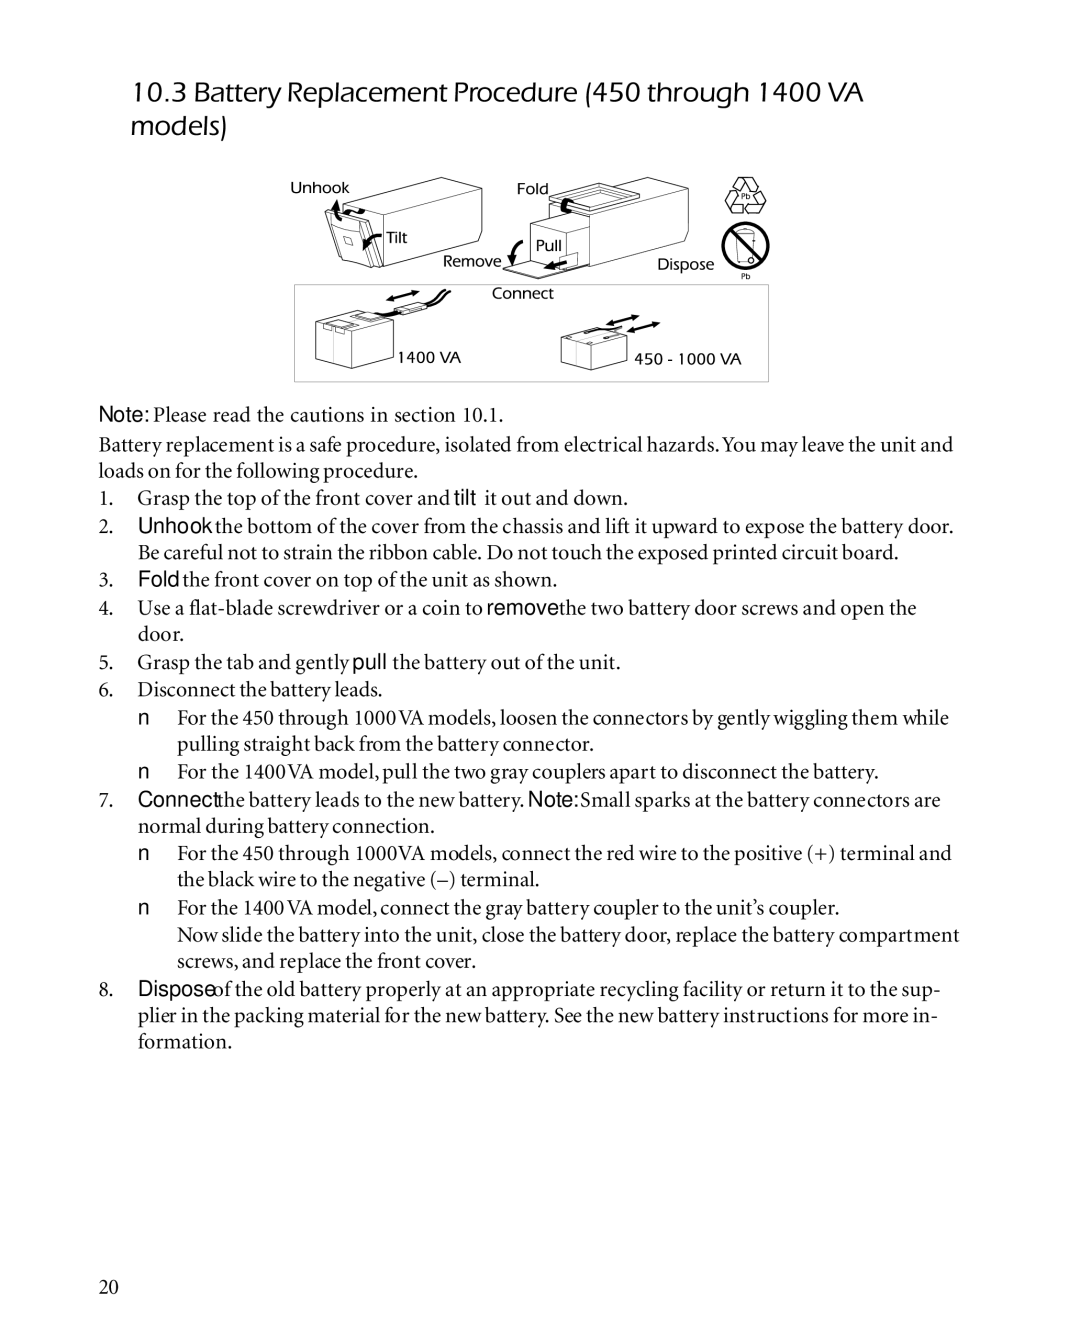
1.Grasp the top of the front cover and tilt it out and down.
2.Unhook the bottom of the cover from the chassis and lift it upward to expose the battery door. Be careful not to strain the ribbon cable. Do not touch the exposed printed circuit board.
3.Fold the front cover on top of the unit as shown.
4.Use a
5.Grasp the tab and gently pull the battery out of the unit.
6.Disconnect the battery leads.
■For the 450 through 1000VA models, loosen the connectors by gently wiggling them while pulling straight back from the battery connector.
■For the 1400VA model, pull the two gray couplers apart to disconnect the battery.
7.Connect the battery leads to the new battery. Note: Small sparks at the battery connectors are normal during battery connection.
■For the 450 through 1000VA models, connect the red wire to the positive (+) terminal and the black wire to the negative
■For the 1400 VA model, connect the gray battery coupler to the unit’s coupler.
Now slide the battery into the unit, close the battery door, replace the battery compartment screws, and replace the front cover.
8.Dispose of the old battery properly at an appropriate recycling facility or return it to the sup- plier in the packing material for the new battery. See the new battery instructions for more in- formation.
20