Anterus Configuration Manager
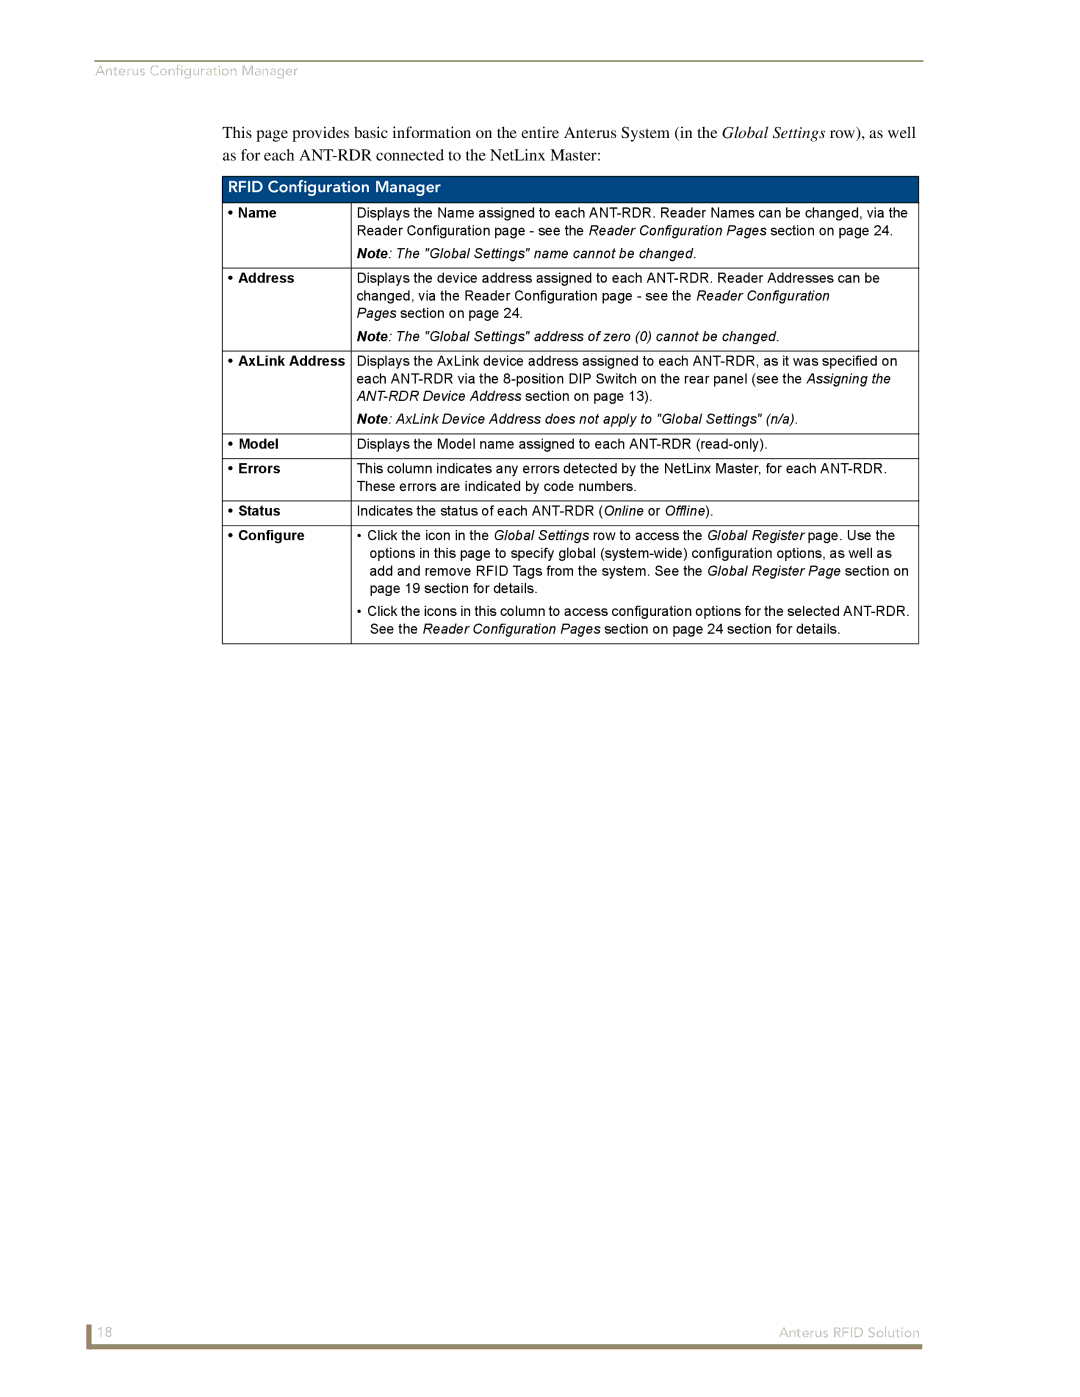
This page provides basic information on the entire Anterus System (in the Global Settings row), as well as for each
RFID Configuration Manager
• Name | Displays the Name assigned to each |
| Reader Configuration page - see the Reader Configuration Pages section on page 24. |
| Note: The "Global Settings" name cannot be changed. |
|
|
• Address | Displays the device address assigned to each |
| changed, via the Reader Configuration page - see the Reader Configuration |
| Pages section on page 24. |
| Note: The "Global Settings" address of zero (0) cannot be changed. |
|
|
• AxLink Address | Displays the AxLink device address assigned to each |
| each |
| |
| Note: AxLink Device Address does not apply to "Global Settings" (n/a). |
|
|
• Model | Displays the Model name assigned to each |
|
|
• Errors | This column indicates any errors detected by the NetLinx Master, for each |
| These errors are indicated by code numbers. |
|
|
• Status | Indicates the status of each |
|
|
• Configure | • Click the icon in the Global Settings row to access the Global Register page. Use the |
| options in this page to specify global |
| add and remove RFID Tags from the system. See the Global Register Page section on |
| page 19 section for details. |
| • Click the icons in this column to access configuration options for the selected |
| See the Reader Configuration Pages section on page 24 section for details. |
|
|
18 | Anterus RFID Solution |
