settings
menus
The Settings menus allow you to configure all aspects of your BDP100. The next few pages will go through the menu items and explain their function. The Settings menus may look daunting if you are new to setting up home cinema, but the majority of them need only be configured once when you first install the system.
The only way to view the Settings menus is on your display device (TV or projector) using the
Entering the settings menu
To enter the settings menu, use the ' and , cursor keys to highlight the ‘Settings’ option on the main menu. If the main menu is not currently displayed, press setup on the remote control to display it. Note that during the playback of music, video or JPEG files further button presses may be required to exit the folder structure. Press > to enter the Settings menu.
Unstable OSD menu or picture display?
The default BDP100 output video resolution when first powered up out of the box has been chosen according to the national standard in the country wheso that most display devices can synchronise to the video signal automatically. This can be changed in the Video Outputs section of the Setup Menus.
If the output resolution and frame rate is set to a setting your display device does not support, the picture may become unstable or may not display at all. If this happens, connect the BDP100 directly to your display using the composite video connection in order to see the menus. Once the correct video settings have been entered, a
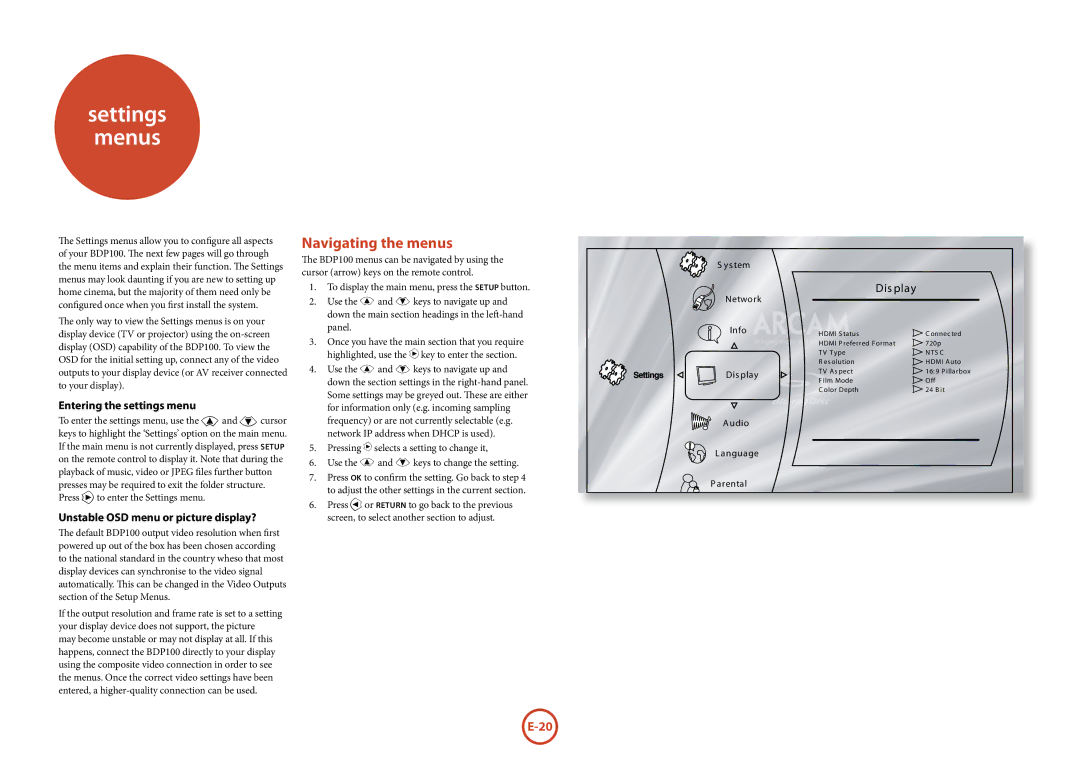
Navigating the menus
The BDP100 menus can be navigated by using the cursor (arrow) keys on the remote control.
1.To display the main menu, press the setup button.
2.Use the B and C keys to navigate up and down the main section headings in the
3.Once you have the main section that you require highlighted, use the E key to enter the section.
4.Use the B and C keys to navigate up and down the section settings in the
5.Pressing > selects a setting to change it,
6.Use the B and C keys to change the setting.
7.Press OK to confirm the setting. Go back to step 4 to adjust the other settings in the current section.
6.Press <or return to go back to the previous screen, to select another section to adjust.
S ys tem |
|
| |
Network | Dis play |
| |
|
| ||
Info | HDMI S tatus | C onnected | |
| HDMI P referred Format | 720p | |
| TV Type | NTS C | |
| R es olution | HDMI Auto | |
Dis play | TV As pect | 16:9 P illarbox | |
Film Mode | Off | ||
| |||
| C olor Depth | 24 B it | |
A udio |
|
| |
L anguage |
|
| |
P arental |
|
|