Large+Sub Pure stereo fed to left and right and extracted bass is sent to the subwoofer.
Sat+Sub Use this setting if you have ‘Small’ satellite left and right speakers. Full bass management is used in analogue stereo so that analogue sources are fed to the DSP where the bass is filtered off left and right and redirected to the subwoofer.
NOTE: The above three Stereo Mode settings pass the audio through the DSP. The Large setting can be duplicated for analogue inputs by pressing Direct to bypass the DSP.
LFE Level: Allows you to adjust the output level of the low frequency effects channel relative to the other speakers in the system. This adjustment affects the loudness of movie low frequency effects such as thunder, explosions, etc.
DTS LFE Gain:DTS soundtracks typically have the LFE track recorded 10dB lower than the main audio tracks. It is therefore necessary to compensate for this by raising the LFE output level by 10dB. Setting the DTS LFE gain to Normal activates this compensation.
Some DTS soundtracks have been recorded with the LFE signal at the same levels as the main audio and therefore require no gain compensation. For these disks set the DTS LFE gain to
Sub Stereo: Allows you to trim the subwoofer output for stereo listening. Use this trim setting, with a stereo source, to reduce the subwoofer output in stereo playback to an acceptable level. The subwoofer level for stereo music often needs to be set at a lower level than that for cinema use.This depends on various factors such as speakers, the types and styles of music to be played and personal taste.
Some external decoders may have the sub output 10dB lower than the main audio outputs. It is therefore necessary to compensate for this by raising the sub level by 10dB. Setting the
No. of subwoofers: Allows you to set the number of subwoofers used in the system from 1 to 3. All three subwoofer outputs are active all the time. This setting compensates the sub output level for the number of subwoofers in the system.
6 – THX SETTINGS
6 - THX Settings
THX Surr. EX: Auto
Boundary Gain Compensation
THX Ultra 2 Sub: No
Advanced Speaker Array
SurrBack L/R: 12 to 48in
6 - THX Settings
THX Surr. EX: Auto
Boundary Gain Compensation
THX Ultra 2 Sub: Yes
Boundary Gain Comp: On
Advanced Speaker Array
SurrBack L/R: 12 to 48in
THX Surr. EX:This can either be set to Auto or Manual and is only applicable when playing THX Surr. EX encoded material.
AutoThe AV8 automatically switches THX to THX Surr.EX when suitably encoded material is detected (this can be temporarily overridden by pressing the THX button on the AV8).![]()
Manual The AV8 will not select THX Surr. EX automatically. It can however be selected manually by pressing the THX button.
Boundary Gain Compensation
THX Ultra2 Sub: THX Ultra2 specified subwoofers can effectively deliver down to 20Hz, which may be problematic in some rooms.
Set to No if the subwoofer being used is not aTHX Ultra2 specified | English | |
subwoofer, or is not capable of a good response to 20Hz. | ||
| ||
Set to Yes If you are using a 20Hz subwoofer or a THX Ultra2 |
| |
specified subwoofer. When set to Yes, another menu option |
| |
appears. |
| |
Boundary Gain Compensation: Tailors the subwoofer low |
| |
frequency response. |
| |
When set to On, this will roll off the very low frequency |
| |
information coming from the subwoofer so that any interactions |
| |
and reinforcements from nearby boundaries (i.e., walls) can be |
| |
compensated for to reduce boom and overblown bass response. |
| |
We recommend this setting for smaller rooms. |
| |
When set to Off, the subwoofer output from the AV8 will |
| |
remain flat to 20Hz. |
| |
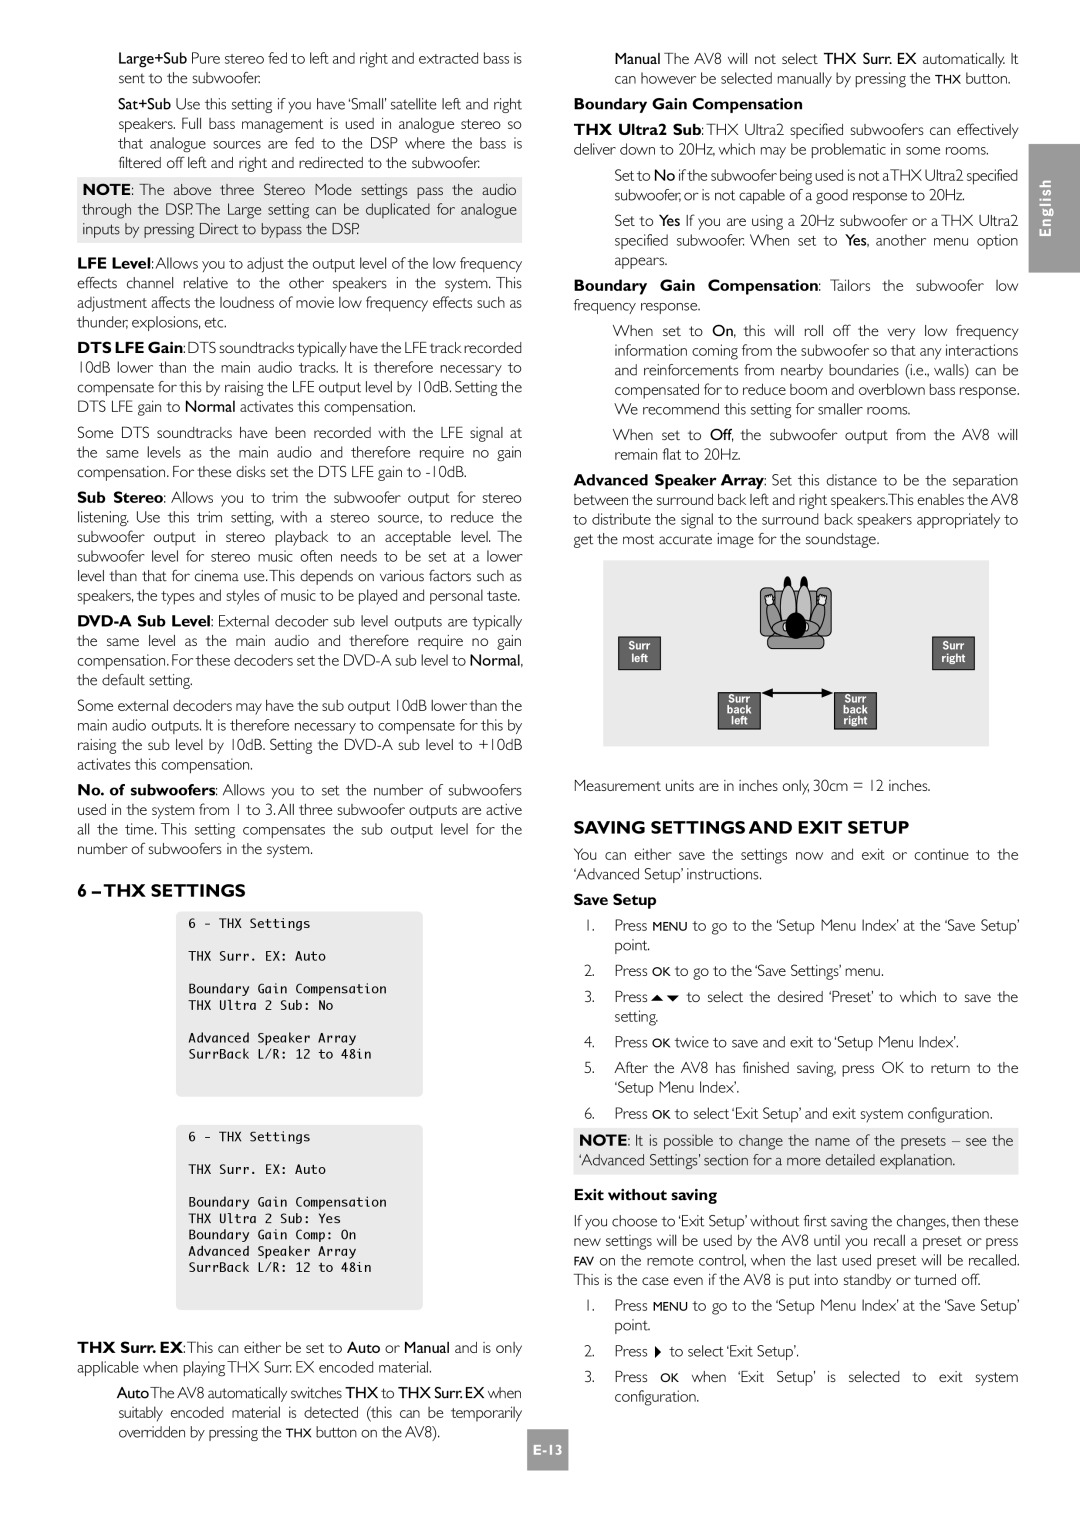
Advanced Speaker Array: Set this distance to be the separation |
| |
between the surround back left and right speakers.This enables the AV8 |
| |
to distribute the signal to the surround back speakers appropriately to |
| |
get the most accurate image for the soundstage. |
|
Surr | Surr |
left | right |
Surr ![]()
![]() Surr
Surr
backback
leftright
Measurement units are in inches only, 30cm = 12 inches.
SAVING SETTINGS AND EXIT SETUP
You can either save the settings now and exit or continue to the ‘Advanced Setup’ instructions.
Save Setup
1.Press MENU to go to the ‘Setup Menu Index’ at the ‘Save Setup’ point.
2.Press OK to go to the ‘Save Settings’ menu.
3.Press56to select the desired ‘Preset’ to which to save the setting.
4.Press OK twice to save and exit to ‘Setup Menu Index’.
5.After the AV8 has finished saving, press OK to return to the ‘Setup Menu Index’.
6.Press OK to select ‘Exit Setup’ and exit system configuration.
NOTE: It is possible to change the name of the presets – see the ‘Advanced Settings’ section for a more detailed explanation.
Exit without saving
If you choose to ‘Exit Setup’ without first saving the changes, then these new settings will be used by the AV8 until you recall a preset or press FAV on the remote control, when the last used preset will be recalled. This is the case even if the AV8 is put into standby or turned off.
1.Press MENU to go to the ‘Setup Menu Index’ at the ‘Save Setup’ point.
2.Press4to select ‘Exit Setup’.
3.Press OK when ‘Exit Setup’ is selected to exit system configuration.