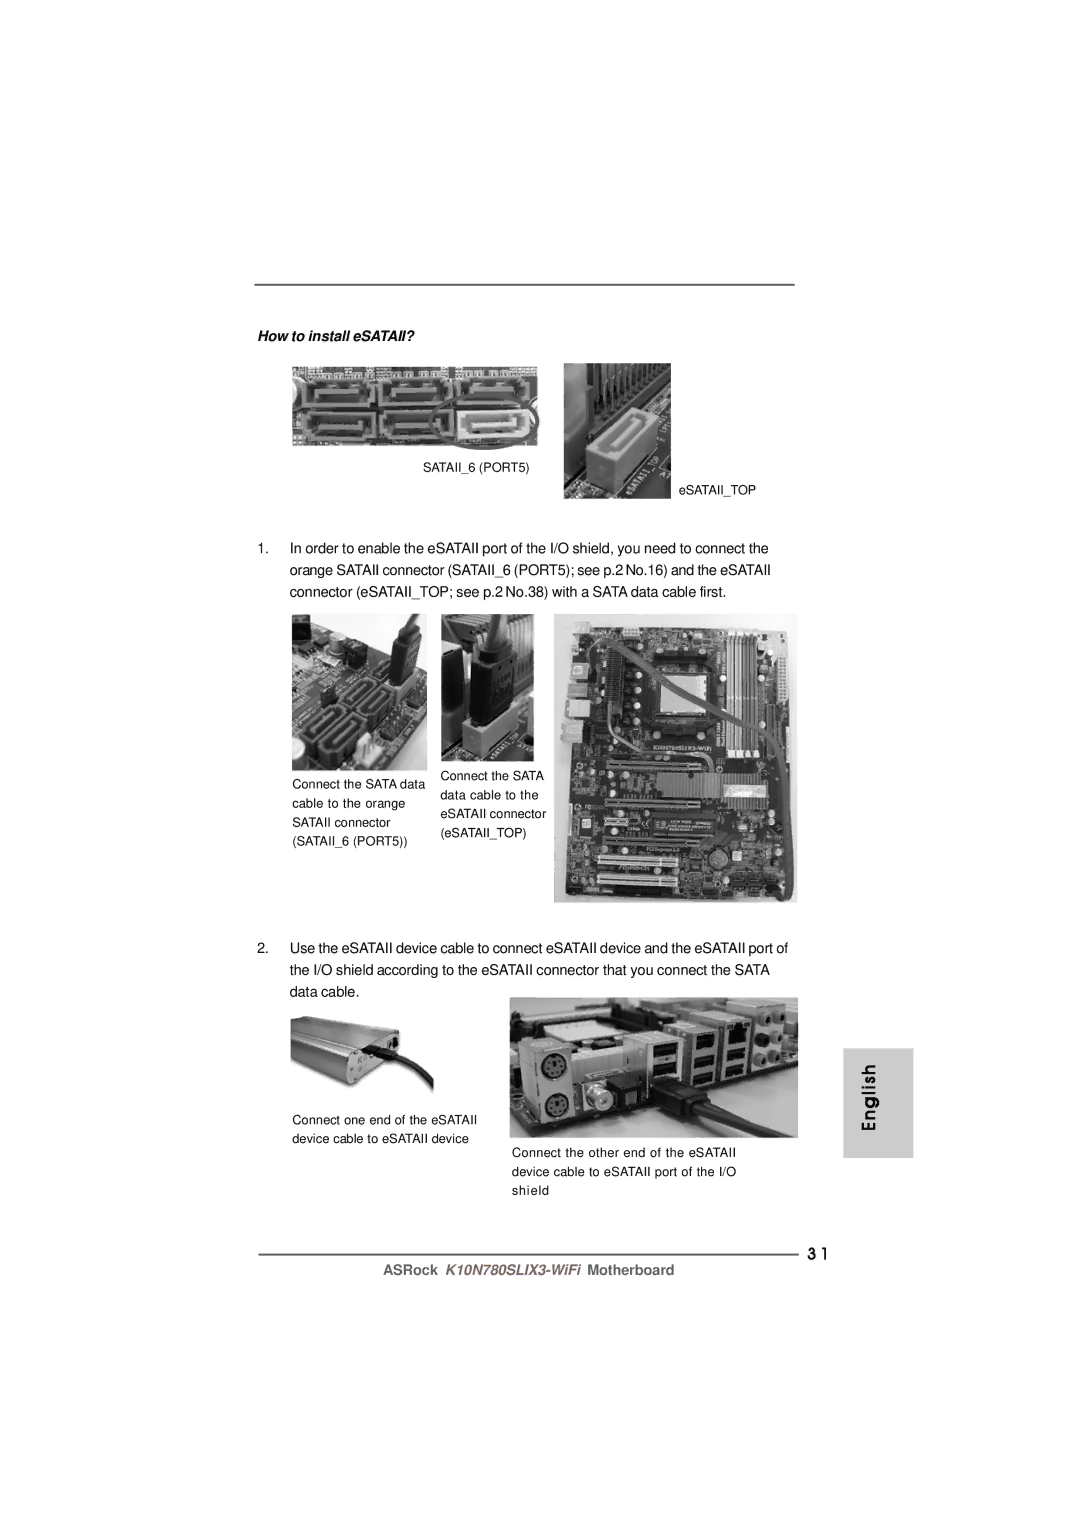
How to install eSATAII?
SATAII_6 (PORT5)
eSATAII_TOP
1.In order to enable the eSATAII port of the I/O shield, you need to connect the orange SATAII connector (SATAII_6 (PORT5); see p.2 No.16) and the eSATAII connector (eSATAII_TOP; see p.2 No.38) with a SATA data cable first.
Connect the SATA data | Connect the SATA | |
data cable to the | ||
cable to the orange | ||
eSATAII connector | ||
SATAII connector | ||
(eSATAII_TOP) | ||
(SATAII_6 (PORT5)) | ||
|
2.Use the eSATAII device cable to connect eSATAII device and the eSATAII port of the I/O shield according to the eSATAII connector that you connect the SATA data cable.
Connect one end of the eSATAII device cable to eSATAII device
English
Connect the other end of the eSATAII device cable to eSATAII port of the I/O shield
3 1
ASRock