REMOTE INTELLIGENT SENSOR - AREA MONITOR
4MAINTENANCE AND TROUBLESHOOTING
4.1MAINTENANCE GENERAL
Under normal circumstances, recommended routine maintenance consists of cleaning the exterior of the enclosure, carrying out a check of key parameters, and checking certain parts for mechanical tightness. In addition, occasional cleaning of the input path and optics block may be required under adverse sampling conditions. Each of these procedures is dealt with below.
NOTE: Most procedures require the unit to be in TEST Mode. To enter TEST Mode see Section 2.8.2.
4.2VERIFYING THAT A GAS ALARM WAS CAUSED BY GAS
In situations where the gas level monitored is continuously zero and an alarm occurs, there may be a tendency to assume that a system ‘fault’ is responsible. Under these circumstances first assume the alarm is genuine and take appropriate
Allow the Test data to cycle to the light level value (track 1), HOLD the display and check that the reading is near 220. RELEASE the track 1 display and then HOLD to check track 2. RELEASE track 2 and again press the TEST Mode button to return to the NORMAL mode.
The light fault will now be clear and the only
fault icon displayed should be the ‘door open’ symbol. The ‘Flashing Bells’ and the numeric display will remain until the end of the current four minute sampling period (which commenced on the exit from the TEST Mode).
4.4ADJUSTING LIGHT LEVELS
RIS’s manufactured before April 1992 have adjustment potentiometers under the tape cassette which has to be removed before light levels can be adjusted (see Supplement A ). This is not necessary for the adjustment on units made after April ’92, which is shown below:
Install the tape cassette if not present. Light levels can only be adjusted with the cassette in- stalled.
Enter the TEST Mode by pressing the red button on the back of the door. Wait until the display has cycled to show:
action. The presence of gas is easily verified. Put the system into the TEST Mode and
remove the cassette. Examine the tape in the gate area and toward the take up spool. The presence of a circular stain, or succession of stains, will verify that gas has been sampled. The nature of the stains will show the level of exposure as follows:
A faint stain, or succession of faint stains increasing in density, suggests an initially low concentration that is slowly increasing. As monitor-
Press the HOLD/RELEASE button onthefront panel firmlysothatthedisplay shows:
200 to 254
1
200 to 254
1 HOLD
ing continued, the stain density would diminish as the contamination dispersed.
If the stains are intense, or become so quickly, and then remain at the same high density, a significant concentration has been sampled. (The constant, dense stains, show that the system was operating in the ‘time mode’ which only occurs at higher concentrations. See Section 3.2.2).
4.3CLEARING A SPURIOUS ALARM
If the tape gate is opened without putting the system into the TEST Mode, an ‘alarm’ may be initiated. It is also likely that a ‘light fault’ will occur. To clear these conditions:
Open the door (if it had been closed), and enter the TEST Mode. Ensure that there is a cassette mounted and that tape is in the gate which should be closed.
Figure 4-1. Entering TEST Mode
This display status will be maintained for
5 minutes, or until the HOLD/RELEASE button is pressed again.
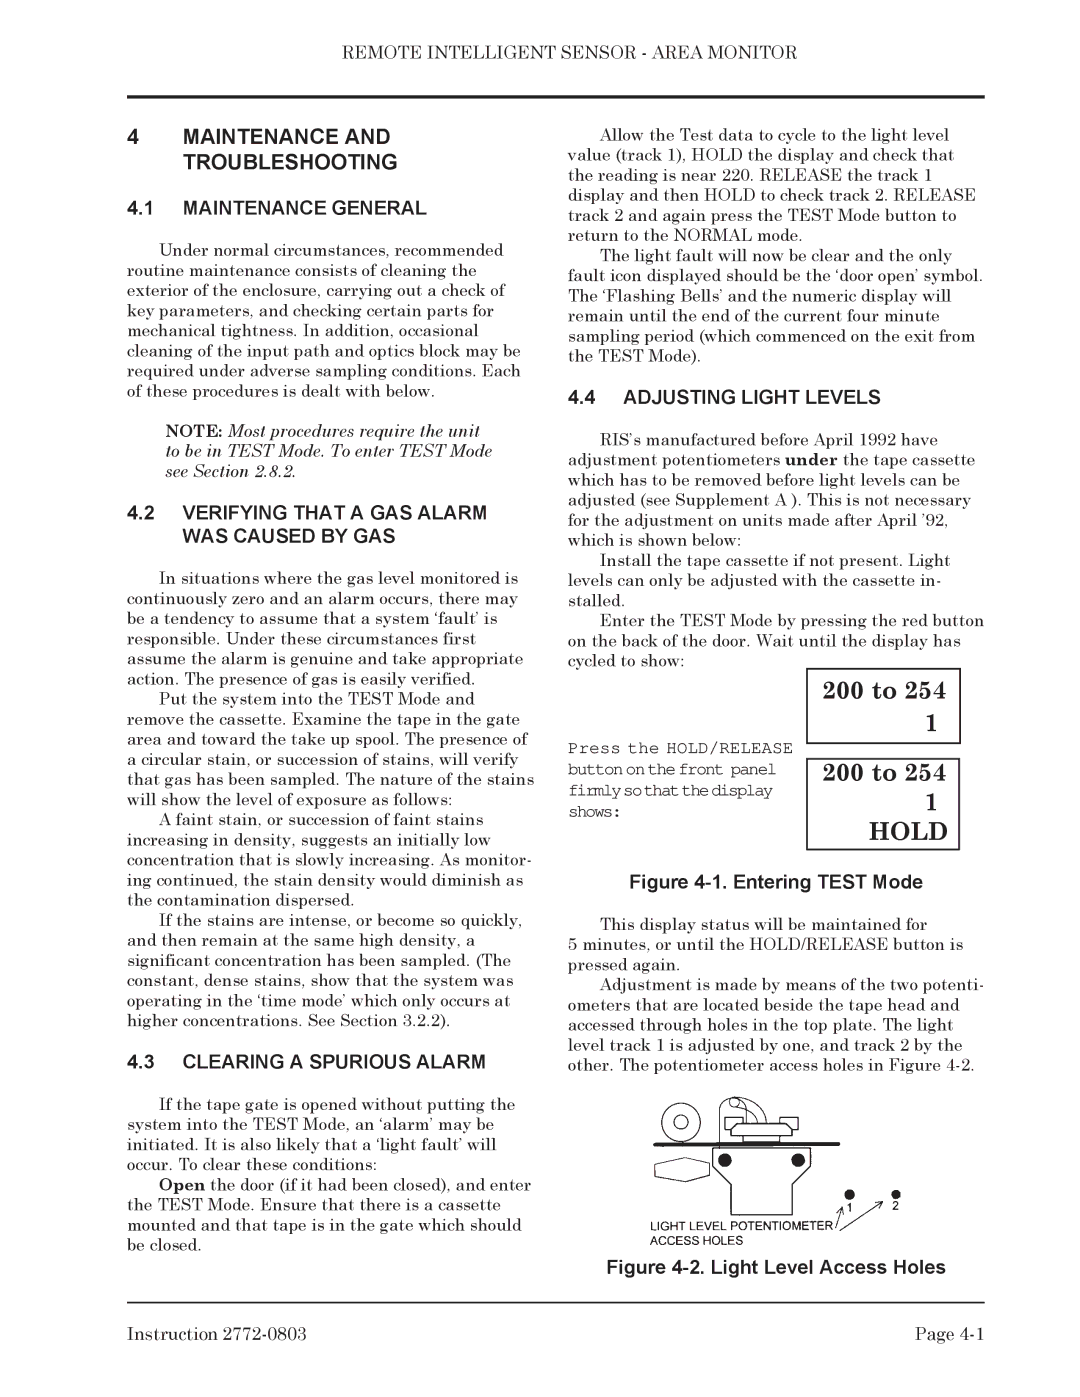
Adjustment is made by means of the two potenti- ometers that are located beside the tape head and accessed through holes in the top plate. The light level track 1 is adjusted by one, and track 2 by the other. The potentiometer access holes in Figure
Figure 4-2. Light Level Access Holes
Instruction | Page |