section
|
| Installation | |
1 | Your PRO2 PS/2 is now mounted securely into the bracket and you | ||
| |||
| are ready to connect cables to the back of the unit. | ||
2 | |||
Single PRO2 PS/2 Installation | |||
3This section provides complete instructions for the hardware setup of a single PRO2 PS/2. (F1DA104Pea, F1DA108Pea, and F1DA116Pea) PS/2 Installation: Keyboard, Video, and Mouse Connections
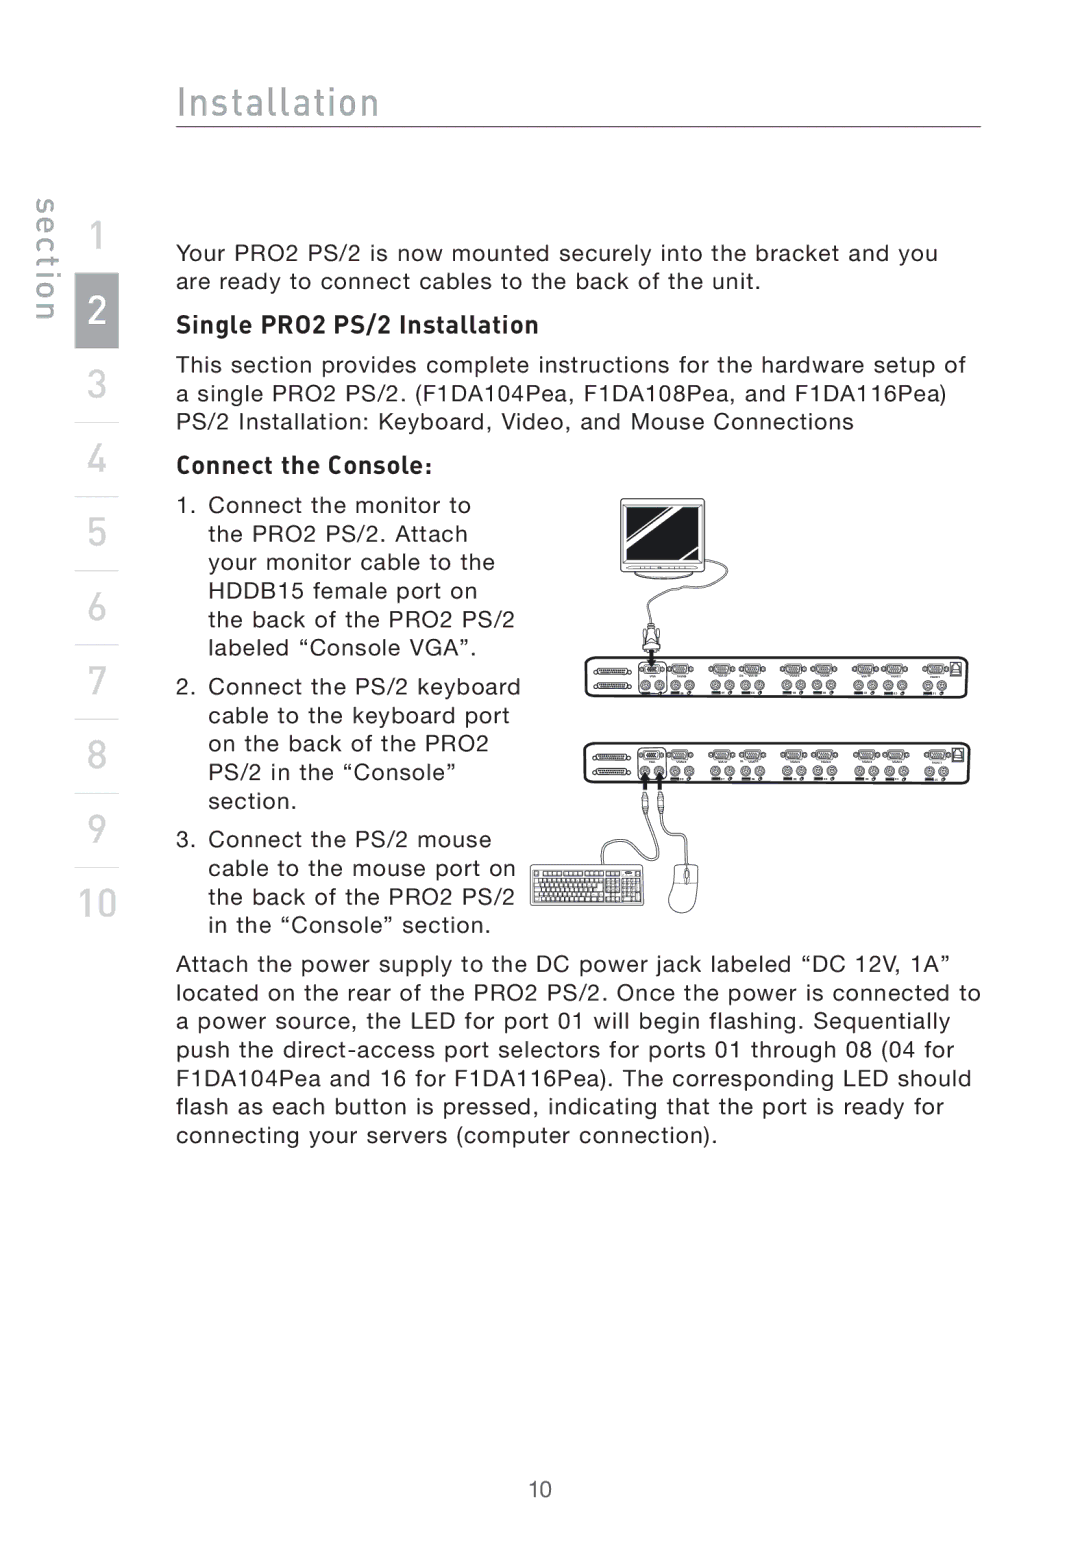
4Connect the Console:
1.Connect the monitor to
5 the PRO2 PS/2. Attach
your monitor cable to the
6HDDB15 female port on the back of the PRO2 PS/2
7 | labeled “Console VGA”. |
|
|
|
|
|
|
|
|
|
|
|
2. Connect the PS/2 keyboard |
| �� | �� | �� |
| �� | �� | �� | �� |
| �� | |
|
| ��� | ����� | ����� | �� ��� �� | ����� | ����� | ����� | ��� �� | ����� | ||
8 | cable to the keyboard port |
|
|
|
|
|
|
|
|
|
|
|
on the back of the PRO2 |
|
|
|
|
|
|
|
|
|
|
| |
|
|
|
|
|
|
|
|
|
|
|
| |
| PS/2 in the “Console” |
| �� | �� | �� |
| �� | �� | �� | �� |
| �� |
|
| ��� | ����� | ����� | �� ��� | �� | ����� | ����� | ����� | ��� | �� | ����� |
9 | section. |
|
|
|
|
|
|
|
|
|
|
|
3. Connect the PS/2 mouse |
|
|
|
|
|
|
|
|
|
|
| |
10 | cable to the mouse port on |
|
|
|
|
|
|
|
|
|
|
|
the back of the PRO2 PS/2 |
|
|
|
|
|
|
|
|
|
|
| |
|
|
|
|
|
|
|
|
|
|
|
| |
| in the “Console” section. |
|
|
|
|
|
|
|
|
|
|
|
Attach the power supply to the DC power jack labeled “DC 12V, 1A” located on the rear of the PRO2 PS/2. Once the power is connected to a power source, the LED for port 01 will begin flashing. Sequentially push the
10
