Assembly4
Clean all parts with mild soap and water and
let dry before assembly and applying electrical power to the equipment.
The Thermoglaze unit is design for ease of assembly and use. The system is crated in a manner so there are few pieces to put together once the Thermoglaze is in place for production.
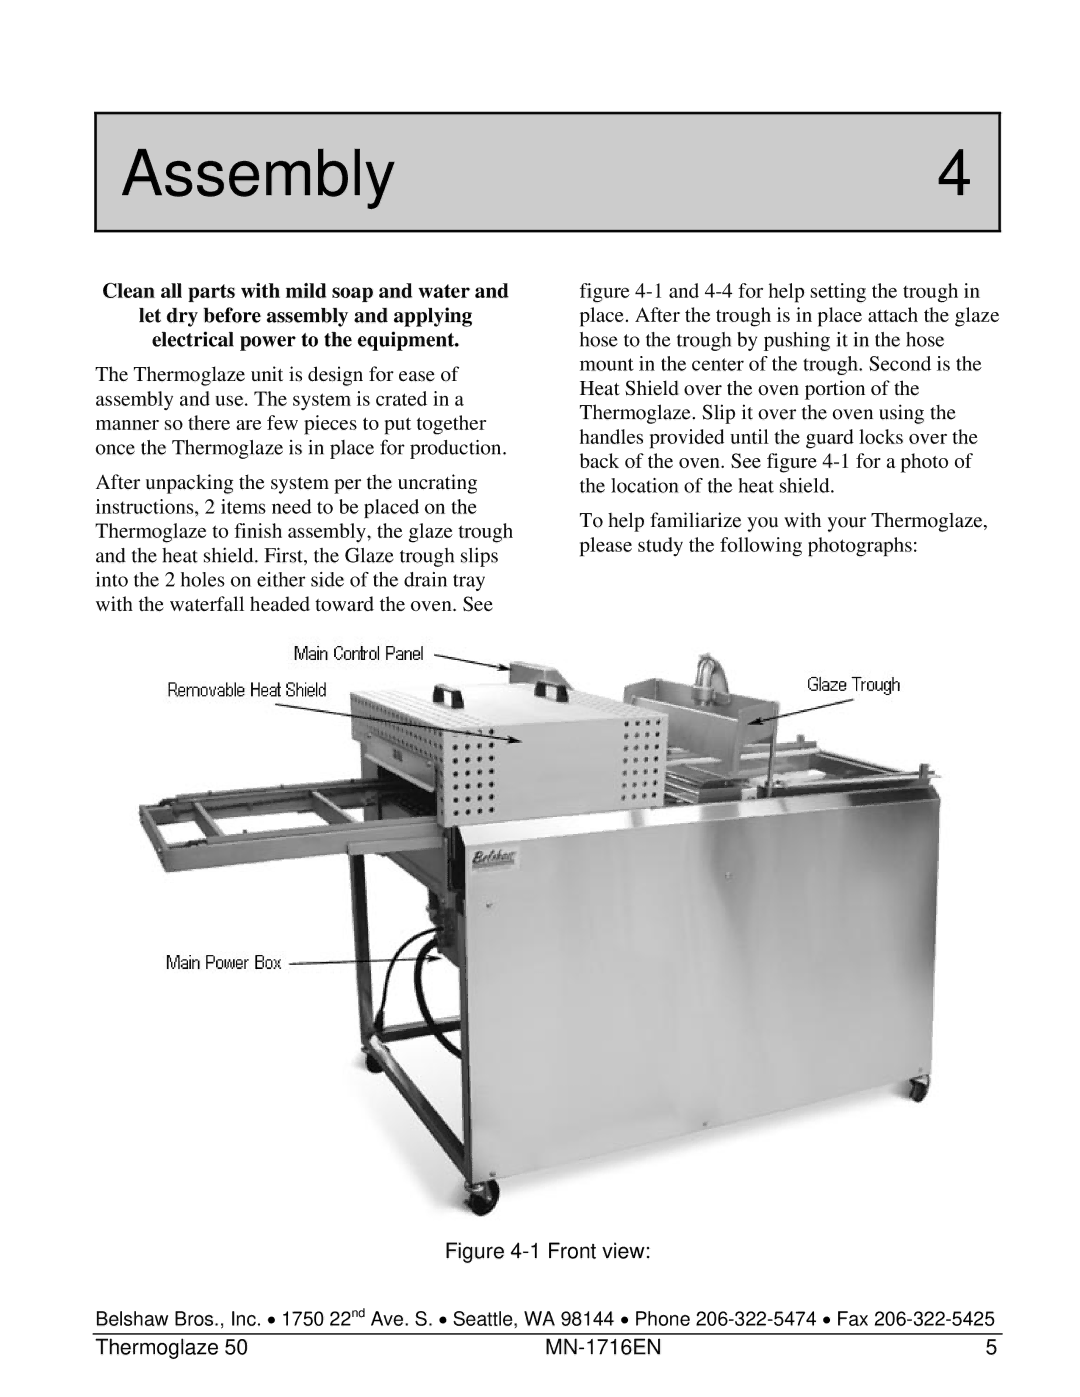
After unpacking the system per the uncrating instructions, 2 items need to be placed on the Thermoglaze to finish assembly, the glaze trough and the heat shield. First, the Glaze trough slips into the 2 holes on either side of the drain tray with the waterfall headed toward the oven. See
figure 4-1 and 4-4 for help setting the trough in place. After the trough is in place attach the glaze hose to the trough by pushing it in the hose mount in the center of the trough. Second is the Heat Shield over the oven portion of the Thermoglaze. Slip it over the oven using the handles provided until the guard locks over the back of the oven. See figure 4-1 for a photo of the location of the heat shield.
To help familiarize you with your Thermoglaze, please study the following photographs:
Figure 4-1 Front view:
Belshaw Bros., Inc. • 1750 22nd Ave. S. • Seattle, WA 98144 • Phone
Thermoglaze 50 | 5 |