English
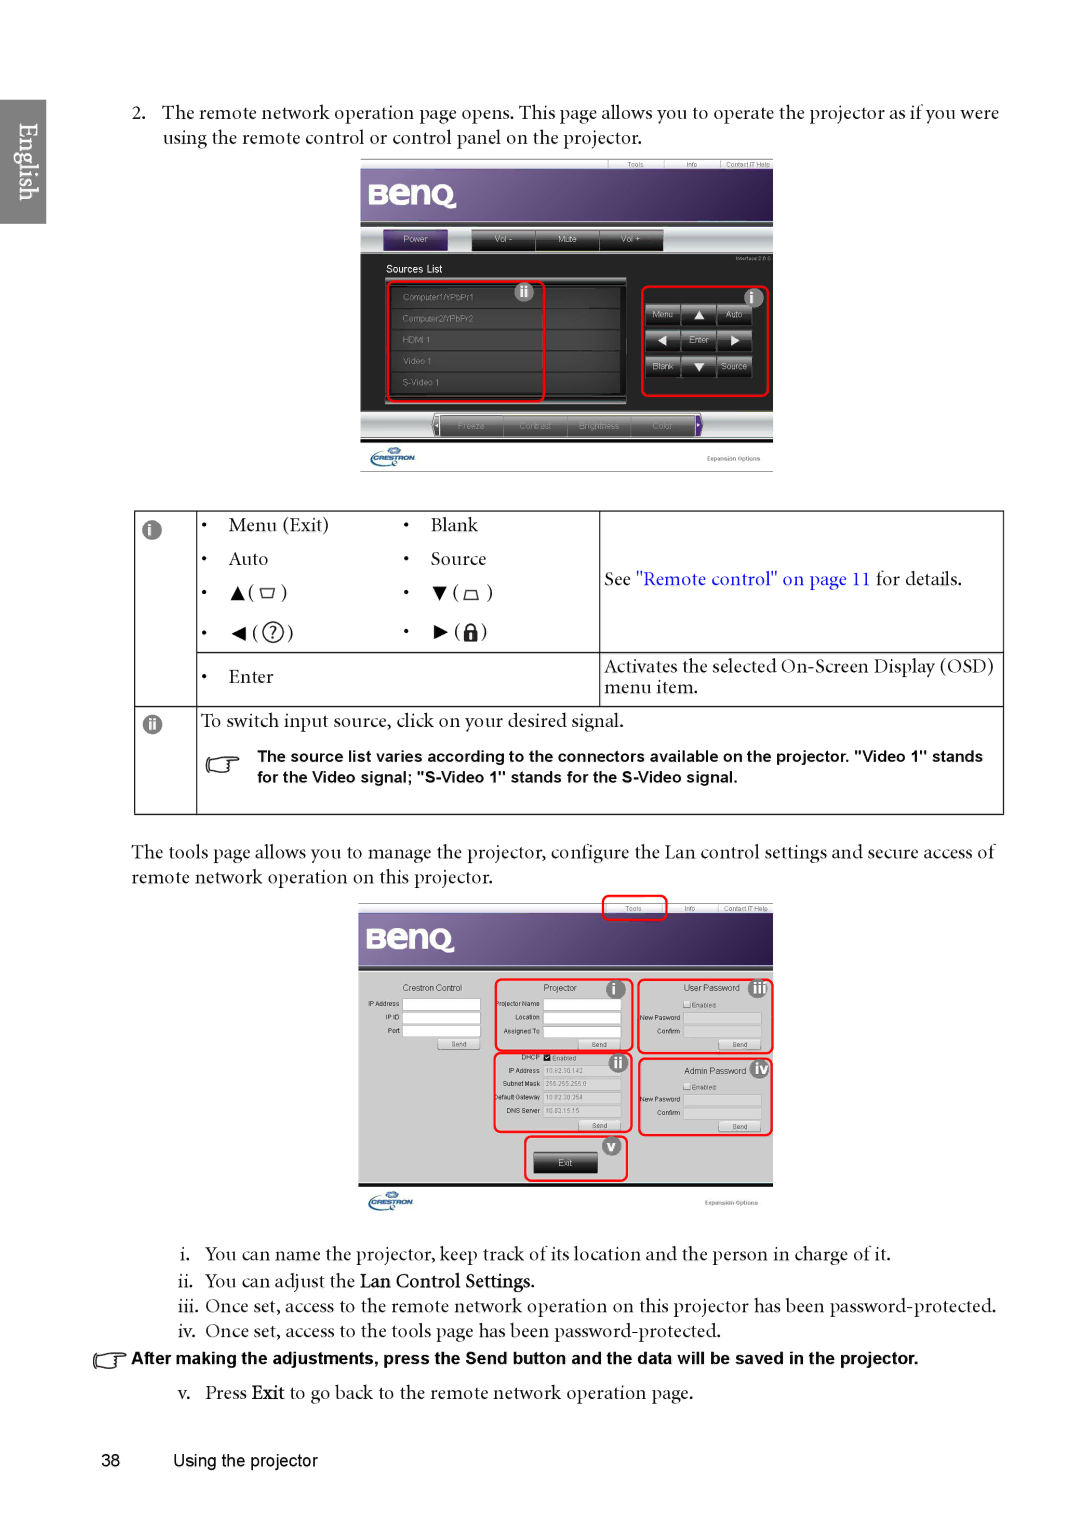
2.The remote network operation page opens. This page allows you to operate the projector as if you were using the remote control or control panel on the projector.
ii | i |
|
i | • | Menu (Exit) | • | Blank |
|
| |
| • | Auto |
| • | Source | See "Remote control" on page 11 for details. | |
| • | ( | ) | • | ( | ) | |
|
| ||||||
| • | ( | ) | • | ( | ) |
|
|
|
|
|
|
|
|
|
| • | Enter |
|
|
|
| Activates the selected |
|
|
|
|
| menu item. | ||
|
|
|
|
|
|
| |
|
|
|
|
|
|
|
|
iiTo switch input source, click on your desired signal.
The source list varies according to the connectors available on the projector. ''Video 1'' stands for the Video signal;
The tools page allows you to manage the projector, configure the Lan control settings and secure access of remote network operation on this projector.
iiii
iiiv
v
i.You can name the projector, keep track of its location and the person in charge of it. ii. You can adjust the Lan Control Settings.
iii. Once set, access to the remote network operation on this projector has been
![]() After making the adjustments, press the Send button and the data will be saved in the projector.
After making the adjustments, press the Send button and the data will be saved in the projector.
v. Press Exit to go back to the remote network operation page.
38 Using the projector
