SPEED AND FLOW CONTROL SETTINGS | |
TWO SPEED CONTROL SWITCH - (FIGURE H) (MODEL BDPS600 ONLY) | H |
Your sprayer has two different speed settings. | |
or• To2.change speeds, press the right side of the switch. An LED indicates setting 1 | |
• Use the lower speed setting (Setting 1) to obtain greater control over your spray- |
|
ing project, while the higher speed (Setting 2) allows for greater coverage in a |
|
shorter amount of time. |
|
• The lower speed level allows you to get closer to your work with less overspray. |
|
Low setting works well with lighter bodied or more free flowing paints like stains |
|
and sealers. |
|
• More heavy bodied paints, like water based latex, will need setting number 2 |
|
• Use the speed control setting in conjuction with the flow control knob and test for |
|
what works best with your material being sprayed. |
|
Set the flow control to a lower or medium settting | I |
Set the flow control to medium or higher setting | |
FLOW CONTROL KNOB - (FIGURE I) | |
The flow control knob regulates the amount of liquid that can be sprayed. | |
TIP:• SelectAlwayslow (1),testmediumthe spray(5) orpatternhigh (9)ononscrapthe flowcardboardcontrol knob.or similar material | |
first. Begin with flow control knob on the highest flow setting. Heavier, |
|
thicker materials should be sprayed on the higher setting closer to #9. |
|
Thinner materials should be sprayed on the lower setting closer to #1. |
|
OPERATION | J |
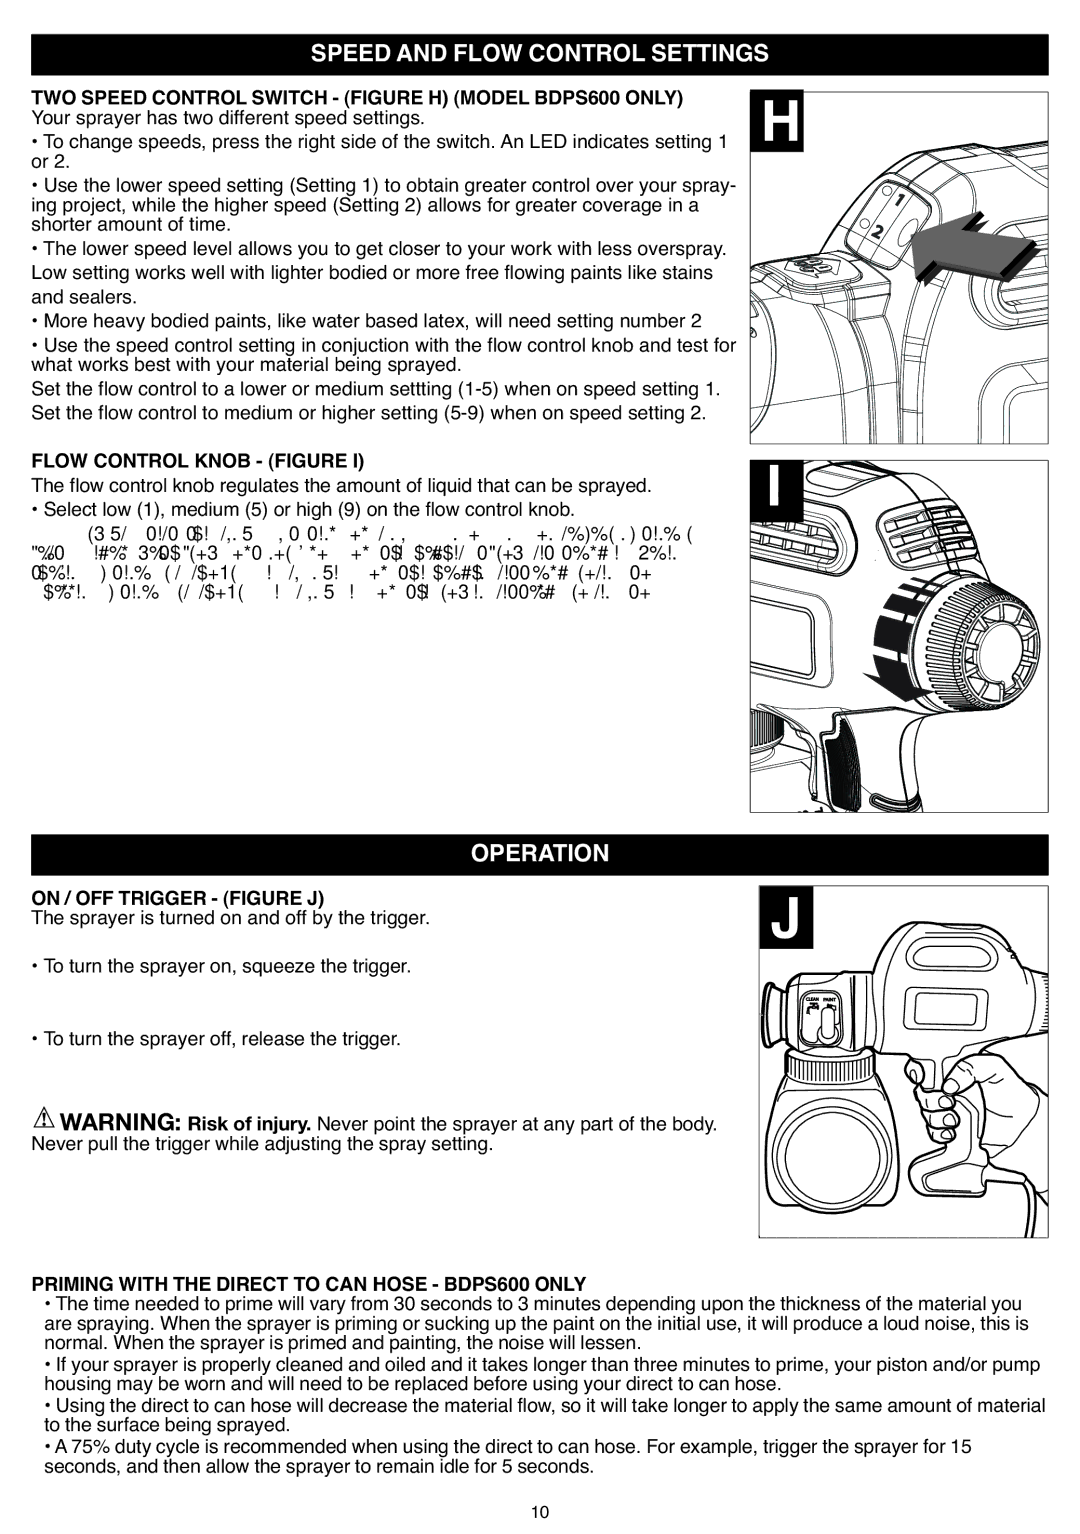
ON / OFF TRIGGER - (FIGURE J) | |
The sprayer is turned on and off by the trigger. | |
• To turn the sprayer on, squeeze the trigger. | |
• To turn the sprayer off, release the trigger. |
|
WARNING: Risk of injury. Never point the sprayer at any part of the body. |
|
Never pull the trigger while adjusting the spray setting. |
|
PRIMING WITH THE DIRECT TO CAN HOSE - BDPS600 ONLY
• The time needed to prime will vary from 30 seconds to 3 minutes depending upon the thickness of the material you are spraying. When the sprayer is priming or sucking up the paint on the initial use, it will produce a loud noise, this is normal. When the sprayer is primed and painting, the noise will lessen.
• If your sprayer is properly cleaned and oiled and it takes longer than three minutes to prime, your piston and/or pump housing may be worn and will need to be replaced before using your direct to can hose.
• Using the direct to can hose will decrease the material flow, so it will take longer to apply the same amount of material to the surface being sprayed.
• A 75% duty cycle is recommended when using the direct to can hose. For example, trigger the sprayer for 15 seconds, and then allow the sprayer to remain idle for 5 seconds.
10