Third, the quick clean system allows for a faster
HOW TO USE THE QUICK CLEAN SYSTEM
• Unplug the sprayer from the power source.
• Fill the quick clean fill cup, to the 95ml fill line, with water or the approprate cleaning solution.
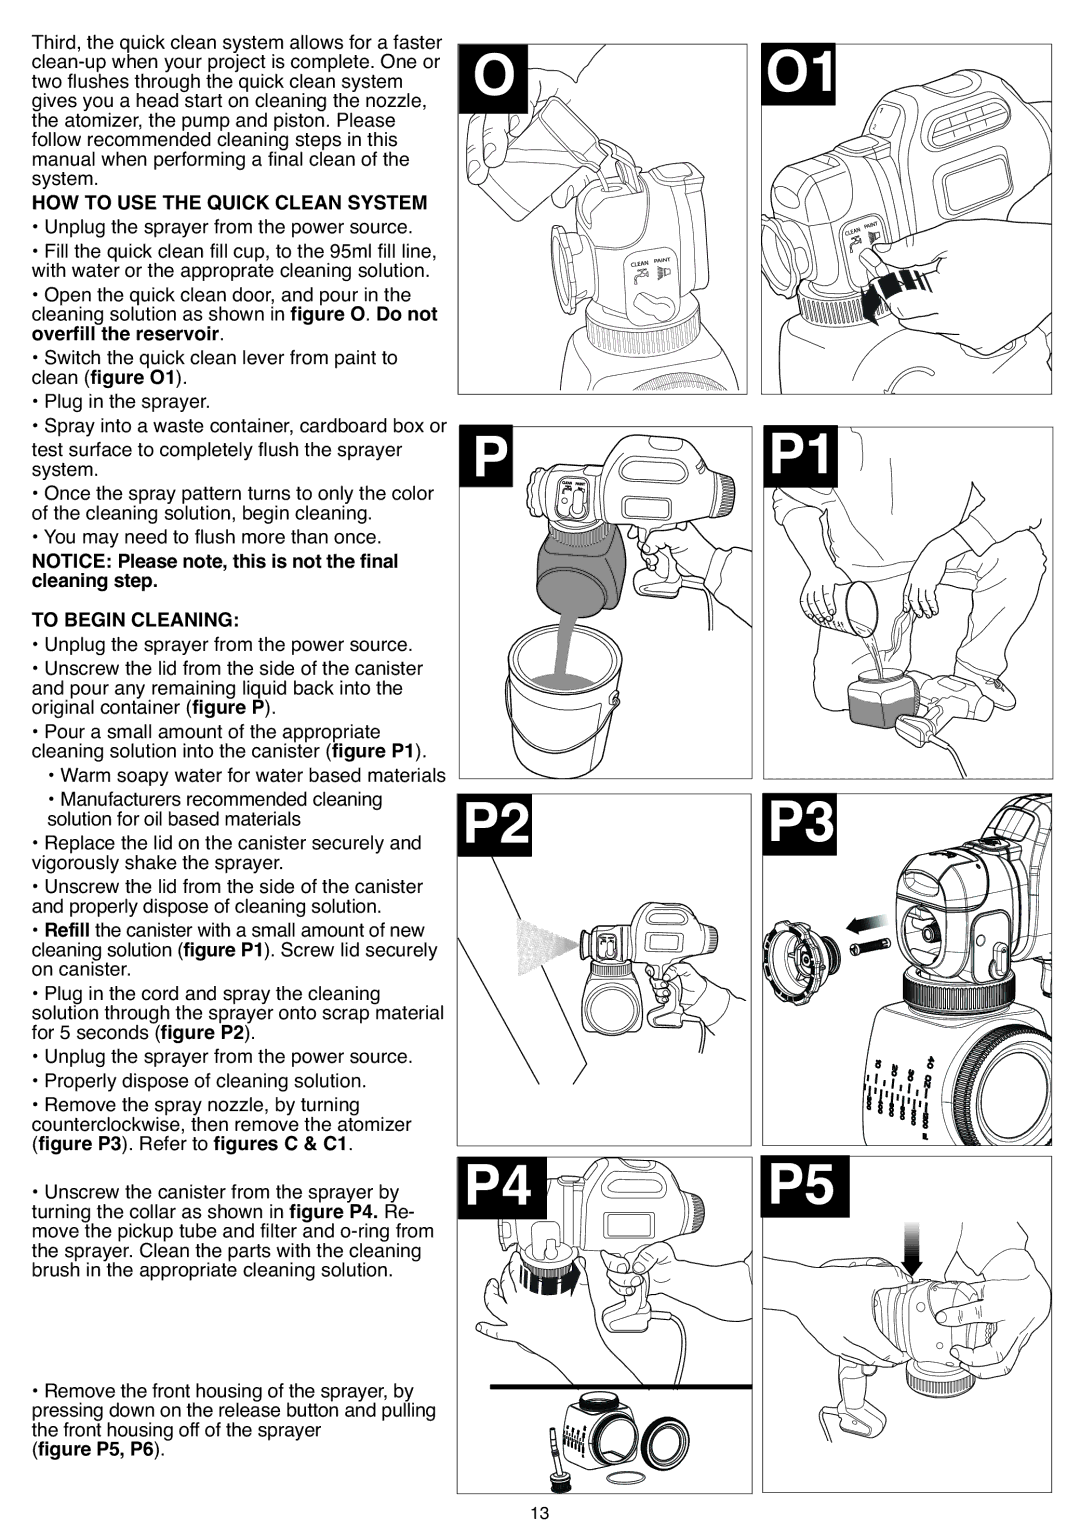
• Open the quick clean door, and pour in the cleaning solution as shown in figure O. Do not overfill the reservoir.
• Switch the quick clean lever from paint to clean (figure O1).
• Plug in the sprayer.
• Spray into a waste container, cardboard box or test surface to completely flush the sprayer system.
• Once the spray pattern turns to only the color of the cleaning solution, begin cleaning.
• You may need to flush more than once.
NOTICE: Please note, this is not the final cleaning step.
TO BEGIN CLEANING:
• Unplug the sprayer from the power source.
• Unscrew the lid from the side of the canister and pour any remaining liquid back into the original container (figure P).
• Pour a small amount of the appropriate cleaning solution into the canister (figure P1).
• Warm soapy water for water based materials
• Manufacturers recommended cleaning solution for oil based materials
• Replace the lid on the canister securely and vigorously shake the sprayer.
• Unscrew the lid from the side of the canister and properly dispose of cleaning solution.
• Refill the canister with a small amount of new cleaning solution (figure P1). Screw lid securely on canister.
• Plug in the cord and spray the cleaning solution through the sprayer onto scrap material for 5 seconds (figure P2).
• Unplug the sprayer from the power source.
• Properly dispose of cleaning solution.
• Remove the spray nozzle, by turning counterclockwise, then remove the atomizer (figure P3). Refer to figures C & C1.
•Unscrew the canister from the sprayer by turning the collar as shown in figure P4. Re- move the pickup tube and filter and
•Remove the front housing of the sprayer, by pressing down on the release button and pulling the front housing off of the sprayer
(figure P5, P6).
O | O1 | 2 | 1 |
P2 | P3 |
|
|
P4 | P5 |
|
|
13 |
|
|
|