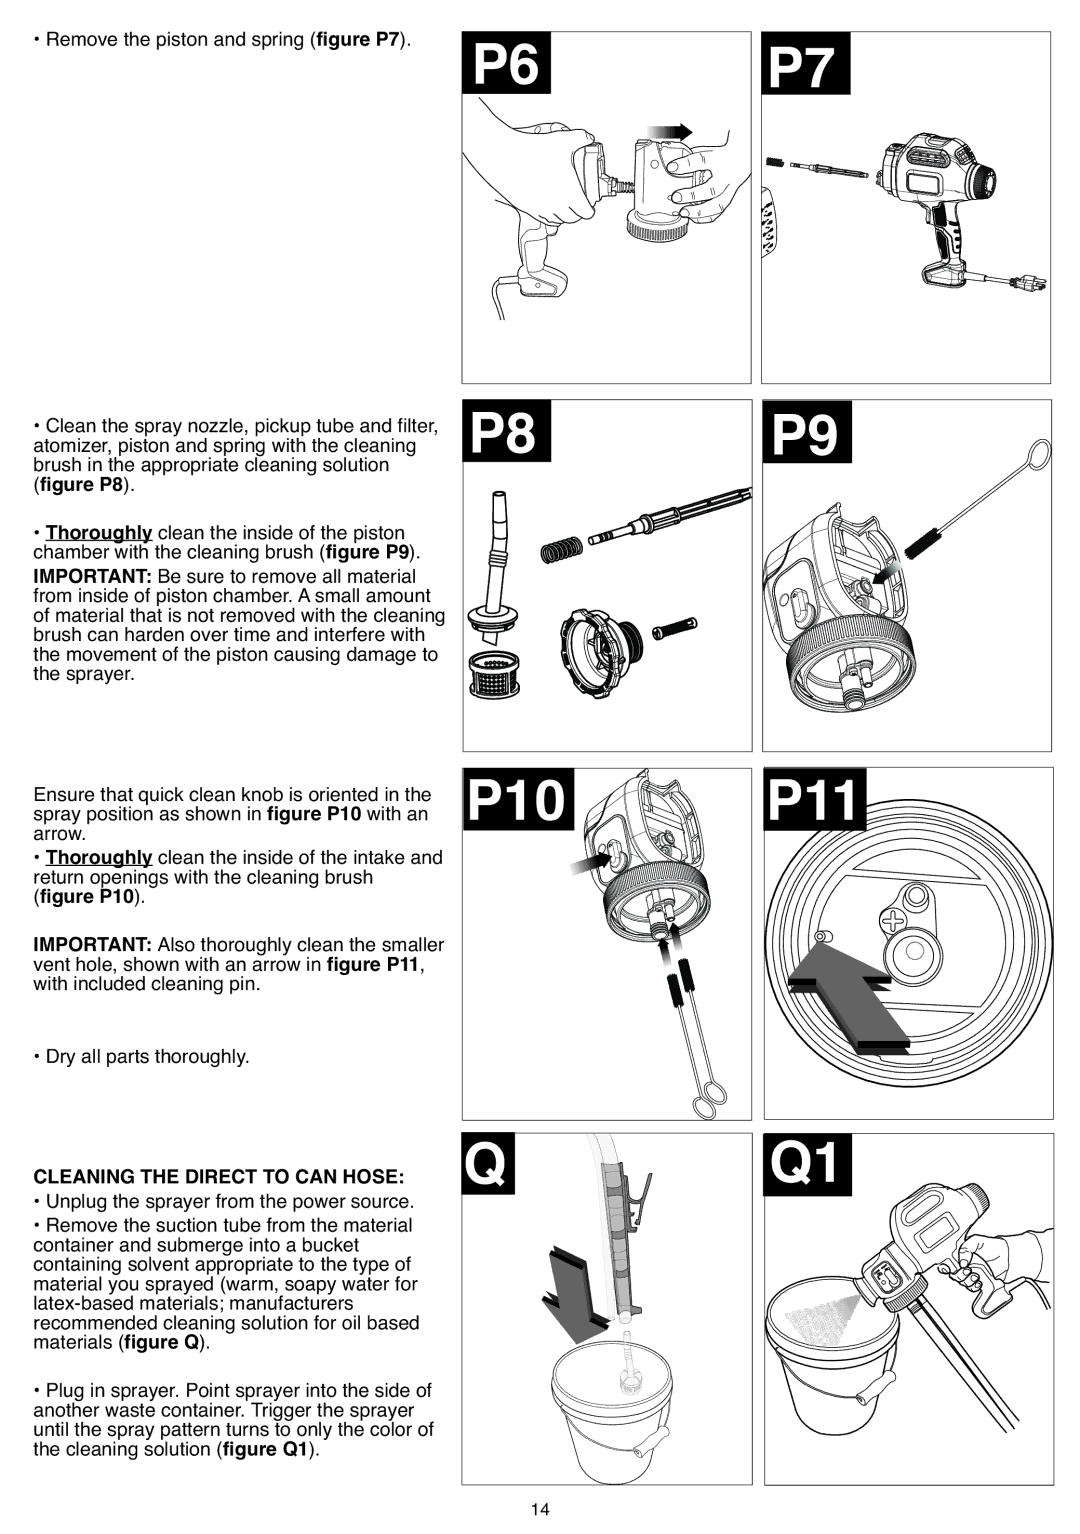
• Remove the piston and spring (figure P7). |
P6 |
P7 |
• Clean the spray nozzle, pickup tube and filter, |
atomizer, piston and spring with the cleaning |
brush in the appropriate cleaning solution |
(figure P8). |
• Thoroughly clean the inside of the piston |
chamber with the cleaning brush (figure P9). |
IMPORTANT: Be sure to remove all material |
from inside of piston chamber. A small amount |
of material that is not removed with the cleaning |
brush can harden over time and interfere with |
the movement of the piston causing damage to |
the sprayer. |
Ensure that quick clean knob is oriented in the spray position as shown in figure P10 with an arrow.
• Thoroughly clean the inside of the intake and return openings with the cleaning brush (figure P10).
IMPORTANT: Also thoroughly clean the smaller vent hole, shown with an arrow in figure P11, with included cleaning pin.
• Dry all parts thoroughly.
CLEANING THE DIRECT TO CAN HOSE:
• Unplug the sprayer from the power source.
• Remove the suction tube from the material container and submerge into a bucket containing solvent appropriate to the type of material you sprayed (warm, soapy water for
• Plug in sprayer. Point sprayer into the side of another waste container. Trigger the sprayer until the spray pattern turns to only the color of the cleaning solution (figure Q1).
Q | Q1 |
14
