WARNING: Be sure to use appropriate | B |
| B1 |
| |||
protective gear and unplug unit. |
| ||
WARNING: Make sure area is well |
| ||
ventilated and free of flammable vapors. |
|
|
|
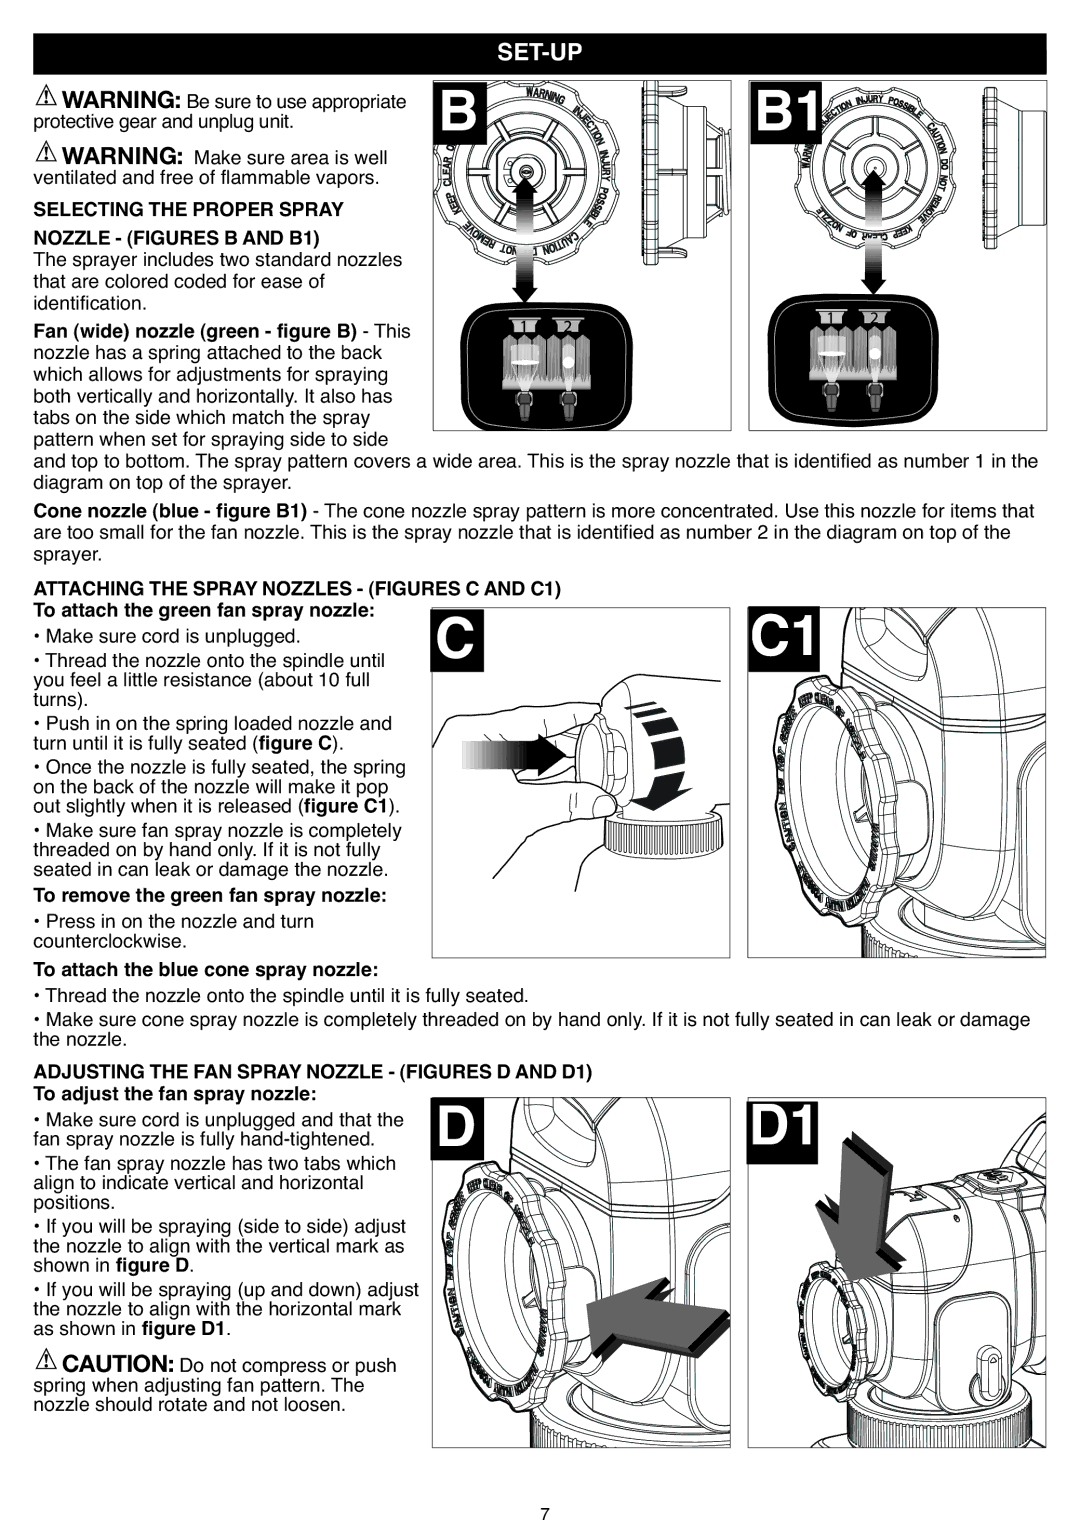
SELECTING THE PROPER SPRAY |
|
|
|
NOZZLE - (FIGURES B AND B1) |
|
|
|
The sprayer includes two standard nozzles |
|
|
|
that are colored coded for ease of |
|
|
|
identification. |
|
|
|
Fan (wide) nozzle (green - figure B) - This |
|
|
|
nozzle has a spring attached to the back |
|
|
|
which allows for adjustments for spraying |
|
|
|
both vertically and horizontally. It also has |
|
|
|
tabs on the side which match the spray |
|
|
|
pattern when set for spraying side to side |
|
| spray nozzle that is identified as number 1 in the |
and top to bottom. The spray pattern covers a wide |
| ||
diagram on top of the sprayer. |
|
|
|
Cone nozzle (blue - figure B1) - The cone nozzle spray pattern is more concentrated. Use this nozzle for items that | |||
are too small for the fan nozzle. This is the spray nozzle that is identified as number 2 in the diagram on top of the | |||
sprayer. |
| AND C1) |
|
ATTACHINGTHE SPRAYNOZZLES - (FIGURES |
| ||
To attach the green fan spray nozzle: |
|
|
|
• Make sure cord is unplugged. |
|
|
|
• Thread the nozzle onto the spindle until |
|
|
|
you feel a little resistance (about 10 full |
|
|
|
turns). |
|
|
|
• Push in on the spring loaded nozzle and |
|
|
|
turn until it is fully seated (figure C). |
|
|
|
• Once the nozzle is fully seated, the spring |
|
|
|
on the back of the nozzle will make it pop |
|
|
|
out slightly when it is released (figure C1). |
|
|
|
• Make sure fan spray nozzle is completely |
|
|
|
threaded on by hand only. If it is not fully |
|
|
|
seated in can leak or damage the nozzle. |
|
|
|
To remove the green fan spray nozzle: |
|
|
|
• Press in on the nozzle and turn |
|
|
|
counterclockwise. |
|
|
|
To attach the blue cone spray nozzle: |
|
|
|
• Thread the nozzle onto the spindle until it is fully seated. |
| ||
• Make sure cone spray nozzle is completely threaded on by hand only. If it is not fully seated in can leak or damage | |||
the nozzle. |
|
|
|
ADJUSTING THE FAN SPRAYNOZZLE - (FIGURES D AND D1) |
| ||
To adjust the fan spray nozzle: |
|
|
|
• Make sure cord is unplugged and that the |
|
|
|
fan spray nozzle is fully |
|
|
|
• The fan spray nozzle has two tabs which |
|
|
|
align to indicate vertical and horizontal |
|
|
|
positions. |
|
|
|
• If you will be spraying (side to side) adjust |
|
|
|
the nozzle to align with the vertical mark as |
|
|
|
shown in figure D. |
|
|
|
• If you will be spraying (up and down) adjust |
|
|
|
the nozzle to align with the horizontal mark |
|
|
|
as shown in figure D1. |
|
|
|
CAUTION: Do not compress or push |
|
|
|
spring when adjusting fan pattern. The |
|
|
|
nozzle should rotate and not loosen. |
|
|
|
7