DVAS Instruction Manual Before You Begin

EN 14


6BEFORE YOU BEGIN

Ensure the following:

Installation environment is less than 40°C.

The front drive bays and rear ventilation panels are not obstructed.

Main Power is sufficient to handle the load of the system.

Rack is properly grounded.

Tips for Rack-mounting:

Remove the power supplies and hard disk canisters to make the system lighter.

Request assistance to lift the unit into the rack.

Do not to trap fingers or items of clothing.

Ensure all fixtures are secure and bolts and screws are fully tightened.

6.1Basic Installation Steps

1.Attach the SCSI cable from the DVR to the DVAS.

If only one DVR is connected to the DVAS, ensure that the cable is connected to Channel 0. Refer to

SECTION 4.0, PRODUCT OVERVIEW.

2.Attach the power cord(s) to the disk array and apply power to the unit.

If an audible alarm is heard, the DVAS unit does not have a RAID group configured, or no disks are present.

3.Wait one minute and apply power to the DVR unit.

4.Configure the DVR for archiving (see DVR instruction manual).

5.Depending upon the model purchased, the DVAS unit is preconfigured.

For your convenience, DVAS disk arrays are shipped with drives preconfigured for RAID.

These configurations suit most applications, but if not, or to use additional features, you must set up the network connection and access the GUI. See SECTION 6.2, Setting up the Network Connection.

Use the GUI interface to:

Add a Hot Spare.

Add Drive(s) (if storage is expanded, the entire RAID must be reconstructed).

Change the allocation of storage (only applicable if two DVRs are connected to a single DVAS).

Monitor the DVAS system.

Use the e-mail alert feature (warnings and error messages can be e-mailed to a specified address).

Attach two DVRs to a DVAS0416 or a DVAS0816 unit (see Quick Configuration page).

Attach only one DVR to a DVAS1416 (see Quick Configuration page).

6.2Setting up the Network Connection

To use the web-based GUI, perform the following:

1.Attach a network cable from the DVAS’s Ethernet port to a network. A simple crossover cable can be used from a PC to the DVAS’s Ethernet port.

2.Access any computer on the network.

If no crossover cable was used to connect the unit to a network, the network’s subnet mask may not allow access to this IP address without some reconfiguration. Access the DVAS Series disk array via a shell or DOS prompt on the host computer and enter the following command.

Windows®:

route add 10.11.12.13 mask 255.255.255.255 <workstation IP number>

Linux:

/sbin/route add 10.11.12.13/32 gw <workstation IP number>

Solaris:

route add 10.11.12.13 mask 255.255.255.255 <workstation IP number>

Where <Workstation IP number> refers to the IP address of the workstation being used. The DVAS Series disk array’s web interface is now accessible via a standard browser (Netscape or Internet Explorer).


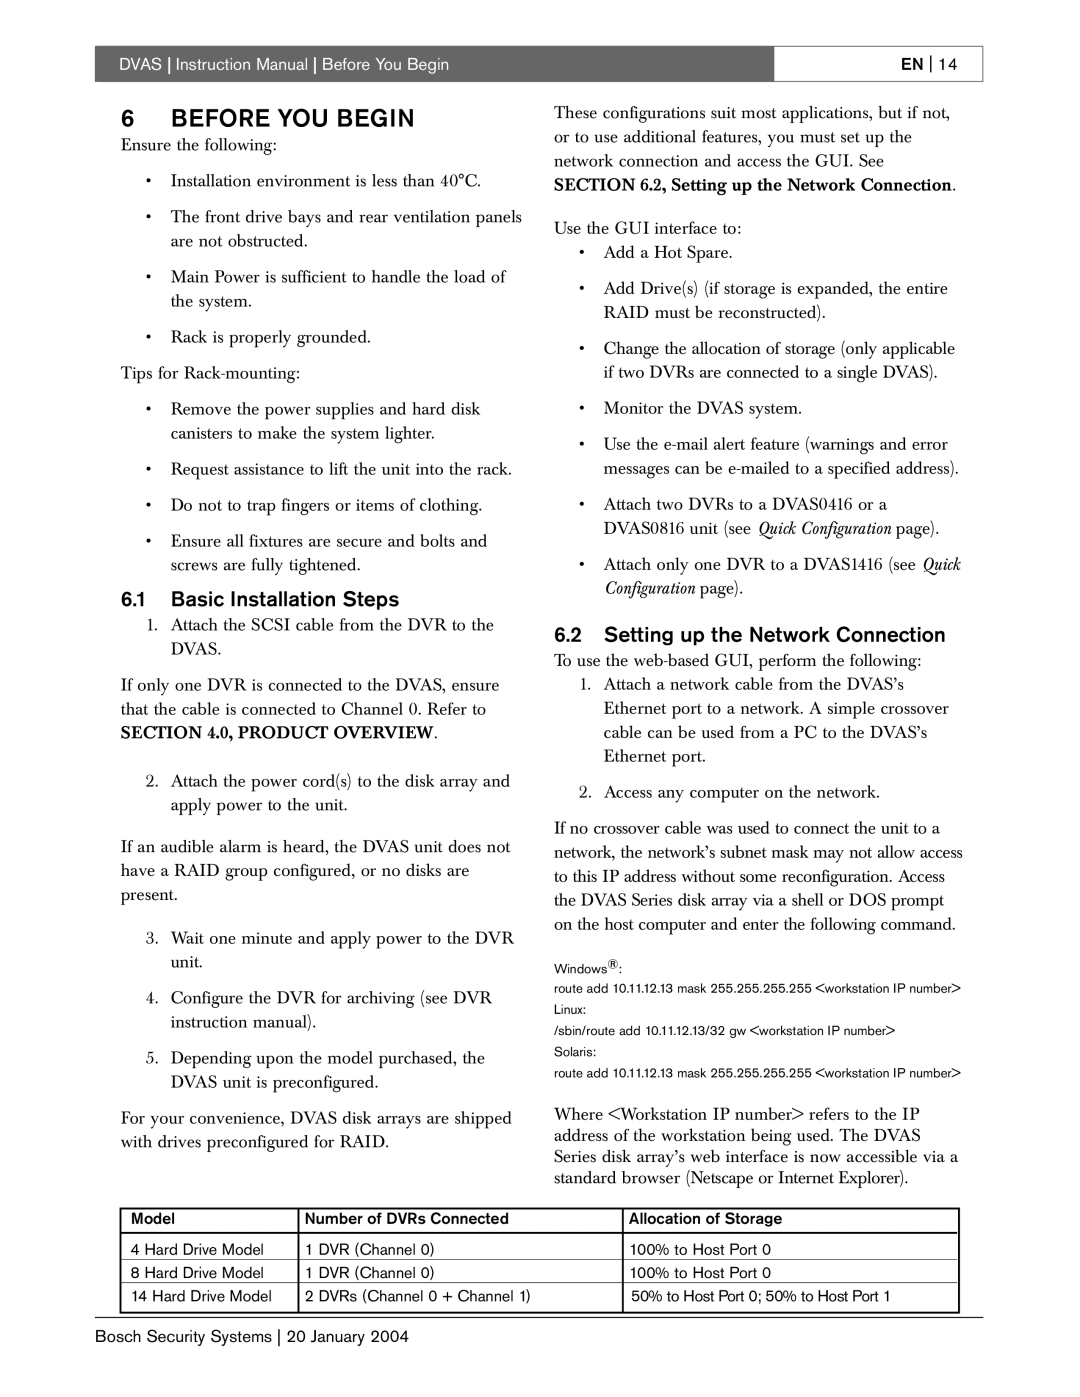
Model

Number of DVRs Connected

Allocation of Storage


4 Hard Drive Model

1

DVR (Channel 0)

100% to Host Port 0


8 Hard Drive Model

1

DVR (Channel 0)

100% to Host Port 0


14 Hard Drive Model

2

DVRs (Channel 0 + Channel 1)

50% to Host Port 0; 50% to Host Port 1


Bosch Security Systems 20 January 2004

Page 14
Image 14
Bosch Appliances DVAS instruction manual Before YOU Begin, Basic Installation Steps, Setting up the Network Connection

DVAS specifications

Bosch Appliances DVAS, a leader in home appliances, epitomizes innovation, efficiency, and design. Their line of dishwashers, known for their meticulous engineering and user-friendly features, represents a commitment to enhancing everyday life through technology.

One of the standout features of Bosch DVAS dishwashers is their exceptional quietness. Operating at a noise level as low as 42 decibels, these dishwashers ensure a peaceful home environment, making them ideal for open-plan living spaces. This remarkable silence is achieved through advanced insulation and a unique design that minimizes vibrations.

Efficiency is a cornerstone of Bosch dishwashers, which are equipped with ENERGY STAR® certification. This not only underscores their eco-friendly nature but also translates into significant savings on energy and water bills for homeowners. Bosch DVAS uses innovative technologies, such as the EcoSense feature, which calculates and adjusts water usage based on the load, ensuring optimal performance while conserving resources.

The Precision Wash system is another notable technology integrated into Bosch dishwashers. This clever feature uses intelligent sensors to detect the level of soil on the dishes, automatically modifying the wash cycle for a tailored cleaning experience. Additionally, the VarioFlex Rack System provides flexibility in loading, allowing for the accommodation of dishes of various shapes and sizes. With foldable tines and adjustable racks, users can create ample space for larger items like pots and pans.

Bosch also takes pride in their EasyGlide racks that facilitate smooth loading and unloading, enhancing user convenience. The unique AquaStop system provides peace of mind by monitoring for leaks 24/7, ensuring that your home stays safe from water damage.

In terms of design, Bosch Appliances DVAS embodies modern aesthetics. With a sleek stainless-steel finish, they blend seamlessly into any kitchen décor. The minimalistic controls and stainless-steel front panels not only offer an elegant appearance but are also easy to clean and maintain.

To top it all off, the Bosch Home Connect feature allows users to control their dishwasher remotely. Whether starting a cycle before you arrive home or checking the status while away, this smart technology redefines convenience in the kitchen.

In summary, Bosch Appliances DVAS dishwashers combine quiet operation, energy efficiency, advanced cleaning technologies, and sleek aesthetics into a single package, making them a top choice for discerning homeowners looking to elevate their kitchen experience.