Setting the bobbin
CONTENTS
1
![]() 2
2
1 2
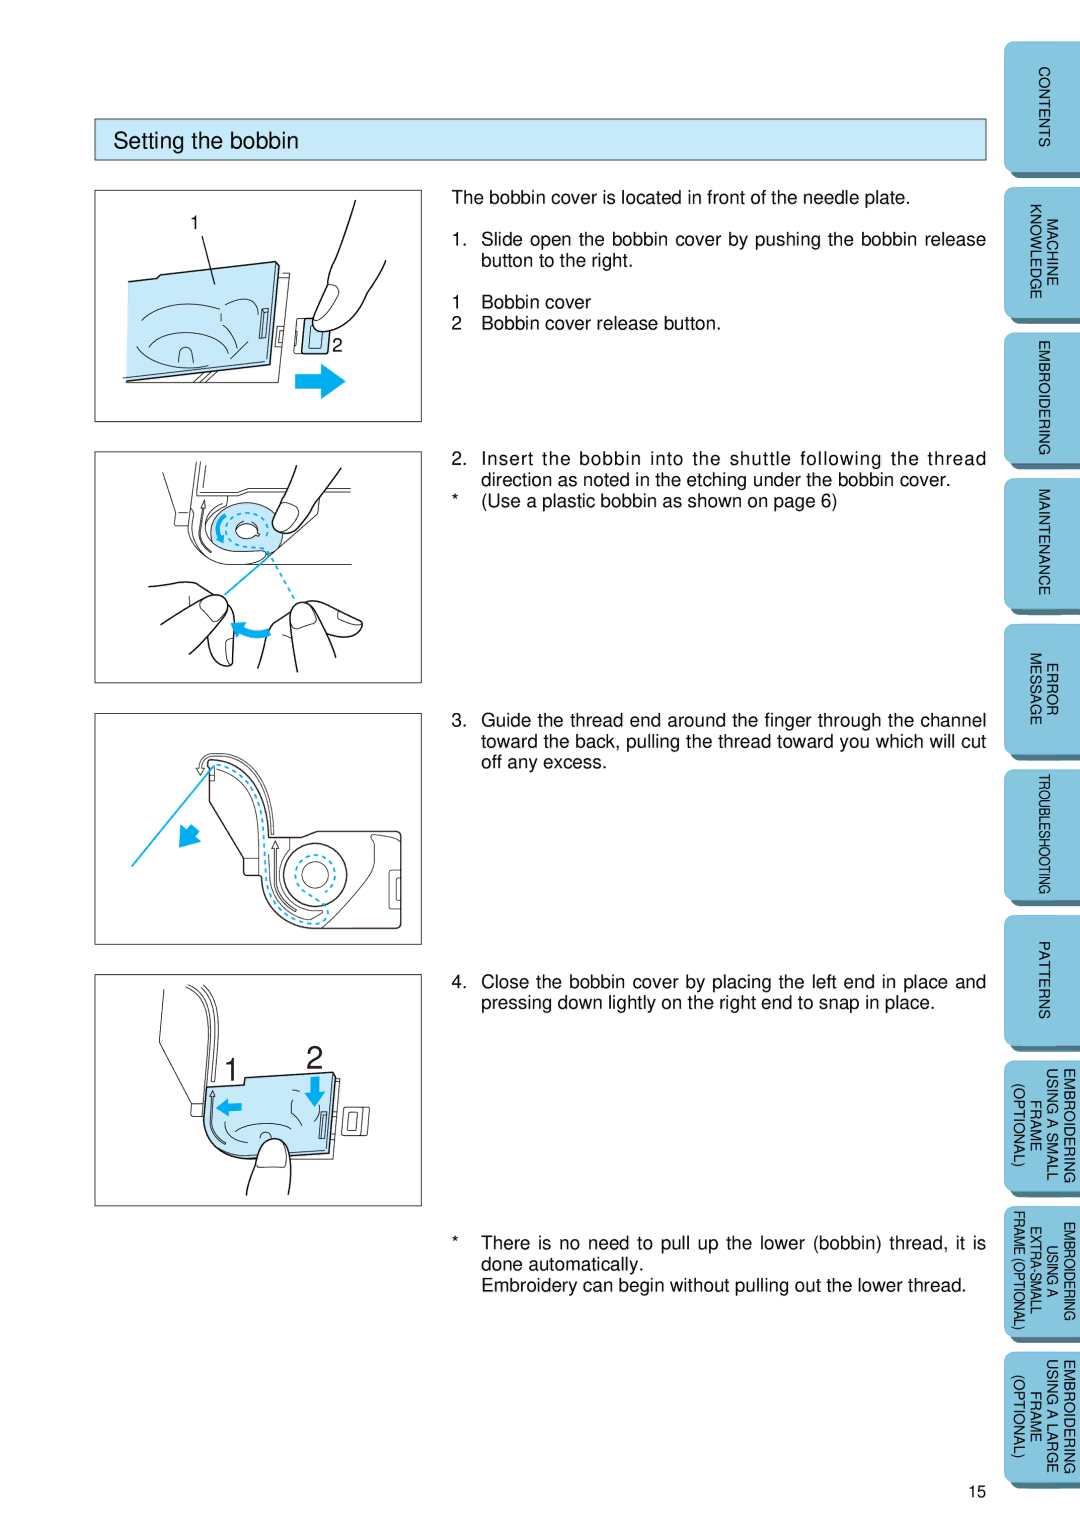
The bobbin cover is located in front of the needle plate.
1. | Slide open the bobbin cover by pushing the bobbin release | MACHINE KNOWLEDGE |
| ||
| button to the right. |
|
1 | Bobbin cover |
|
2Bobbin cover release button.
2. | Insert the bobbin into the shuttle following the thread |
| EMBROIDERING |
| |
|
|
|
| ||
| direction as noted in the etching under the bobbin cover. |
|
|
|
|
|
| MAINTENANCE |
| ||
* | (Use a plastic bobbin as shown on page 6) |
|
| ||
|
|
|
| ||
|
|
|
|
|
|
|
|
|
|
|
|
3. | Guide the thread end around the finger through the channel |
| MESSAGE | ERROR |
|
|
|
|
| ||
| toward the back, pulling the thread toward you which will cut |
|
|
|
|
| off any excess. |
|
|
|
|
|
|
| TROUBLESHOOTING |
| |
|
|
|
|
| |
4. | Close the bobbin cover by placing the left end in place and |
| PATTERNS |
| |
|
|
|
| ||
| pressing down lightly on the right end to snap in place. |
|
|
|
|
|
|
|
|
|
|
|
|
|
|
|
|
|
| (OPTIONAL) | FRAME | USING A SMALL | EMBROIDERING |
|
|
|
|
|
|
|
|
|
|
|
|
* | There is no need to pull up the lower (bobbin) thread, it is | FRAME(OPTIONAL) | USINGA | EMBROIDERING | |
|
|
|
| ||
| done automatically. |
|
|
|
|
| Embroidery can begin without pulling out the lower thread. |
|
|
|
|
|
|
|
|
|
|
|
|
|
|
|
|
|
| (OPTIONAL) | FRAME | USING A LARGE | EMBROIDERING |
|
|
|
|
|
|
15
