2
1
3
CONTENTS
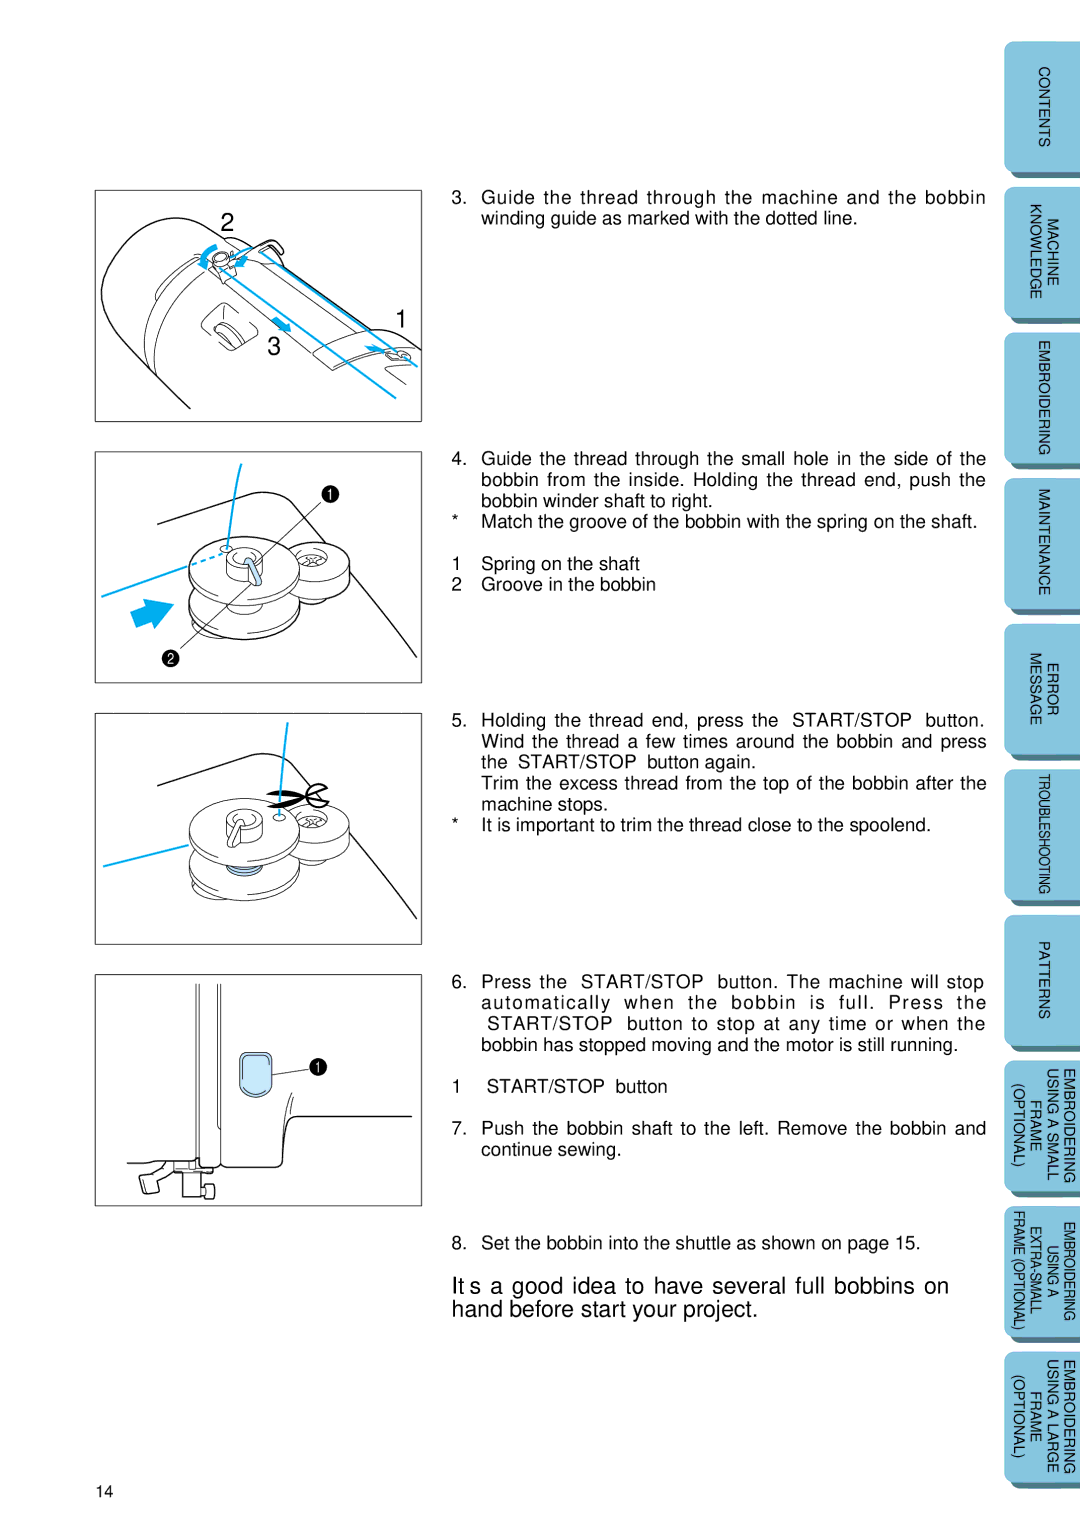
3. | Guide the thread through the machine and the bobbin |
| KNOWLEDGE | MACHINE |
|
| winding guide as marked with the dotted line. |
|
| ||
|
|
|
|
| |
|
|
|
|
| |
|
|
|
|
| |
4. | Guide the thread through the small hole in the side of the |
| EMBROIDERING |
| |
|
|
|
| ||
| bobbin from the inside. Holding the thread end, push the |
|
|
|
|
|
| MAINTENANCE |
| ||
| bobbin winder shaft to right. |
|
| ||
|
|
|
|
| |
* | Match the groove of the bobbin with the spring on the shaft. |
|
|
|
|
1 | Spring on the shaft |
|
|
|
|
2 | Groove in the bobbin |
|
|
|
|
|
|
|
|
|
|
|
|
|
|
|
|
5. | Holding the thread end, press the “START/STOP” button. |
| MESSAGE | ERROR |
|
|
|
|
| ||
| Wind the thread a few times around the bobbin and press |
|
|
|
|
| the “START/STOP” button again. |
|
|
|
|
| Trim the excess thread from the top of the bobbin after the |
| TROUBLESHOOTING |
| |
|
|
|
|
| |
| machine stops. |
|
|
|
|
* | It is important to trim the thread close to the spoolend. |
|
|
|
|
|
|
|
|
| |
|
|
|
|
| |
6. | Press the “START/STOP” button. The machine will stop |
| PATTERNS |
| |
|
|
|
| ||
| automatically when the bobbin is full. Press the |
|
|
|
|
| “START/STOP” button to stop at any time or when the |
|
|
|
|
| bobbin has stopped moving and the motor is still running. |
|
|
|
|
|
|
|
|
|
|
1 | “START/STOP” button | (OPTIONAL) | FRAME | USINGASMALL | EMBROIDERING |
|
|
|
| ||
7. | Push the bobbin shaft to the left. Remove the bobbin and |
|
|
|
|
| continue sewing. |
|
|
|
|
|
|
|
|
|
|
|
|
|
|
|
|
8. | Set the bobbin into the shuttle as shown on page 15. | FRAME(OPTIONAL) | USINGA | EMBROIDERING | |
|
|
|
| ||
It’s a good idea to have several full bobbins on |
|
|
|
| |
hand before start your project. |
|
|
|
| |
|
|
|
|
|
|
|
|
|
|
|
|
|
| (OPTIONAL) | FRAME | USING A LARGE | EMBROIDERING |
|
|
|
|
|
|
14
