THREAD TENSION ADJUSTMENT
Use this procedure when changing the thread tension.
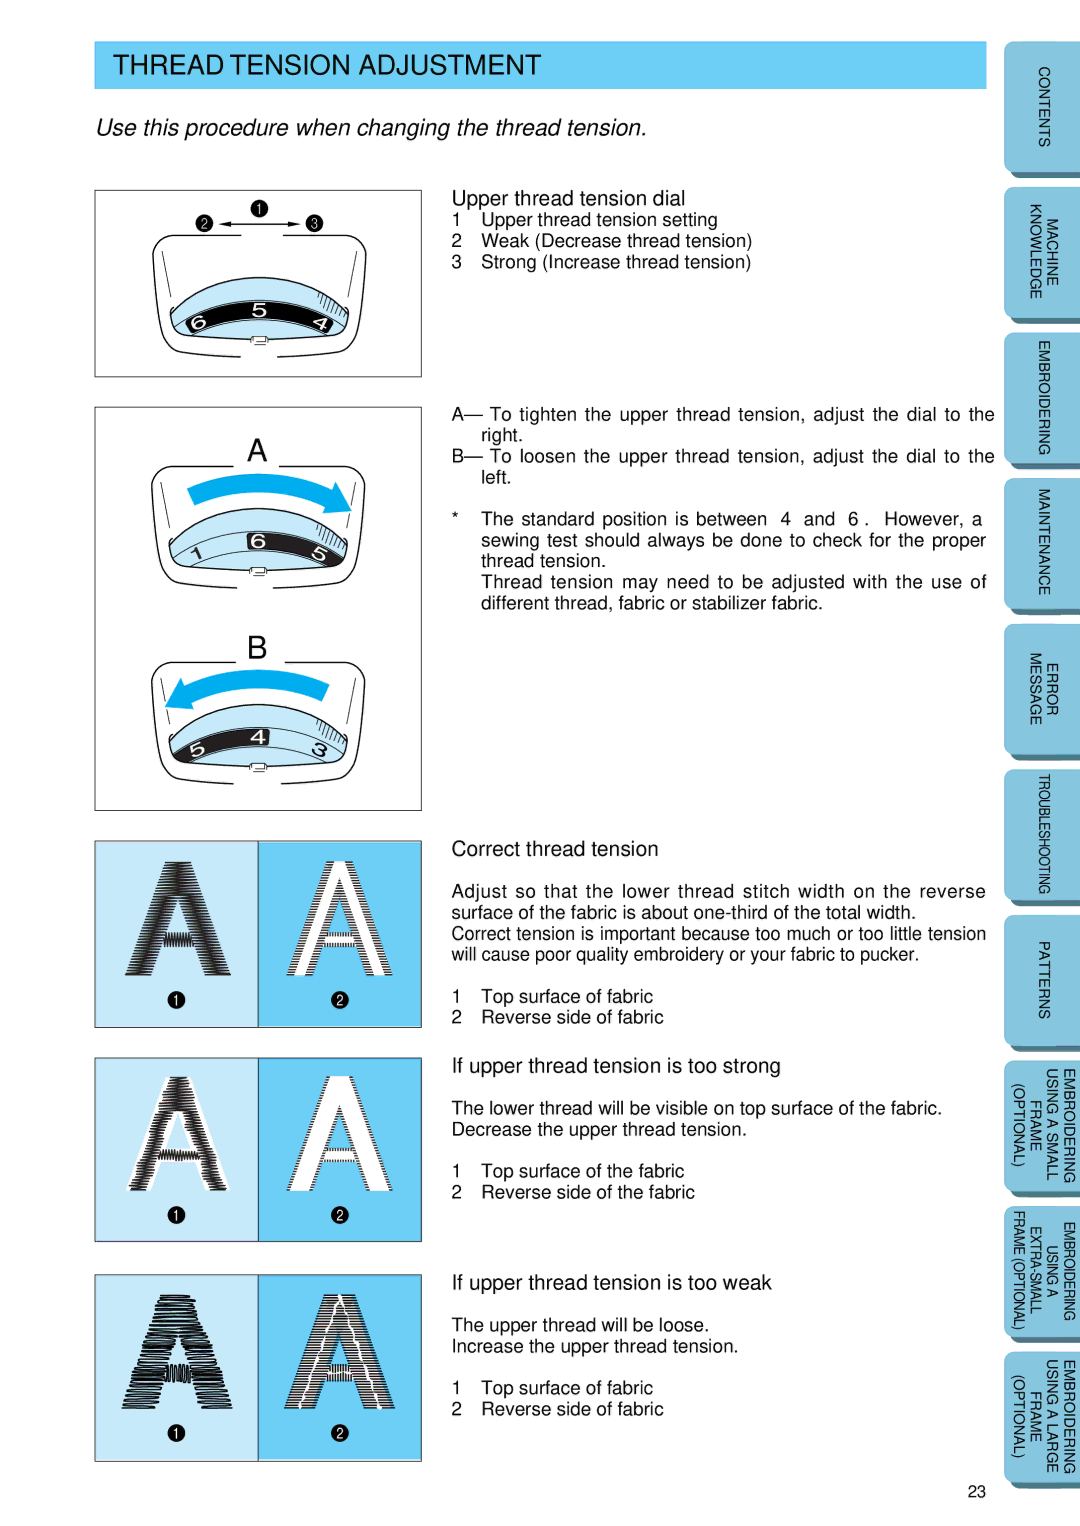
Upper thread tension dial
1 Upper thread tension setting
2Weak (Decrease thread tension)
3 Strong (Increase thread tension)
A– To tighten the upper thread tension, adjust the dial to the right.
AB– To loosen the upper thread tension, adjust the dial to the left.
*The standard position is between “4” and “6”. However, a
sewing test should always be done to check for the proper thread tension.
Thread tension may need to be adjusted with the use of different thread, fabric or stabilizer fabric.
B
Correct thread tension
Adjust so that the lower thread stitch width on the reverse surface of the fabric is about
Correct tension is important because too much or too little tension will cause poor quality embroidery or your fabric to pucker.
1 Top surface of fabric
2Reverse side of fabric
If upper thread tension is too strong
The lower thread will be visible on top surface of the fabric.
Decrease the upper thread tension.
1 Top surface of the fabric
2Reverse side of the fabric
| CONTENTS | |
|
|
|
|
|
|
| KNOWLEDGE | MACHINE |
|
| |
|
| |
| EMBROIDERING | |
|
| |
|
| |
| MAINTENANCE | |
|
|
|
|
|
|
| MESSAGE | ERROR |
|
| |
|
| |
| TROUBLESHOOTING | |
|
| |
| PATTERNS | |
|
|
|
|
| |
(OPTIONAL) | FRAME | EMBROIDERING USING A SMALL |
|
|
|
If upper thread tension is too weak
The upper thread will be loose. Increase the upper thread tension.
1Top surface of fabric
2 Reverse side of fabric
FRAME (OPTIONAL) | USING A | EMBROIDERING | |
|
|
|
|
(OPTIONAL) | FRAME | USING A LARGE | EMBROIDERING |
|
|
|
|
23