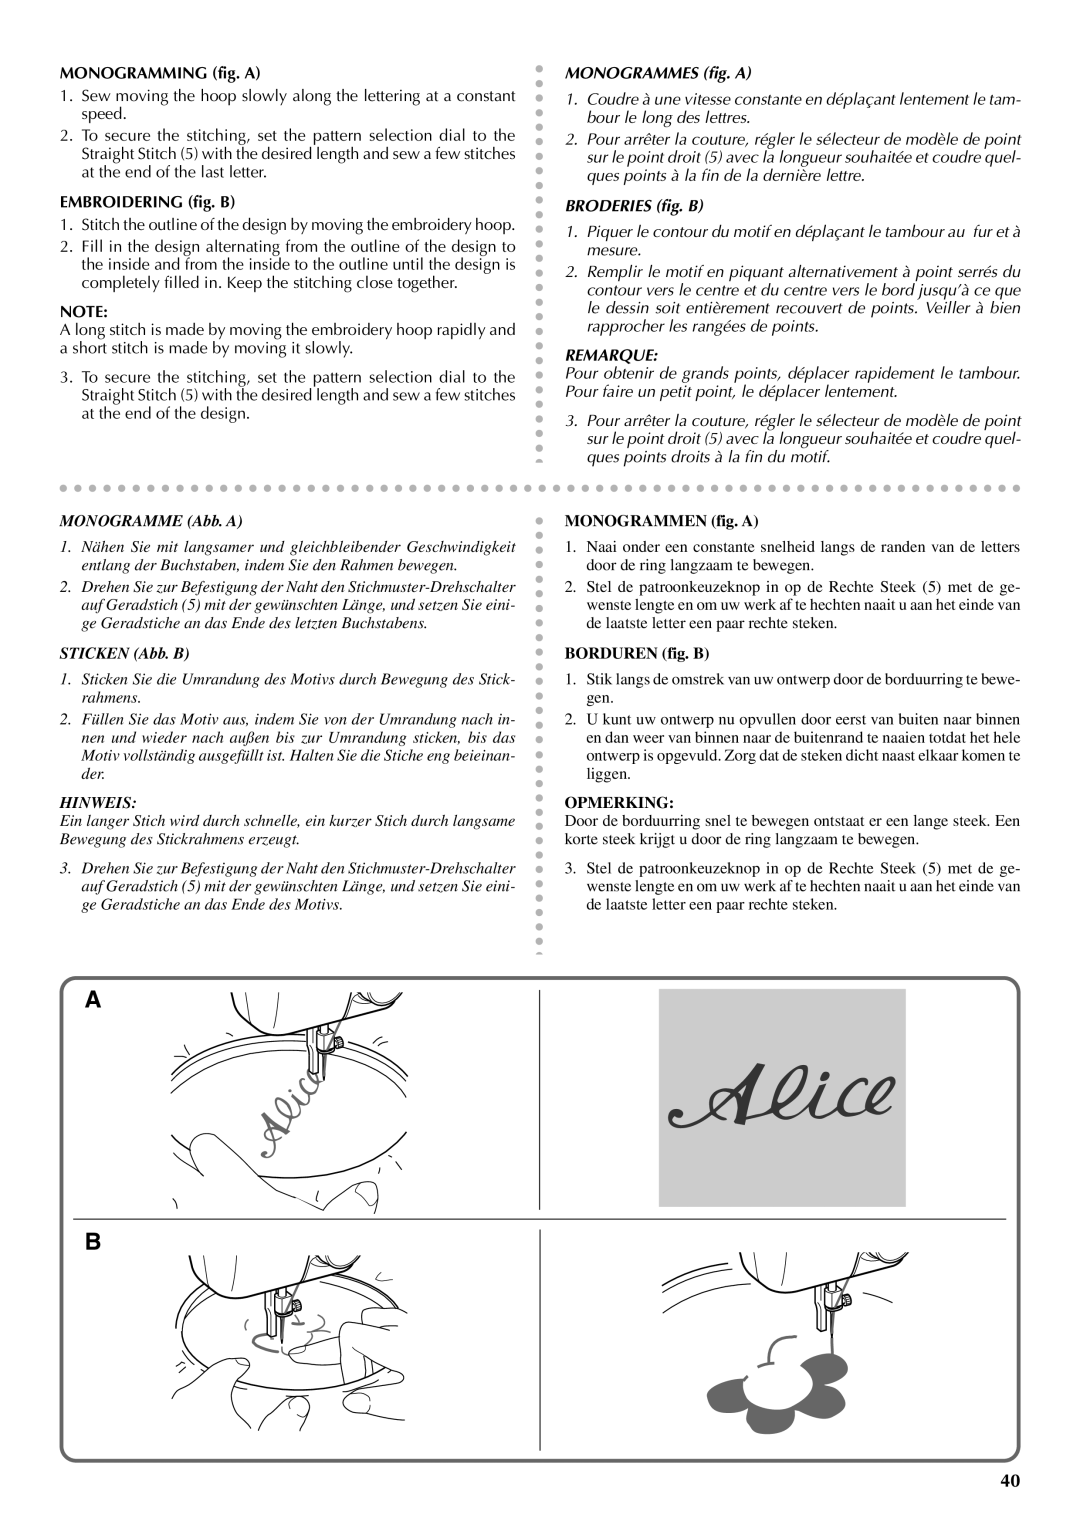
MONOGRAMMING (fig. A)

1.Sew moving the hoop slowly along the lettering at a constant speed.

2.To secure the stitching, set the pattern selection dial to the Straight Stitch (5) with the desired length and sew a few stitches at the end of the last letter.

EMBROIDERING (fig. B)

1.Stitch the outline of the design by moving the embroidery hoop.

2.Fill in the design alternating from the outline of the design to the inside and from the inside to the outline until the design is completely filled in. Keep the stitching close together.

NOTE:

A long stitch is made by moving the embroidery hoop rapidly and a short stitch is made by moving it slowly.

3.To secure the stitching, set the pattern selection dial to the Straight Stitch (5) with the desired length and sew a few stitches at the end of the design.

MONOGRAMME (Abb. A)

1.Nähen Sie mit langsamer und gleichbleibender Geschwindigkeit entlang der Buchstaben, indem Sie den Rahmen bewegen.

2.Drehen Sie zur Befestigung der Naht den Stichmuster-Drehschalter auf Geradstich (5) mit der gewünschten Länge, und setzen Sie eini- ge Geradstiche an das Ende des letzten Buchstabens.

STICKEN (Abb. B)

1.Sticken Sie die Umrandung des Motivs durch Bewegung des Stick- rahmens.

2.Füllen Sie das Motiv aus, indem Sie von der Umrandung nach in- nen und wieder nach außen bis zur Umrandung sticken, bis das Motiv vollständig ausgefüllt ist. Halten Sie die Stiche eng beieinan- der.

HINWEIS:

Ein langer Stich wird durch schnelle, ein kurzer Stich durch langsame Bewegung des Stickrahmens erzeugt.

3.Drehen Sie zur Befestigung der Naht den Stichmuster-Drehschalter auf Geradstich (5) mit der gewünschten Länge, und setzen Sie eini- ge Geradstiche an das Ende des Motivs.

A

MONOGRAMMES (fig. A)

1.Coudre à une vitesse constante en déplaçant lentement le tam- bour le long des lettres.

2.Pour arrêter la couture, régler le sélecteur de modèle de point sur le point droit (5) avec la longueur souhaitée et coudre quel- ques points à la fin de la dernière lettre.

BRODERIES (fig. B)

1.Piquer le contour du motif en déplaçant le tambour au fur et à mesure.

2.Remplir le motif en piquant alternativement à point serrés du contour vers le centre et du centre vers le bord jusqu’à ce que le dessin soit entièrement recouvert de points. Veiller à bien rapprocher les rangées de points.

REMARQUE:

Pour obtenir de grands points, déplacer rapidement le tambour. Pour faire un petit point, le déplacer lentement.

3.Pour arrêter la couture, régler le sélecteur de modèle de point sur le point droit (5) avec la longueur souhaitée et coudre quel- ques points droits à la fin du motif.

MONOGRAMMEN (fig. A)

1.Naai onder een constante snelheid langs de randen van de letters door de ring langzaam te bewegen.

2.Stel de patroonkeuzeknop in op de Rechte Steek (5) met de ge- wenste lengte en om uw werk af te hechten naait u aan het einde van de laatste letter een paar rechte steken.

BORDUREN (fig. B)

1.Stik langs de omstrek van uw ontwerp door de borduurring te bewe- gen.

2.U kunt uw ontwerp nu opvullen door eerst van buiten naar binnen en dan weer van binnen naar de buitenrand te naaien totdat het hele ontwerp is opgevuld. Zorg dat de steken dicht naast elkaar komen te liggen.

OPMERKING:

Door de borduurring snel te bewegen ontstaat er een lange steek. Een korte steek krijgt u door de ring langzaam te bewegen.

3.Stel de patroonkeuzeknop in op de Rechte Steek (5) met de ge- wenste lengte en om uw werk af te hechten naait u aan het einde van de laatste letter een paar rechte steken.

B

40

Page 47
Image 47
Brother VX 1400 operation manual Monogrammes fig. a

VX 1400 specifications

The Brother VX 1400 is a versatile sewing machine designed for both novice and experienced sewists. Known for its user-friendly features, the VX 1400 combines reliability with innovative technology to deliver exceptional performance.

One of the standout features of the Brother VX 1400 is its built-in stitch options. With a selection of over 25 stitches, including utility stitches, decorative stitches, and stretch stitches, this machine allows users to explore a variety of sewing projects. The easy-to-use selector dial makes it simple to choose the desired stitch, ensuring that users can complete their tasks with efficiency and precision.

The VX 1400 is equipped with an automatic needle threader, a game-changer for those sewing for extended periods. This feature simplifies the threading process, allowing users to focus more on their creative projects rather than dealing with frustrating interruptions. Additionally, the top-loading bobbin system further enhances convenience, making it easier to insert and monitor bobbin thread levels.

Another key characteristic of the Brother VX 1400 is its compact design. Lightweight and portable, this sewing machine is ideal for those who want to take their sewing on the go. Whether you’re heading to a sewing class or working on a project at a friend’s house, the VX 1400 is easy to transport without compromising on functionality.

The machine also features adjustable stitch length and width, providing sewists with complete control over their creations. This adaptability is particularly beneficial for various fabrics, from lightweight materials to heavier textiles, allowing users to customize their sewing experience.

For additional convenience, the Brother VX 1400 comes with an attached free arm, which is perfect for sewing cylindrical projects like sleeves and pant legs. This feature greatly enhances ease of use, particularly for intricate sewing tasks.

In terms of technology, the VX 1400 maintains simplicity while incorporating modern conveniences that cater to today’s sewing enthusiasts. Overall, the Brother VX 1400 stands out in its class by combining essential features with ease of use, making it a great choice for anyone interested in the art of sewing. Whether you're mending clothing or creating beautiful home decor, this machine is equipped to handle a wide range of sewing tasks. With the Brother VX 1400, your creative possibilities are virtually endless.