|
| Getting started | 7 |
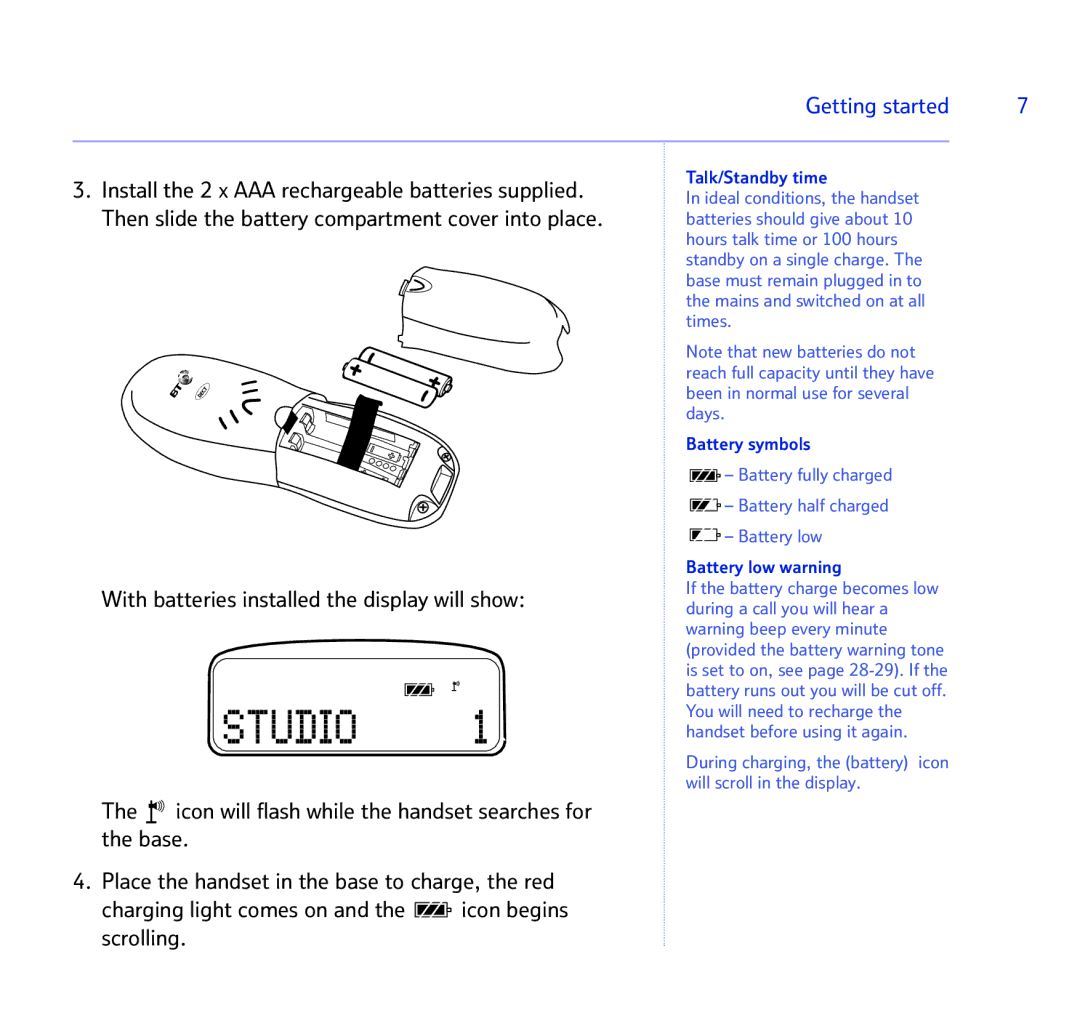
3. Install the 2 x AAA rechargeable batteries supplied. | Talk/Standby time |
| |
In ideal conditions, the handset |
| ||
Then slide the battery compartment cover into place. |
| ||
batteries should give about 10 |
| ||
|
| hours talk time or 100 hours |
|
|
| standby on a single charge. The |
|
|
| base must remain plugged in to |
|
|
| the mains and switched on at all |
|
|
| times. |
|
|
| Note that new batteries do not |
|
|
| reach full capacity until they have |
|
|
| been in normal use for several |
|
|
| days. |
|
|
| Battery symbols |
|
|
| – Battery fully charged |
|
|
| – Battery half charged |
|
|
| – Battery low |
|
|
| Battery low warning |
|
With batteries installed the display will show: | If the battery charge becomes low |
| |
during a call you will hear a |
| ||
|
|
| |
|
| warning beep every minute |
|
|
| (provided the battery warning tone |
|
|
| is set to on, see page |
|
|
| battery runs out you will be cut off. |
|
STUDIO | 1 | You will need to recharge the |
|
handset before using it again. |
| ||
|
| During charging, the (battery) icon |
|
|
| will scroll in the display. |
|
The ![]()
![]()
![]() icon will flash while the handset searches for the base.
icon will flash while the handset searches for the base.
4.Place the handset in the base to charge, the red
charging light comes on and the ![]()
![]() icon begins scrolling.
icon begins scrolling.
