SERVICE (cont.)
CONTROL THERMOSTAT (cont.)
Removal and Replacement.
Mechanical Thermostat
1.Disconnect the wires from the thermostat.
2.Remove the thermostat capillary bulb by firmly
3.Remove the
4.Slide the thermostat off of the guide stud on the rear panel and discard.
5Slide new thermostat over the guide stud on rear panel.
6.Secure the thermostat to the rear panel using a
7.Slide the grommet to the line 4.5” above the bulb on the new capillary tube.
8.Insert the capillary bulb through the hole in the tank lid and press the grommet firmly and evenly so that the groove in the grommet fits into the tank lid.
9.Carefully bend the capillary tube so that the tube and bulb inside the tank are in the vertical posi- tion and away from any electrical connections.
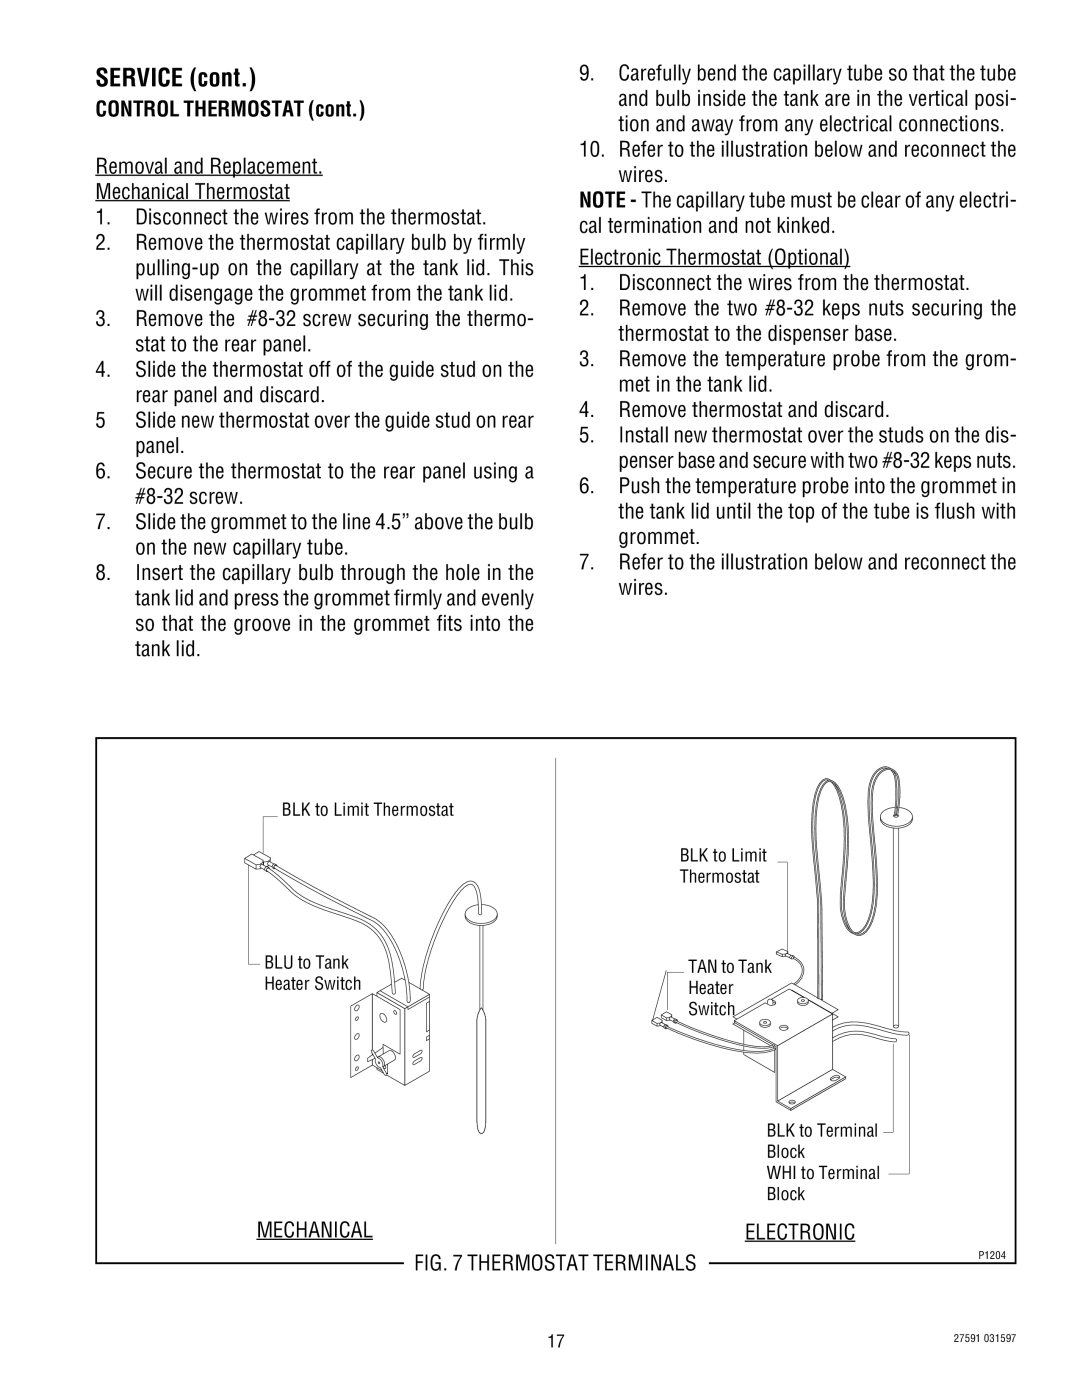
10.Refer to the illustration below and reconnect the wires.
NOTE - The capillary tube must be clear of any electri- cal termination and not kinked.
Electronic Thermostat (Optional)
1.Disconnect the wires from the thermostat.
2.Remove the two
3.Remove the temperature probe from the grom- met in the tank lid.
4.Remove thermostat and discard.
5.Install new thermostat over the studs on the dis- penser base and secure with two
6.Push the temperature probe into the grommet in the tank lid until the top of the tube is flush with grommet.
7.Refer to the illustration below and reconnect the wires.
BLK to Limit Thermostat
BLK to Limit
Thermostat
BLU to Tank | TAN to Tank |
Heater Switch | Heater |
| Switch |
| BLK to Terminal |
| Block |
| WHI to Terminal |
| Block |
MECHANICAL | ELECTRONIC |
FIG. 7 THERMOSTAT TERMINALS | P1204 |
|
17 | 27591 031597 |
|
