About this Manual | 9 |
|
|
About this Manual
Thank you for purchasing the Canon DC201/DC210/DC211. Please read this manual carefully before you use the camcorder and retain it for future reference. Should your camcorder fail to operate correctly, refer to the Troubleshooting table ( ![]() 63).
63).
Conventions Used in the Manual
IMPORTANT: Precautions related to the camcorder’s operation.
NOTES: Additional topics that complement the basic operating procedures.
![]() POINTS TO CHECK: Restrictions that apply if the function described is not available in all operating modes (the operating mode to which the camcorder should be set, the type of disc required, etc.).
POINTS TO CHECK: Restrictions that apply if the function described is not available in all operating modes (the operating mode to which the camcorder should be set, the type of disc required, etc.).
![]() : Reference page number.
: Reference page number.
![]() : Option or feature that applies or is available only with a specific model. The following terms are used in the manual:
: Option or feature that applies or is available only with a specific model. The following terms are used in the manual:
“Screen” refers to the LCD and the viewfinder screen.
“Scene” refers to one movie unit from the point you press the start/stop button to start recording until you press again to pause the recording.
The terms “Photo” and “Still image” are used interchangeably with the same meaning.
The photos included in the manual are simulated pictures taken with a still camera. Note that unless indicated otherwise, illustrations in this manual refer to the
 model.
Introduction
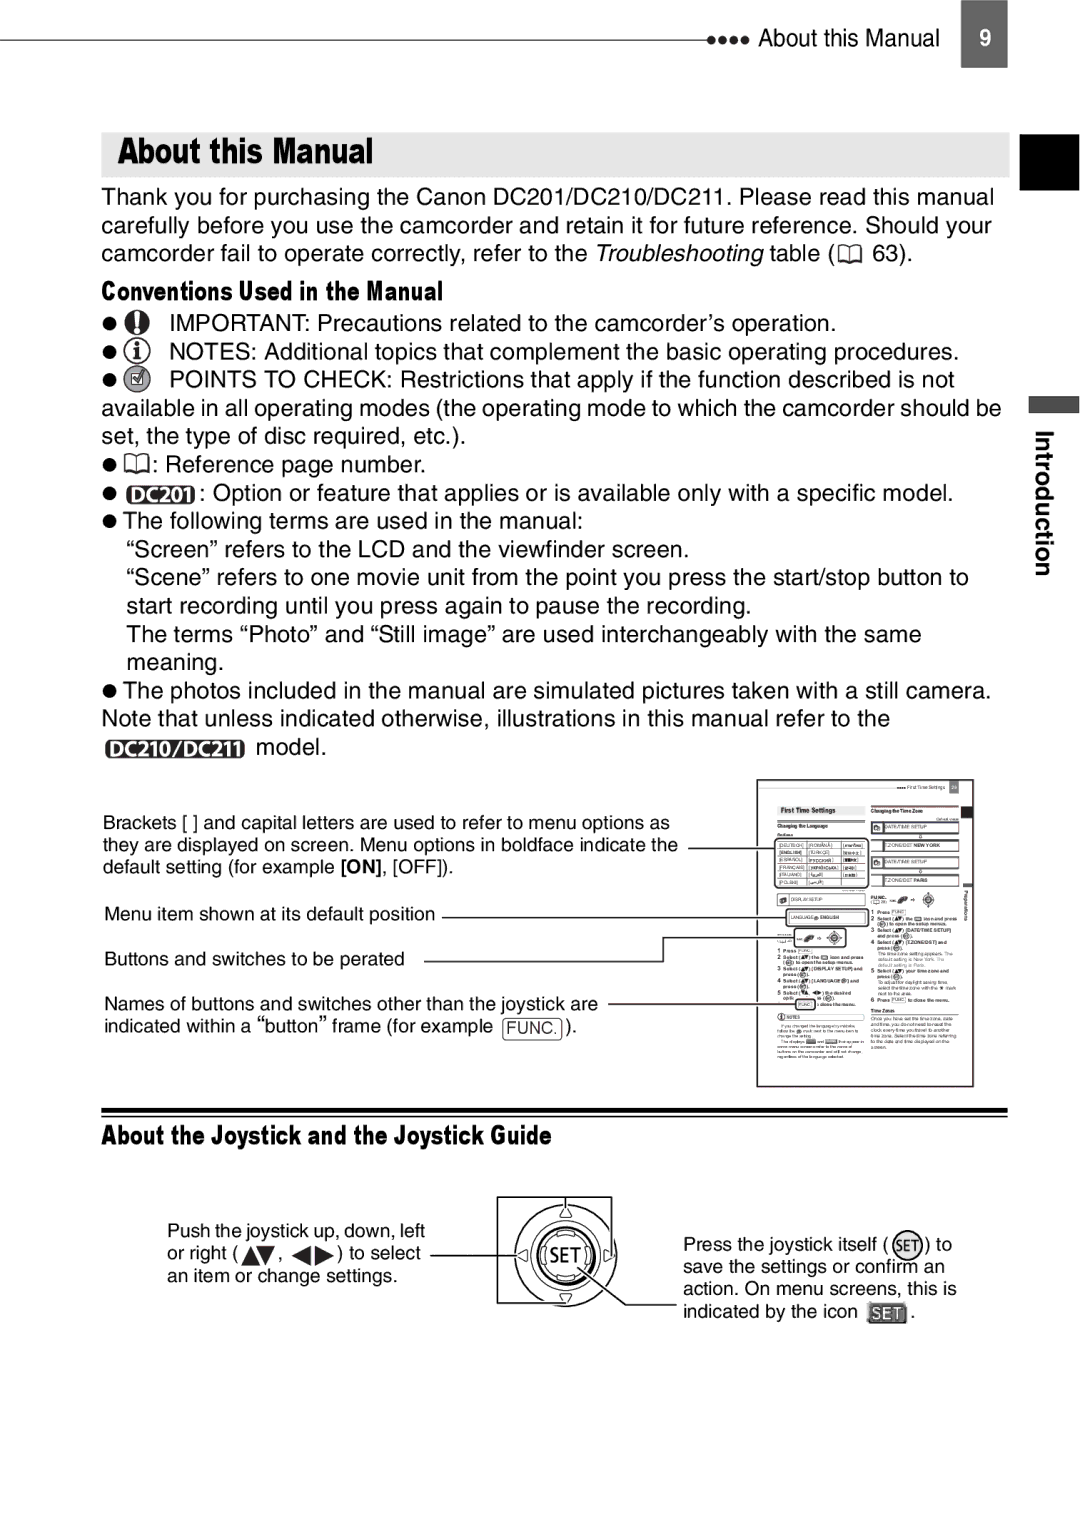
Brackets [ ] and capital letters are used to refer to menu options as they are displayed on screen. Menu options in boldface indicate the default setting (for example [ON], [OFF]).
Menu item shown at its default position
Buttons and switches to be perated
Names of buttons and switches other than the joystick are indicated within a “button” frame (for example FUNC. ).
First Time Settings 29
First Time Settings |
| Changing the Time Zone |
Default value
Changing the Language | DATE/TIME SETUP |
Options |
|
[DEUTSCH] [ ROMANA ] | [ | ] | T.ZONE/DST NEW YORK |
[ENGLISH] | [TÜRKÇE] |
| [ |
| ] | |
[ESPAÑOL] | [ |
| ] | [ | ] | DATE/TIME SETUP |
[FRANÇAIS] | [ |
| ] | [ | ] |
|
[ITALIANO] | [ | ] |
| [ | ] |
|
[POLSKI] | [ | ] |
|
|
| T.ZONE/DST PARIS |
|
|
| Default value | |||
|
| DISPLAY SETUP |
|
| FUNC. |
|
|
|
|
| ||||
|
|
|
| ( | 28) |
|
|
|
|
| ||||
|
|
|
|
|
|
|
| 1 | Press FUNC.. |
|
| |||
|
| LANGUAGE | ENGLISH |
| 2 | Select ( |
| ) the | icon and press | |||||
|
|
|
|
|
|
|
|
| ( | ) to open the setup menus. | ||||
|
|
|
|
|
|
|
| 3 | Select ( |
| ) [DATE/TIME SETUP] | |||
FUNC. |
|
|
|
|
|
| and press ( | ). |
|
| ||||
( |
| 28) |
|
|
|
|
| 4 | Select ( |
| ) [T.ZONE/DST] and | |||
1 | Press | FUNC.. |
|
|
|
| press ( | ). |
|
| ||||
|
|
|
| The time zone setting appears. The | ||||||||||
2 | Select ( | ) the | icon and press |
| default setting is New York. The |
| ||||||||
3 | ( | ) to open the setup menus. |
| default setting is Paris. |
| |||||||||
Select ( | ) [DISPLAY SETUP] and | 5 | Select ( |
| ) your time zone and | |||||||||
4 | press ( |
| ). |
|
|
|
| press ( | ). |
|
| |||
Select ( | ) [LANGUAGE | ] and |
| To adjust for daylight saving time, | ||||||||||
5 | press ( |
| ). |
|
|
|
| select the time zone with the | mark | |||||
Select ( | , | ) the desired |
| next to the area. |
|
| ||||||||
6 | option and press ( | ). |
| 6 | Press FUNC. to close the menu. | |||||||||
Press FUNC. to close the menu. |
|
|
|
|
|
|
| |||||||
|
|
|
|
|
|
|
| Time Zones |
|
|
|
| ||
|
| NOTES |
|
|
|
| Once you have set the time zone, date | |||||||
| If you changed the language by mistake, | and time, you do not need to reset the | ||||||||||||
follow the | mark next to the menu item to | clock every time you travel to another | ||||||||||||
change the setting. |
|
|
| time zone. Select the time zone referring | ||||||||||
| The displays |
| and | that appear in | to the date and time displayed on the | |||||||||
some menu screens refer to the name of | screen. |
|
|
|
|
| ||||||||
buttons on the camcorder and will not change, |
|
|
|
|
|
|
| |||||||
regardless of the language selected. |
|
|
|
|
|
|
|
| ||||||
Preparations
About the Joystick and the Joystick Guide
Push the joystick up, down, left
or right ( ![]() ,
, ![]()
![]() ) to select an item or change settings.
) to select an item or change settings.
Press the joystick itself ( ![]() ) to save the settings or confirm an action. On menu screens, this is
) to save the settings or confirm an action. On menu screens, this is
indicated by the icon ![]() .
.