4 |
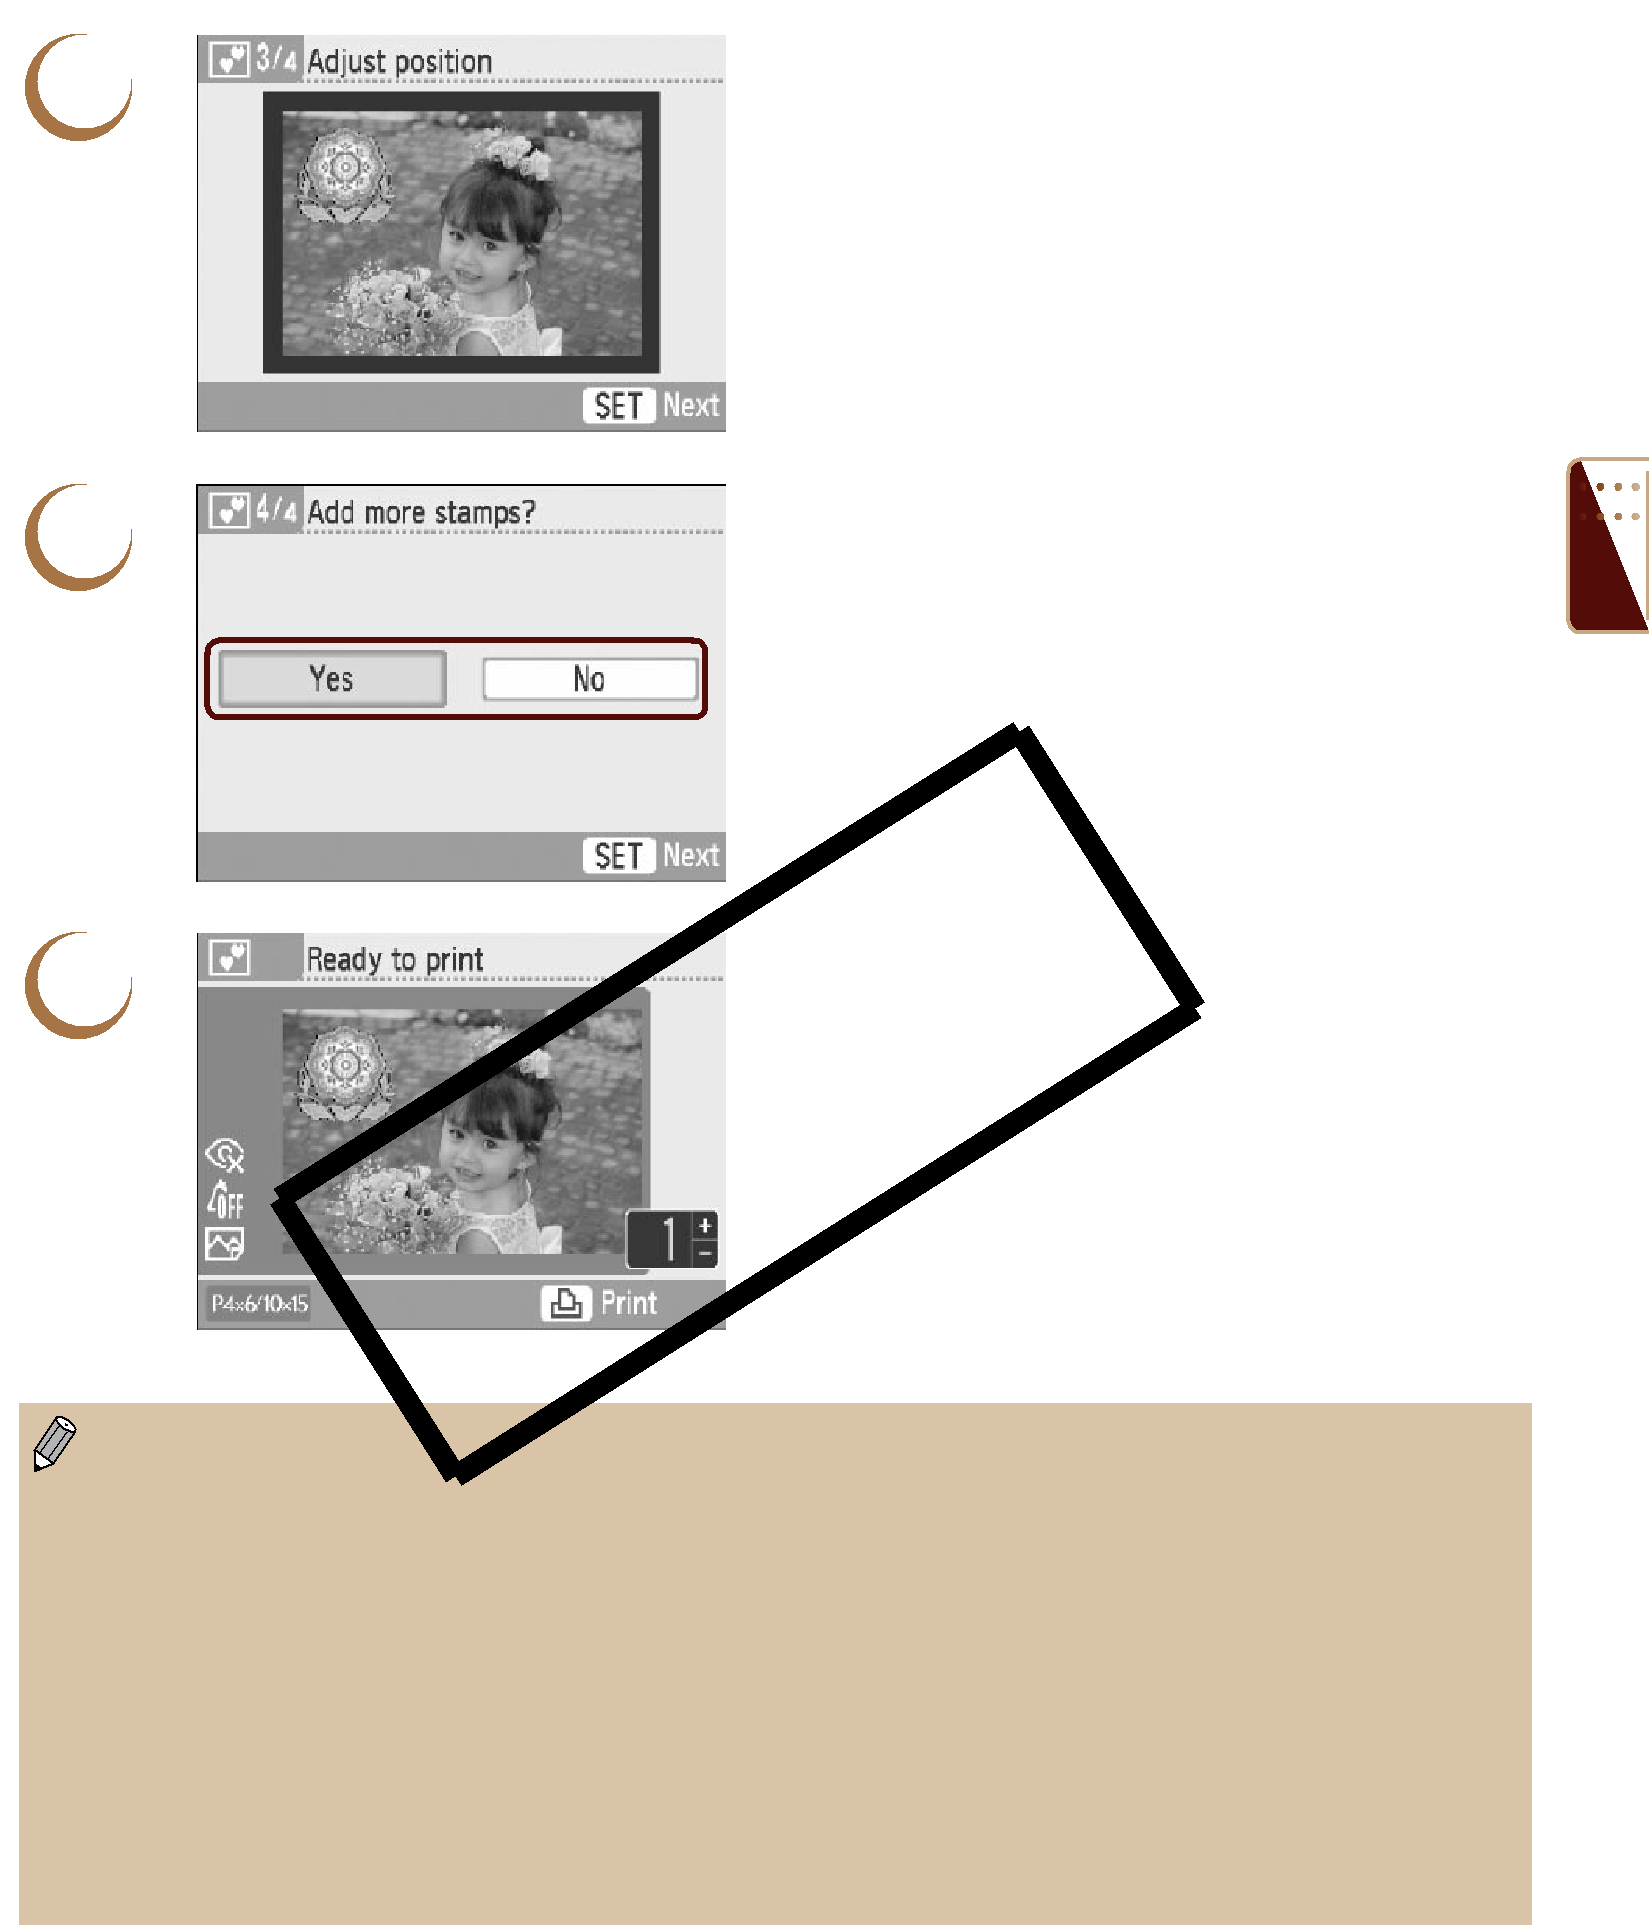
| Choose where to place the stamps. |
| ||
| Press the udl r buttons to move the stamp. | |
|
| Depending on the stamp, press the m(DISPLAY) |
|
| button, or turn the w wheel to rotate the stamp |
|
| 90 degrees. |
|
| Press the o button to place the stamp. |
|
|
|
5 | Choose whether or not to add another stamp. |
To add a stamp, press the l r buttons, or turn | |
| the w wheel to choose [Yes], then press the |
| o button. Repeat Steps 3 to 5. |
| To print without adding more stamps, press the |
| l r buttons or turn the w wheel to choose |
| [No] and press the o button. Then proceed to |
| Step 6. |
6 |
| Print. | |
| |||
| | ress the ., buttons to choose the number of | |
|
|
| copies to be printed. |
|
| | ress the p button to start printing. |
|
|
|
|
With the exception of [Correct
Changing the settings in [My Colors] (p. 35) will change the color settings on the image but will not affect the stamps.
Images with a pixel resolution below 640×480 or an aspect ratio greater than 2:1 cannot be printed with stamps.
When a cartridge is replaced
In Step 4, pressing the b(BACK) button and then the o button will clear all clip art.
You can add clip art to SELPHY using the supplied software (pp. 56,
43