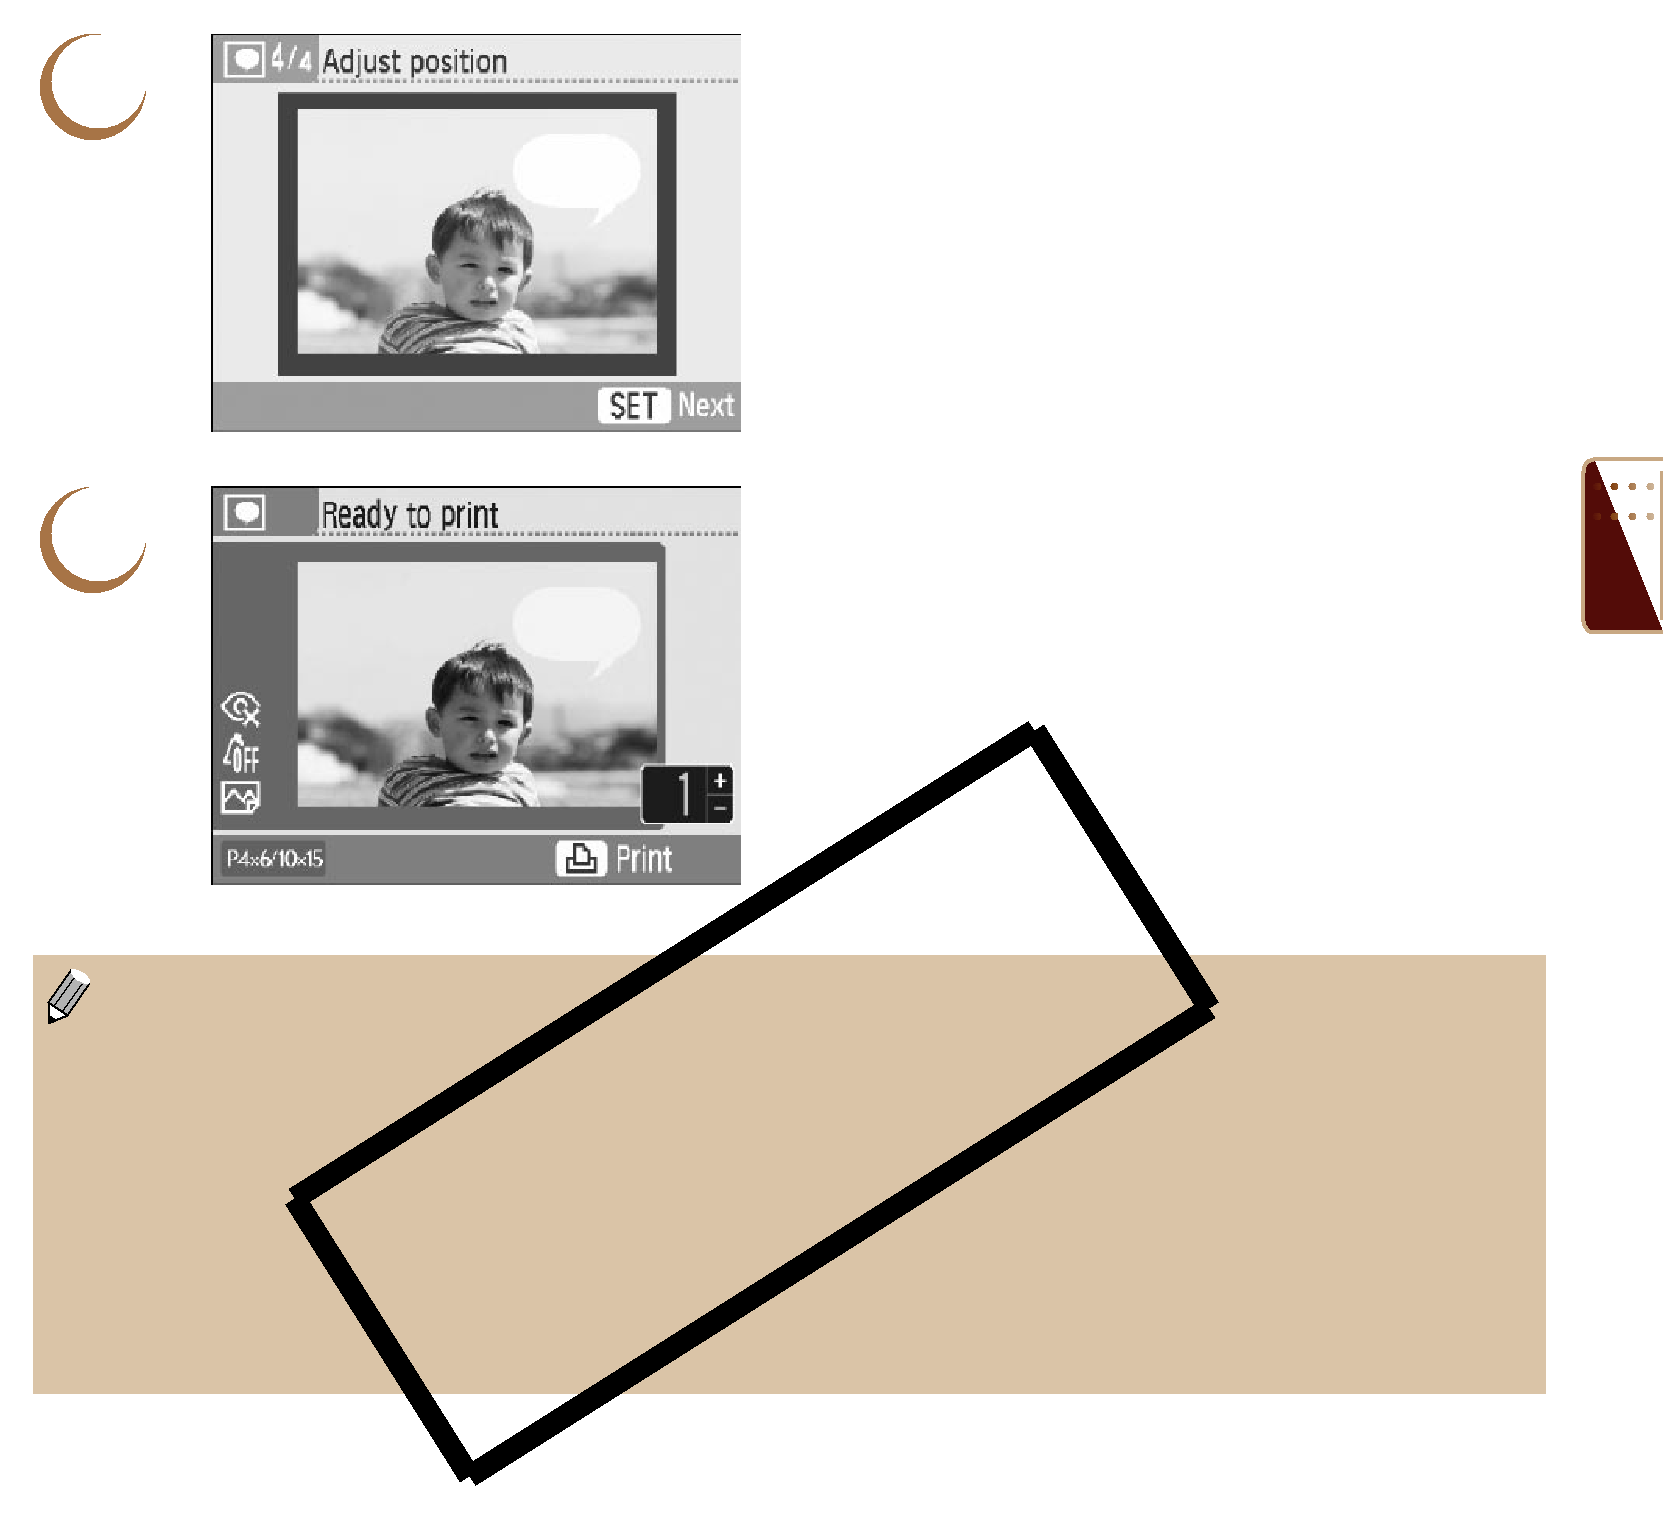
5 | Choose where to place the speech |
bubble. | |
| Press the udl r buttons to move the speech |
| bubble. |
| Depending on the speech bubble, press the |
| m(DISPLAY) button or turn the w wheel to rotate |
| the speech bubble or move its position. |
| Press the o button to place the speech |
| bubble. |
6 | Print. |
Press the ., buttons to choose the number of |
copies to be printed.
Press the p button to start printing.
 With the exception of [Borders] (p. 32), [Correct
Changing the settings in [My Colors] (p. 35) will change the color settings on the image but will not affect the color of the speech bubbles.
Images with a resolution lower than 640×480 cannot be printed with speech bubbles.
When a cartridge is replaced
49