Aligning the Print Head
If ruled lines are printed misaligned or print results are otherwise unsatisfactory, adjust the print head position.
 Note
Note
Make sure that the Inner Cover is closed.
Automatic Print Head Alignment
For Automatic Print Head Alignment, follow the procedure below.
 Note
Note
zYou cannot feed paper from the Cassette when performing Automatic Print Head Alignment. Always load paper in the Auto Sheet Feeder.
Aligning the Print Head without a Computer
zThe Print Head can also be aligned from the printer itself, using the RESUME/CANCEL button. If the printer driver is not installed in the computer, align the Print Head in this way.
1.Make sure that the printer is on.
2.Press the Open Button to open the Paper Output Tray and extend the Output Tray Extension.
3.Load a sheet of A4 or
4.Hold down the RESUME/CANCEL button until the POWER lamp flashes green four times, and then release it immediately.
The print head alignment pattern is printed. Do not open the Top Cover while printing. The print head position is adjusted automatically when the print head alignment pattern finishes printing.
1 With the printer on, load a sheet of A4 or
2 Press the Open Button to open the Paper Output Tray and extend the Output Tray Extension.
3
4
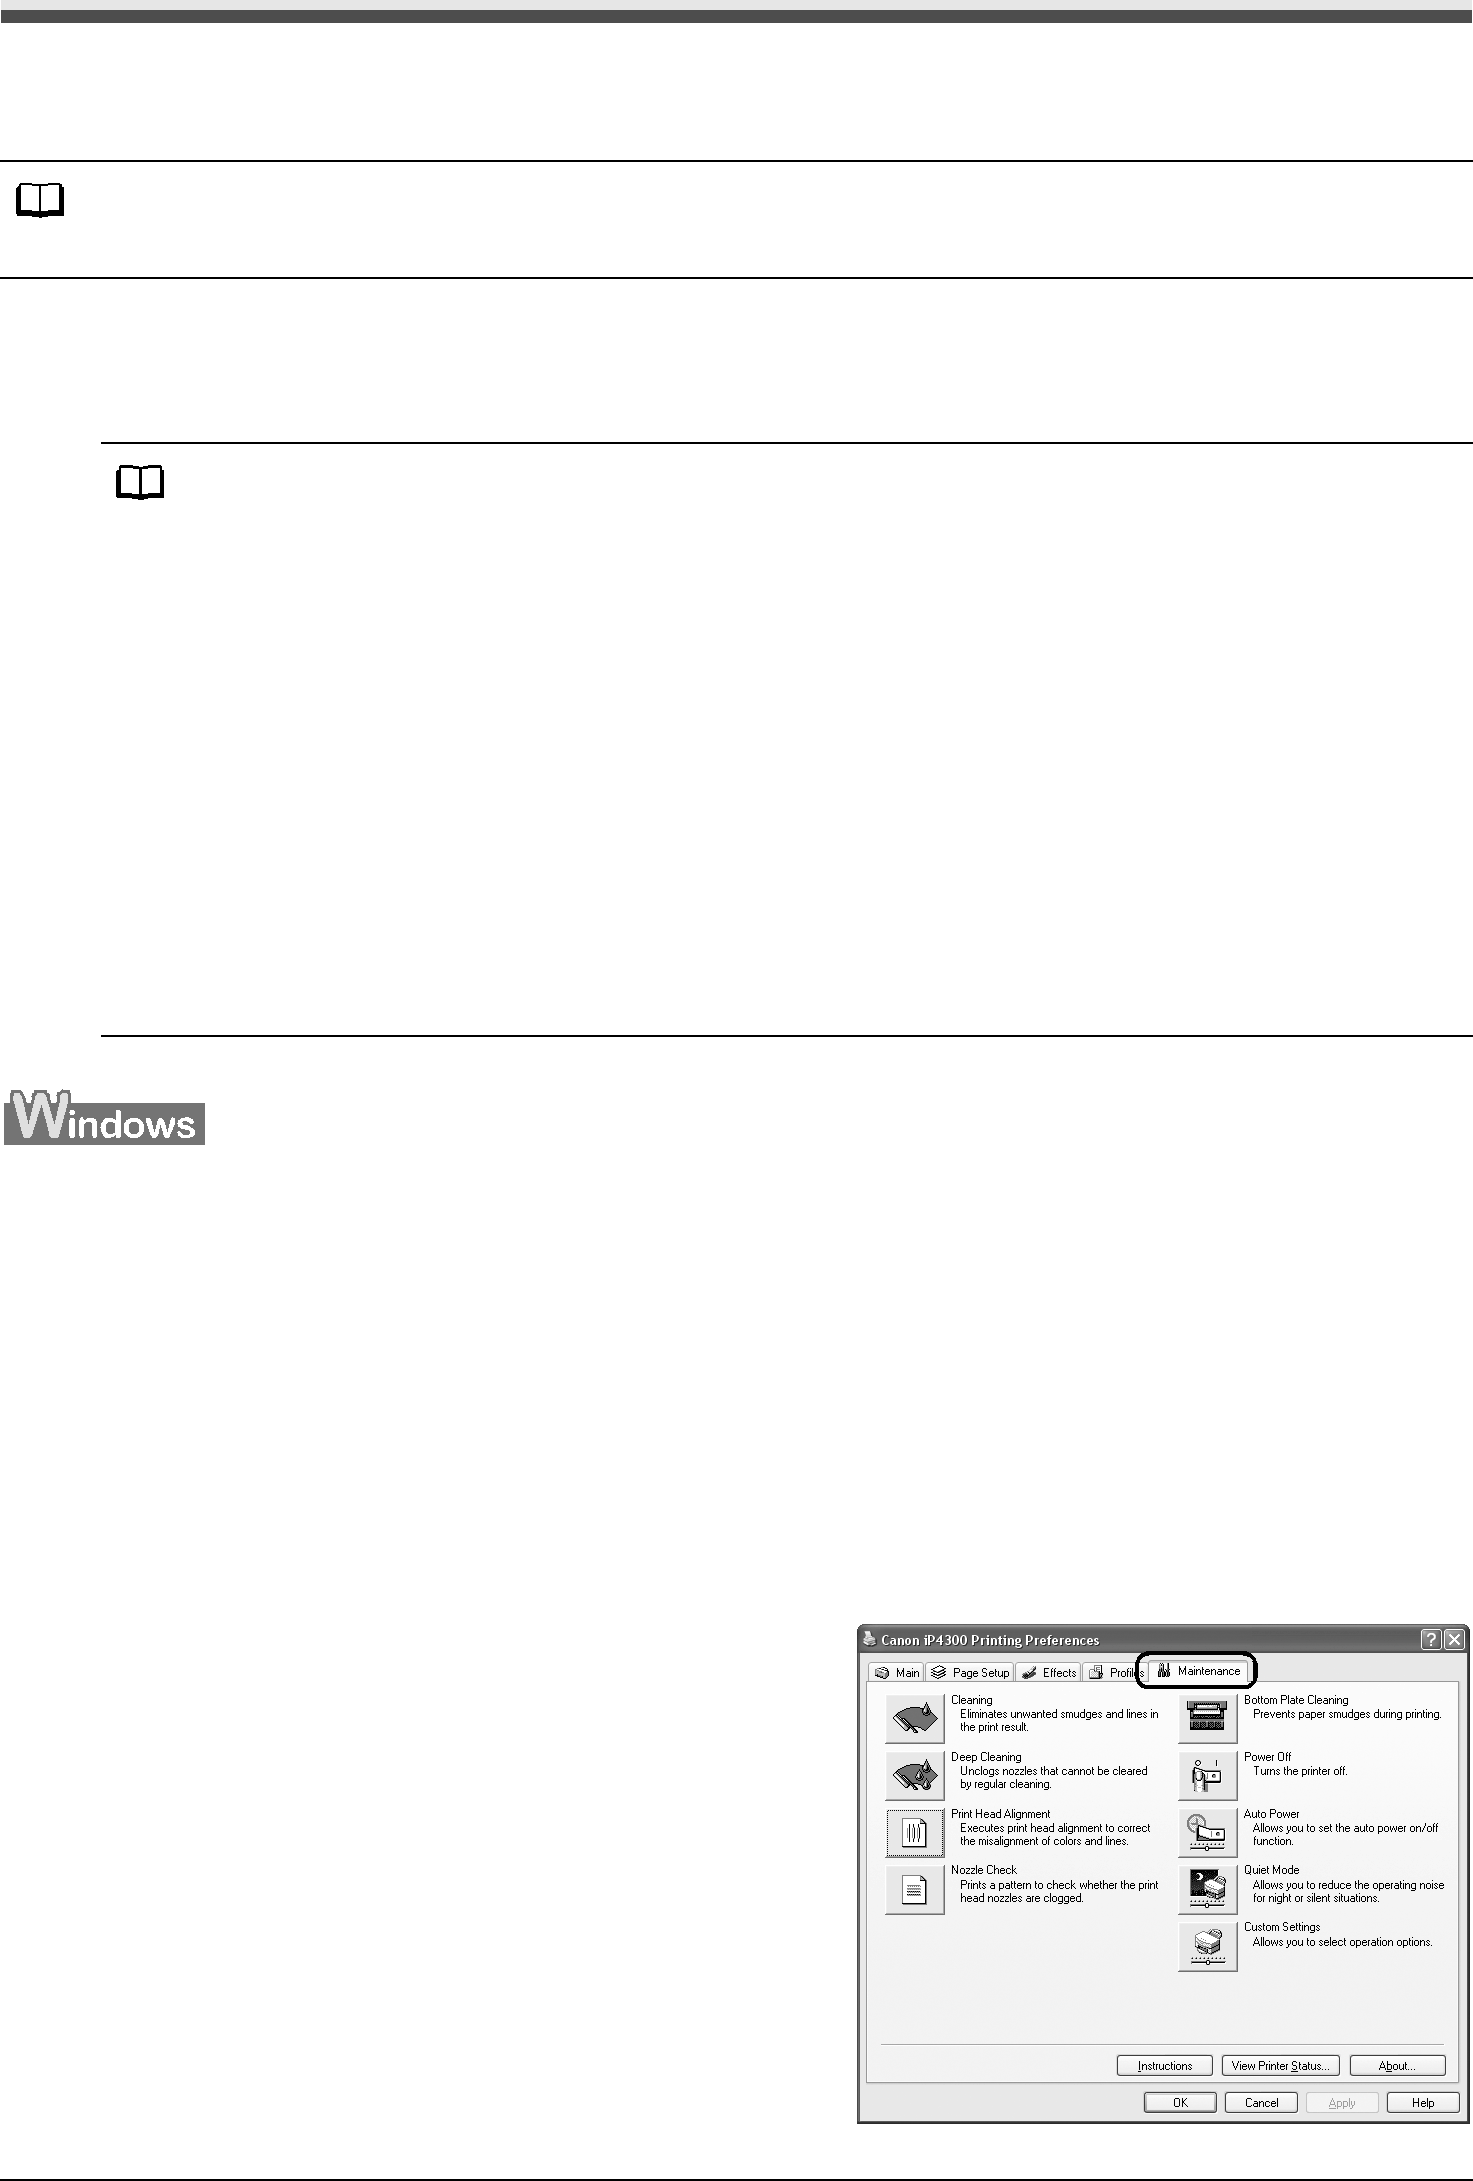
Open the printer properties dialog box.
Print the pattern.
(1) | Click the Maintenance tab. | (1) |
|
| |||
(2) | Click Print Head Alignment. |
|
|
|
|
(2)
44Routine Maintenance