NOTE | NOTE |
When reassembling the blower wheel on to the motor shaft ensure that the blower wheel is flush with the end of the motor shaft (SeeFigure
h. Reverse above procedure for reassembly.
Wheel Flush With Motor Shaft
Figure 3-36 Evaporator Blower Wheel (Flush With End Of Motor Shaft)
When placing the evaporator motor/blower assembly back into the lower scroll assem- bly cradle, make sure that the assembly is seated securely in the cradle.
(See Figure
3.6.6 Compressor Replacement
Perform the procedures outlined in Section 3.5.2
There are 4 bolts with the Low Profile Compressor.
The system charge for the Low Profile unit is 16.9 OZ.
3.6.7 Capacitor Removal
To remove the capacitor, do the following:
a. Perform steps a., b. & c. as outlined in Section 3.6.5.
b. Perform steps outlined in Sections 3.5.8 & 3.5.9.
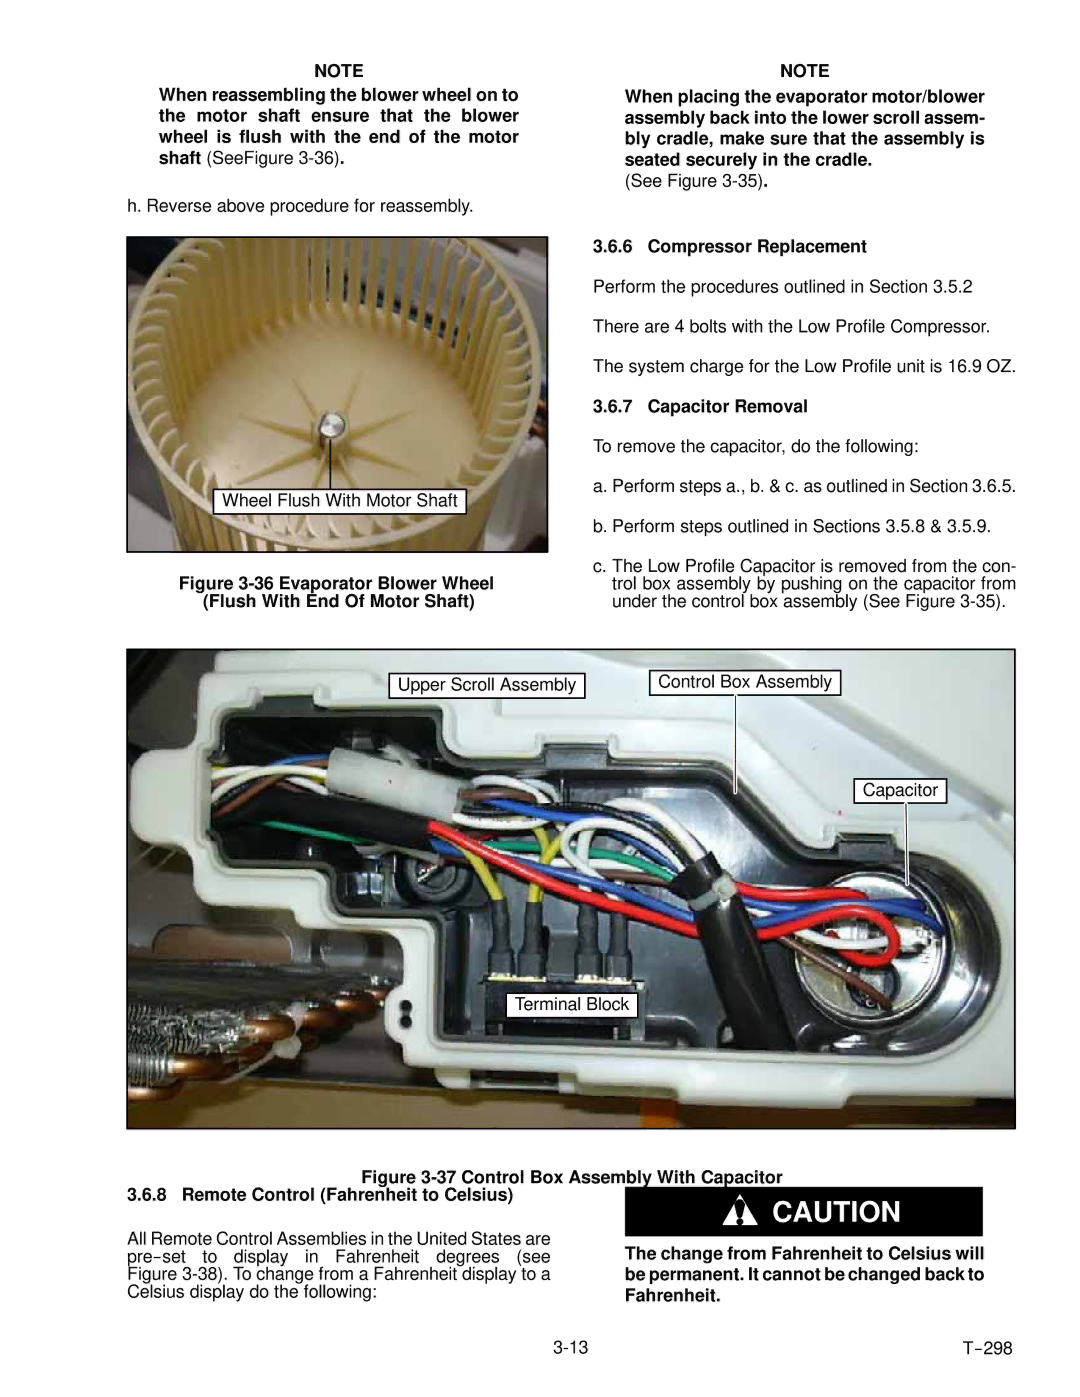
c. The Low Profile Capacitor is removed from the con- trol box assembly by pushing on the capacitor from under the control box assembly (See Figure
Upper Scroll Assembly
Terminal Block
Control Box Assembly
Capacitor
Figure 3-37 Control Box Assembly With Capacitor 3.6.8 Remote Control (Fahrenheit to Celsius)
CAUTION
All Remote Control Assemblies in the United States are |
|
| |
The change from Fahrenheit to Celsius will | |||
Figure | be permanent. It cannot be changed back to | ||
Celsius display do the following: | Fahrenheit. | ||
