
 Music Presets
4. Edit the Music Preset parameters.
Press the (w) down button to display “CHORD” and then press the (ENTER) button to advance to the chord progression editing screen.
Next, perform the editing operation described under “To edit the chord progression” (page
Press the (q) up button to display “Parameter” and then press the (ENTER) button to advance to the Auto Accompaniment parameter editing screen. Next, perform the editing operation described under “To edit Auto Accompaniment parameters” (page
5. After editing everything you want, press the (EXIT) button.
•This will display a message asking if you want to save the user preset.
6.Press the (YES) button.
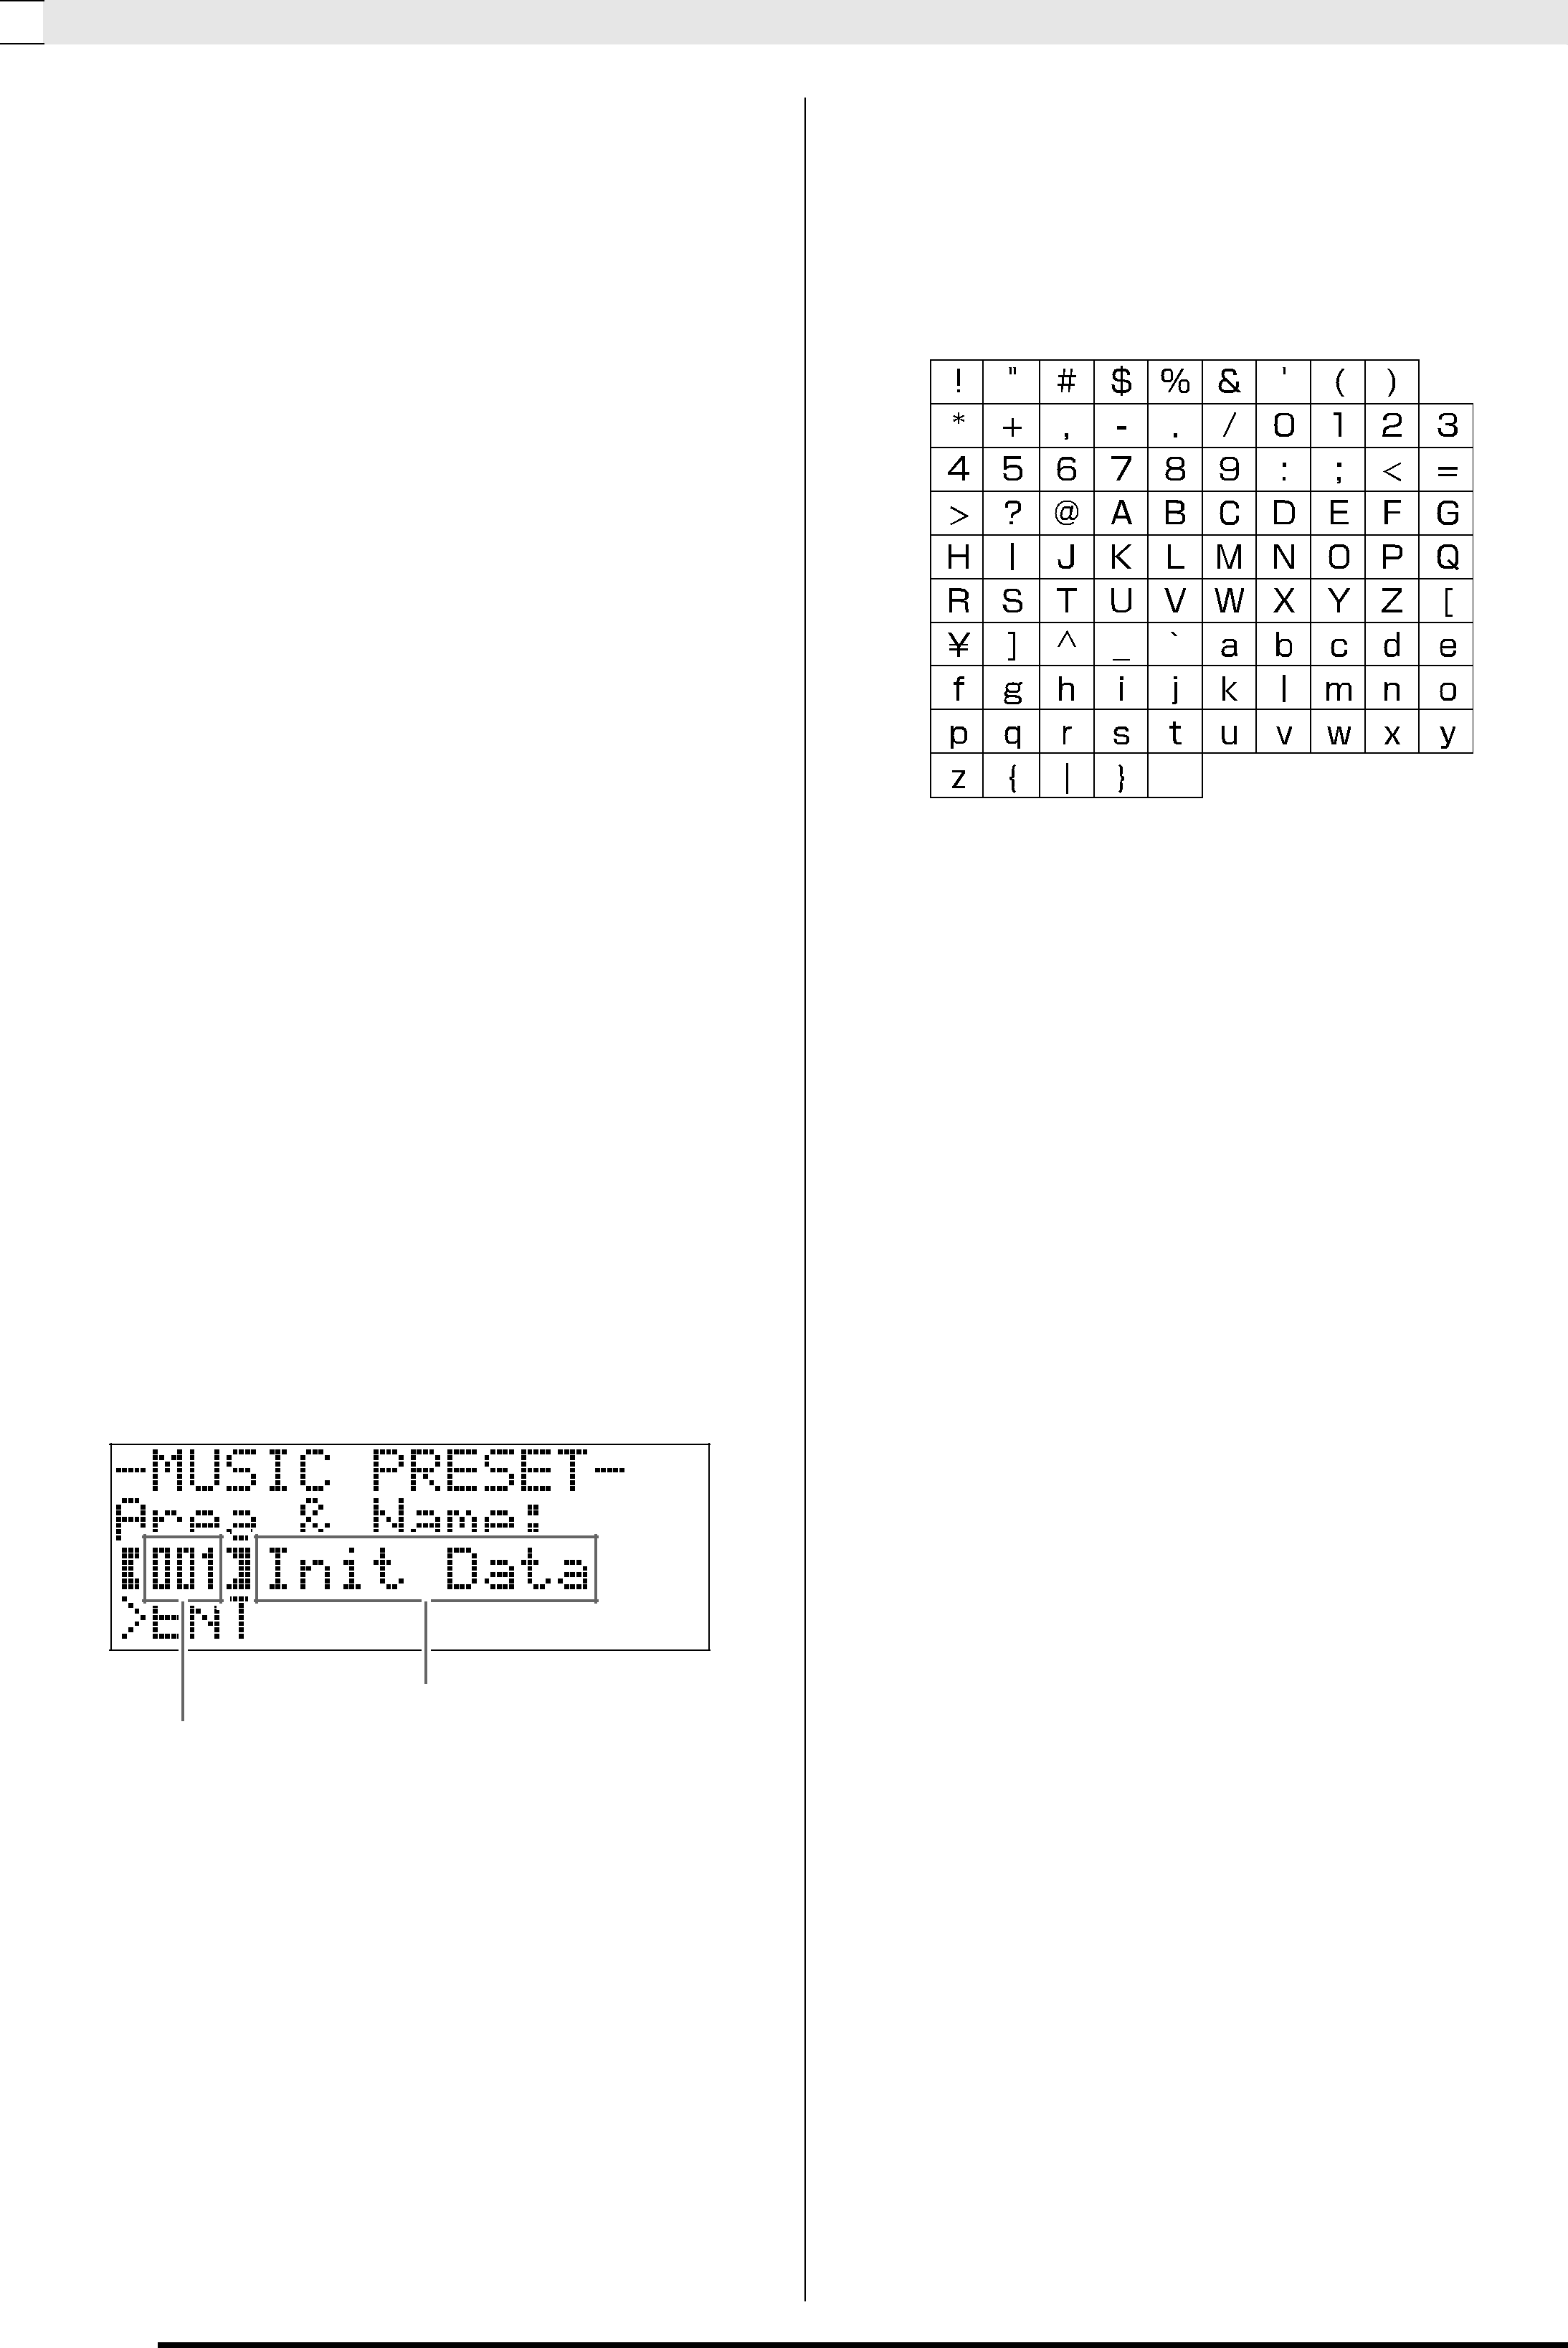
This displays a screen for selecting the Music Preset number and name for storing the edited data.
•If you do not want to save the edited data, press the (NO) button in place of the (YES) button.
Music Preset name
Music Preset number for data storage
7. Use the (w, q) buttons to select the Music Preset number where you want to store the edited data.
8.
9.
Enter a name for the preset.
Use the (u) and (i) buttons to move the cursor to the character you want to change and then use the (w, q) buttons to change the character. The following shows a table of available characters.
•To input a space, press both of the (w and q) buttons at the same time.
Press the (ENTER) button.
This saves the data.
•If the preset number where you are saving the data already has data saved to it, a message (Replace?) will appear on the display to confirm whether you want
to replace the existing data with the new data. Press the (YES) button to replace. To cancel the save
operation and return to the screen in step 6, press the (NO) button instead.