
 Assembling the Stand
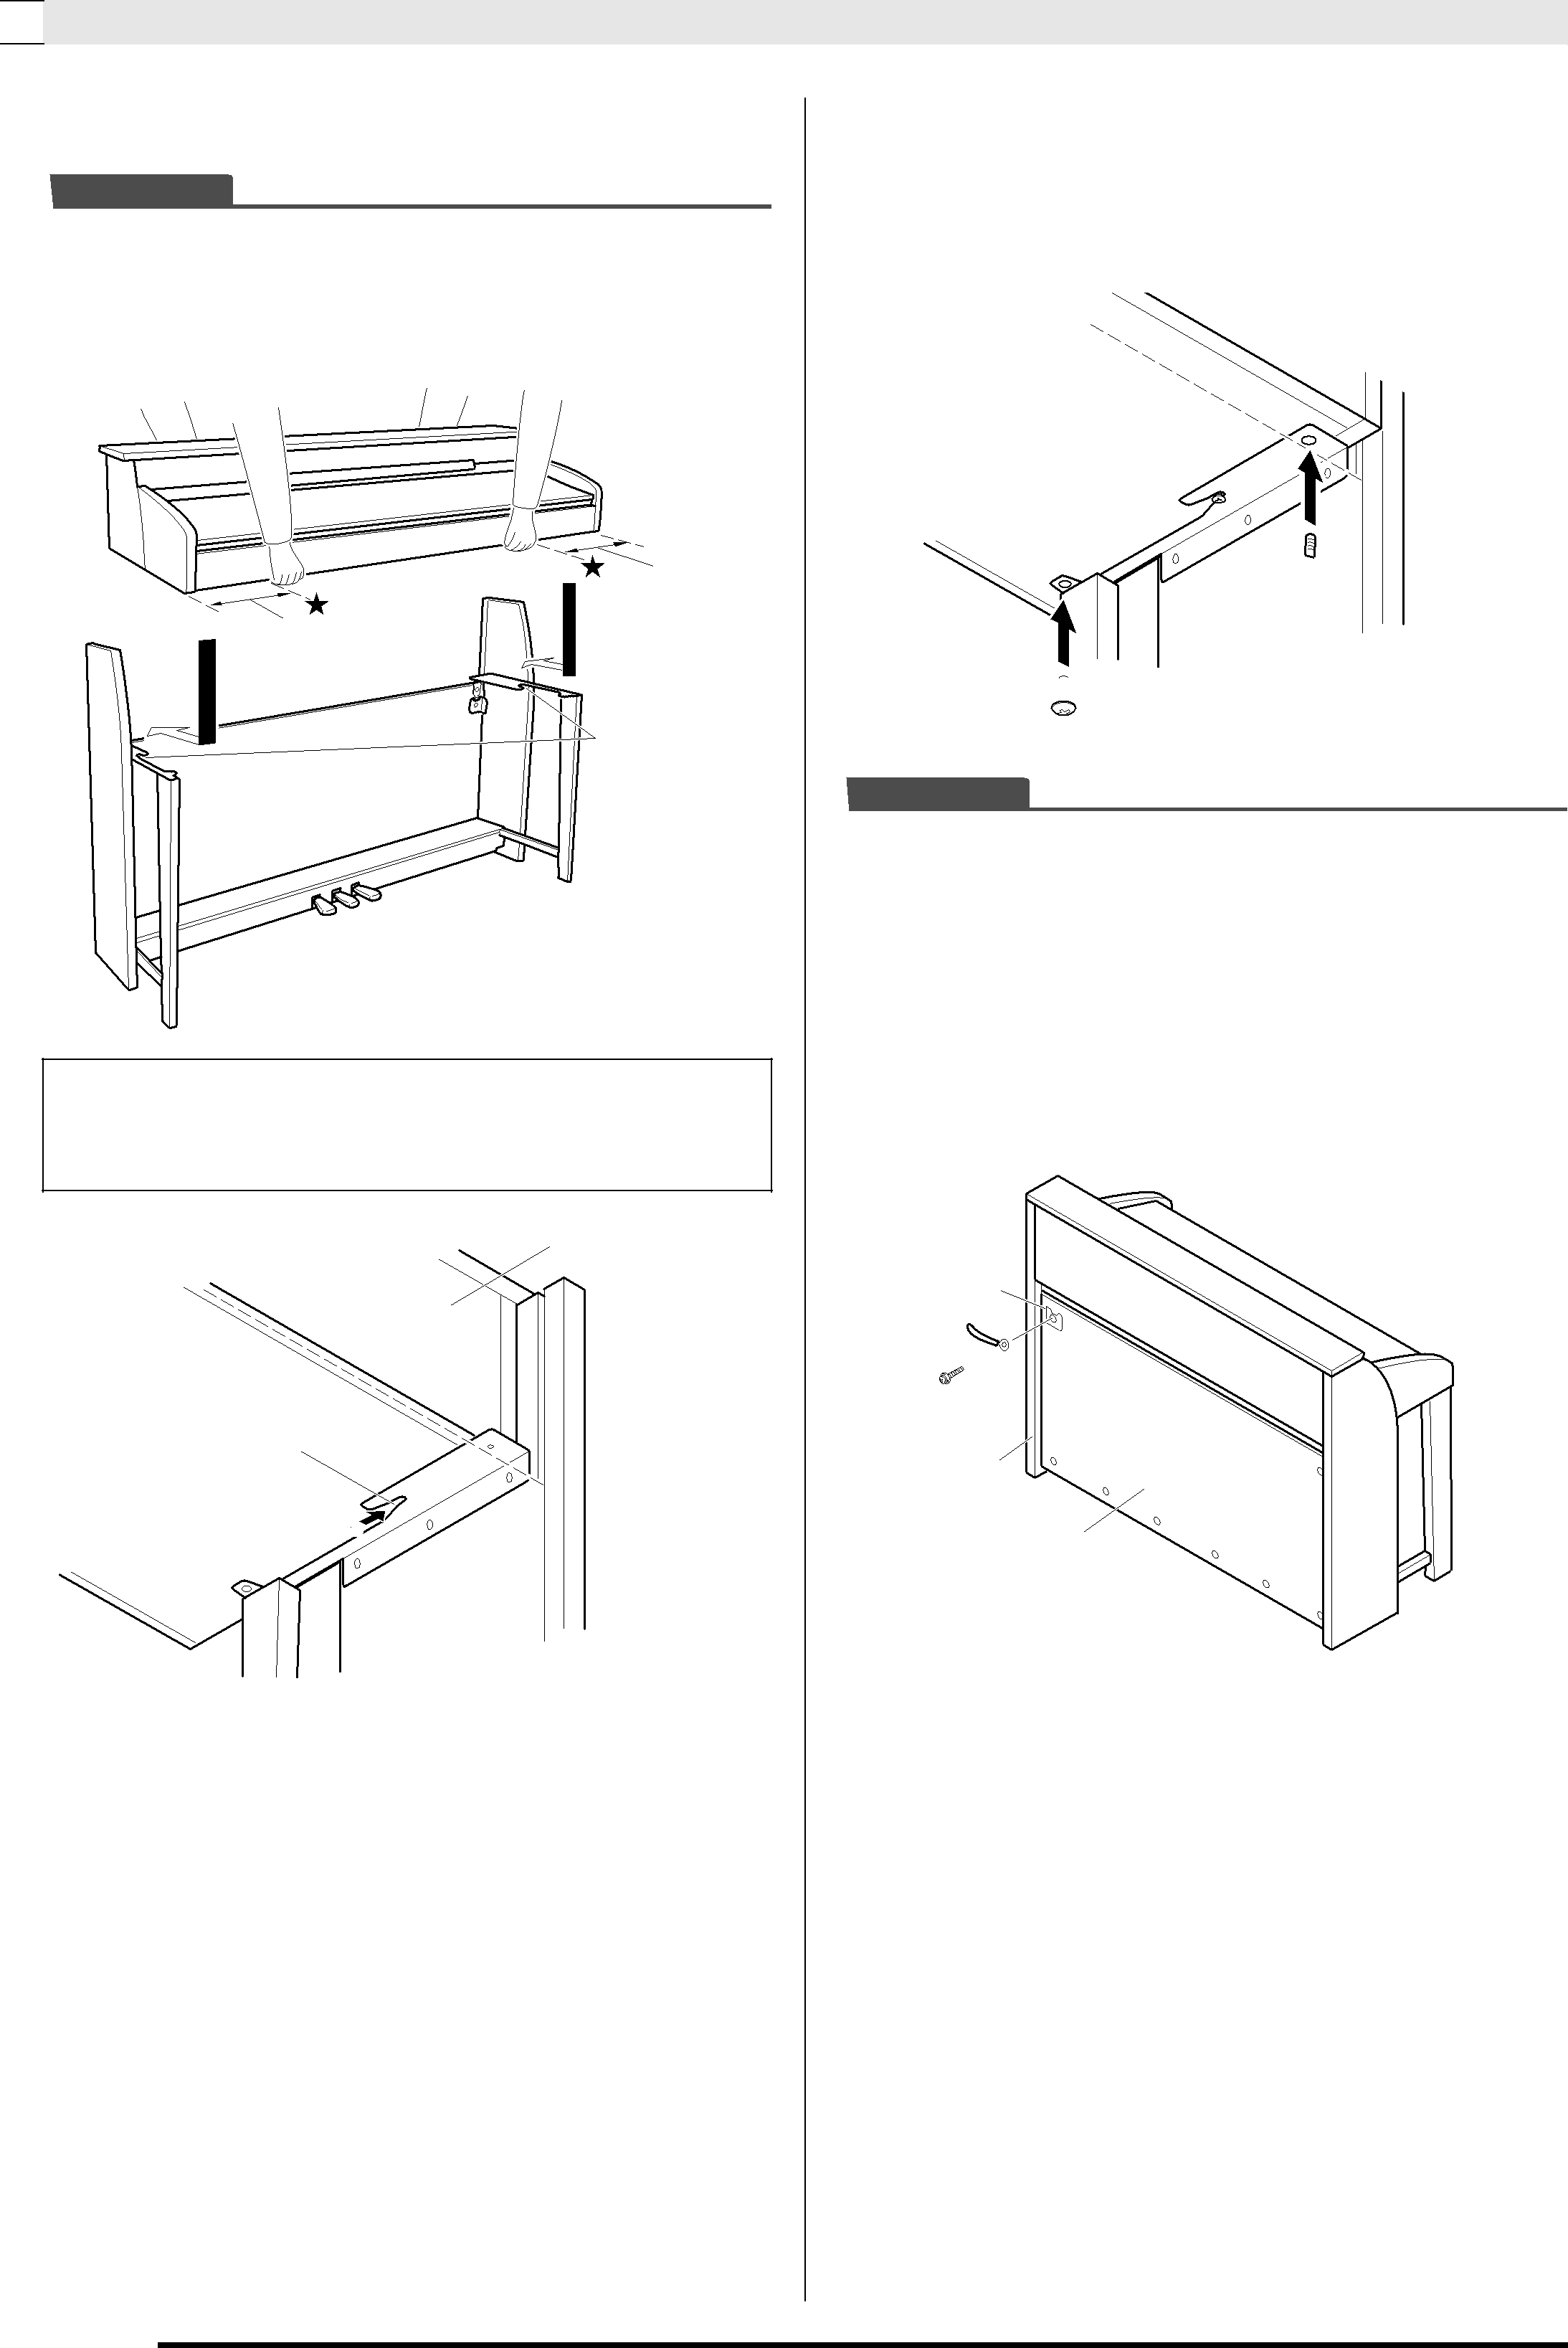
6. Place the piano onto the stand.
 IMPORTANT!
•In order to ensure you do not get your fingers pinched between the piano and the stand, grasp the
piano on its sides (not its ends) at the locations marked with stars () in the illustration.
At least 10cm
At least 10cm
7
•At this time the screws on the bottom of the piano
should hook into the cutouts in the stand brackets .
Back of piano
Stand side
 panel
panel
Bracket cutout
7
6

7. First, use the two butterfly bolts to secure the back of the piano to the stand. Next, use the two screws to secure the front of the piano.
H


K
 IMPORTANT!
•The butterfly bolts and the screws keep the
piano from slipping off the stand. Never use the piano without the butterfly bolts and the screws installed.
8. Attach the left side of the back panel to the bracket of the side panel .
•When attaching the back panel, place the clip on the screw as shown in the illustration below.
8
G
I

B
C